Monday, March 31, 2008

Making Glitter Safe - FOR CHARITY!

Maybe you heard about the Ellen Glitter-Ban Drama and resulting peaceful rally coming up on April 8th in Burbank? If you haven't, where have you been? Don't answer that, just go to the press release or read all of the controversial posts from the always amusing Kathy Cano-Murillo, the Crafty Chica herself.

This week, Kathy gave this fun glitter rally a philosophical once over and began wondering "what if?"
  • What if people say
    • "Why are you rallying for this, and not something critical like the war, womens’ rights, immigration?"
    • "What do you want to get out of this?"
    • "How does this help anyone?"
    • "Why should Ellen (or anyone else) care?"
Leave it to Kathy to combine her love of glitter with her almost obsessive love of American Idol and toss in the fact that Ellen is co-hosting Idol Gives Back again this year, and suddenly the silly and fun glitter rally has a purpose: Auction off glitter art on eBay for Idol Gives Back.

Kathy says, "I am so serious/excited/devoted to this glitter/Ellen cause even more so now. So much that I am even parting with my beloved ceramic Chihuahua statue. It is covered in microfine holographic purple glitter that I mixed myself. I’ll miss him so much, but it is for a good cause!"


The Crafty Chica's beloved purple chihuahua - being donated for charity!

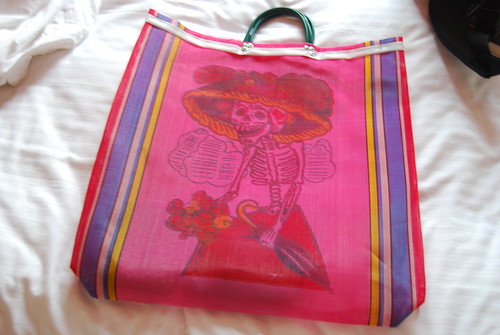
Since I'm a sucker for charity and I adore Kathy, I'll also be donating for the cause. I figure if she can give up her purple holographic-glitter chihuahua, then I can give up my glittered "Crafty Chica" sacred heart tote bag (heart design by Patrick Murillo), which I glitterfied on the Crafty Chica Cruise this year.

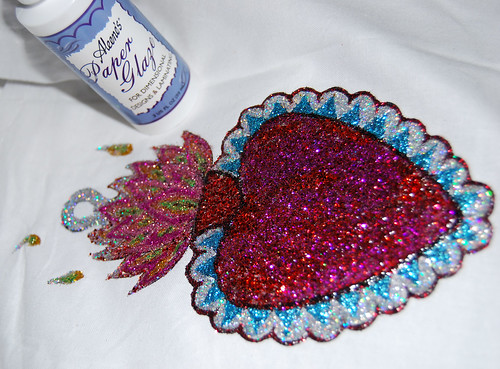
It seems the appropriate donation to make since it's COVERED with glitter AND I found a way to keep the glitter from flaking off -- it's a new off-label use for Aleene's Paper Glaze!

So please keep up on the blogs and we'll let you know when the eBay bidding frenzy will begin. Bid often and bid well folks! Let's make the world safe for glitter while we help out those in need.


If you would like to donate a piece of glitter art for the above cause, here is how to do it:
  1. Choose/make an item that has an element of glitter in it (any kind of glitter you want!), that you think will earn mucho bids.
  2. Send Kathy a picture or two of your item. Along with the following:
    • Name of item
    • Description of it's qualities/features
    • Value, starting bid
    • Short (3-sentence) bio of you

DEADLINE: ASAP
Read more ...

Sunday, March 30, 2008

Queer Loteria

I was totally unable to come up with a title that was funnier than the truth.

There’s this....


and many more. Clicky on El Sirenito (you know he wants it) for the entire series.
Read more ...

Saturday, March 29, 2008

Stuff like this SO makes up for the cranky-butts!

So as more than a few of you know, I’m under doc’s orders to keep the stress out of my life since it goes right to the ol’ tum tum. I have awesome friends, so that makes it easy, but when you administer TWO art collectives, things can get hairy (and fangy) at times.

Anyway, I opened up my MySpace mail yesterday and found this e-mail that got me a little misty and a LOT happy. (I’ve removed her name to maintain her privacy, but she’s a cute-as-a-bug Latina who actually lives in the same town I do.)

I just had to tell you I love your galleries, you get me all nostalgic, it’s like you get the culture and what is all about it’s awesome.

Thank you for the work you do, and the feeling it brought to me, I know it sounds a bit corny, but bare with me ;)


If you know someone whose actions or work makes you feel good, drop ’em a note today and tell them, or blog about how awesome their business is, or both!
Read more ...

Thursday, March 27, 2008

My take on the jewelry organizer/mirror thingie ... thus far

Here's what I've been up to:
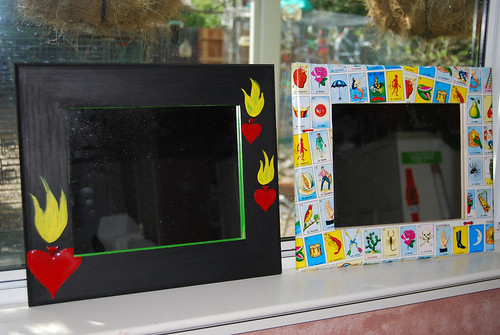
mirrors-hearts n loteria

One of these mirrors will be getting the jewelry organizer treatment that I blogged about recently.

The other will need to find itself another home, probably on Etsy.

I just haven't decided which mirror will suffer which fate.
Read more ...

Wednesday, March 26, 2008

What you’ve heard is true. The Scary-Art Shadow is creeping across the earth....

From the Scary-Art Collective blog

"Scary-Art" was a term coined in early 2006 by friend, art-lover and gym owner, Chip Conrad, to describe the paintings of Nicolas Caesar. Not entirely unlike Mary Shelly’s creature, Scary-Art has taken on a life of its own since that moment several moons ago. Yes, it still describes Caesar’s art, but it also describes his outsider artist friends and cohorts who began showing with him in Sacramento’s midtown muffin shop galleries and any other venue that would have them. Now "Scary-Art" describes a group of maladjusted misfits who pal around and spend their time painting, sculpting, gluing, photographing, stitching and repurposing whatever catches their fancy, as well as the things they have painted, sculpted, glued, photographed, stitched and repurposed. And so the Scary-Art Collective came into the world. Love us or hate us, here we are.

Recently, Caesar and fellow scary artist John Hageman, Jr. began work on a few new web comic projects. First, we were treated with entertaining tales of zombified warts, morons at street fairs and drawings of ’Satan’s Onion Ring’ in Nicolas Caesar’s Grindhouse. While only a few weeks into their newest experiment, "Schadenfreude," we’ve learned that sometimes Gremlins like to wear hotpants (why NOT hotpants?) and that you can fit 17 happy meal toys up an emo kid’s ass if you really try. These twisted weeklies were teamed up with Hageman’s irreverent "Social Vermyn" web comic, and Scary-Art Comics, as Douglas Adams so aptly put it, ’had suddenly been called into existence.’

And here we are, with the virtual ink still wet on the latest web comic, giving you MORE news about another sprouting tentacle of the Scary-Artctopus. We are excited to announce the unavoidable approach of
SCARY-CRAFT! Go ahead. Shut lock your doors and bar your windows ... the E6000 fumes will creep through the cracks and find you. Stay tuned as we build onto our "brand" with a new logo, web page and get ready for our first show later this year!

Original post can be found here.
Read more ...

Two Cool Artists (and their goodies are MINE)

I indulged in the past week, but just a little bit, to celebrate selling a painting, several prints and an original quilt!


This is my new Grey Gargoyle by Nicolas Caesar. Isn’t he cute??? I haven’t even found a place for the last painting I received from Nik (Silly Rabbit, Rabies are for Kids!), and now I need to make room for baby! My growing collection of unhung art will be a motivator for getting rid of the china cabinet and opening up more wall space in my studio SOON.

And today, I got this little gem from Gothcupcake’s Etsy store:

If you aren’t a Harry Potter fanatic (like me), you might not know the value of such a ring to protect against some of the nasty creatures out there.

A boggart is a shapeshifter that takes on the form of its intended victim’s worst fear. It generally likes to hide in dark, enclosed places, such as in cupboards, under beds, in hollow trees, or corners of MySpace. A common defence against a boggart is to use a spell to make it appear amusing, since boggarts are weakened by laughter. This is achieved by pointing a wand at the boggart and saying "Riddikulus" while thinking something very funny; this charm can apparently be used to destroy an already weakened boggart.

Fine advice for life. I’ll wear it at all my Second Saturday art shows ... y’know, just in case.

Drop in on Gothcupcake’s Etsy shop and check out her goodies. Whether you love cupcakes, goth stuff, horror classics, Harry Potter, vegan baking recipes or girls with pink hair, you’ll thank me for sending you in her direction!
Read more ...

Monday, March 24, 2008

UPDATE/CLARIFICATION - Ellen should be happy - loose glitter no more!

I called my pal Yoli (of Sacred Snatch Designs infamy) this weekend with a glitter and sealant issue I needed help with. I'm your go-to if you have a sewing, pressing or fabric-related Q, but Yoli is THE source of info on all kinds of crafty miscellany.

Admittedly, this was an "off label" use, as they say in the pharmaceutical industry... I was seriously loving my Crafty Chica tote bag, which I glittered up on day one of the Crafty Chica cruise (duh, where else). Can you tell I was diggin' on it right from the get go?


Let me clarify something - This was a project we did ON the cruise ship and we were limited to the supplies already on board. We only had two brands of glue (Crafty Chica’s new super-thick white glue and Aleene’s original Gold Label Tacky Glue). I didn’t have my Fabri-Tac and we didn’t have any gem glue available to us. Yes, we had some Tulip glitter glues, but they paled in comparison to the shiny, holographic goodness of the new (and yet to be launched) Crafty Chica loose glitters. And seriously, girls, let’s face it, we were on the CRAFTY CHICA CRUISE ... we wanted to use the new products that the rest of you poor crafting slobs wouldn’t even SEE until July (and we wore tiaras and drank tea with our pinkies in the air asking, "I wonder what the POOR people are doing today?" while we did it).

So my issue became HOW DO I KEEP GLITTER FROM FLAKING OFF COTTON FABRIC WHEN IT WAS AFFIXED WITH BASIC WHITE GLUE?


So I CAREFULLY allowed everything to dry and somehow got this loose glitter and glue masterpiece home from the cruise (via a flight from San Diego to Sacramento). By some magic, it only lost a little bit of the sparkle on the way. I had become accustomed to the idea that I wouldn't be able to USE my tote ... not as a tote anyway, but DANG if it wouldn't make some awesome wall art.

Oh, back to Yoli... So I says to her, I says, "Which sealant do you think would be the best to seal glitter on my Crafty Chica tote?" We talked a while about the pros and cons of loose glitter (yeah, yeah, use a different adhesive ... use glitter glue ... please refer to the above explanation of my unique circumstances), and narrow my glaze options down to either Triple Thick, which I have in a spray and in a tub, or Aleene's Paper Glaze. We both agreed that a spray was out of the question unless I wanted to laminate the un-glittered portion of the cotton bag too. The Paper Glaze had the advantage of being in a squeeze bottle (though I have a supply of those around the studio anyway). Though I LOVE Triple Thick on hard surfaces, I don't like that it stays as tacky as it does.... So we both agreed that I'd try the Paper Glaze.

Yoli sent me to my glaze shelf with a prayer (I think she lit a candle for me too).

AND IT WORKED!

It worked SO well, in fact, that I think I might even be able to use this as a TOTE BAG after all!
The glaze is firm but flexible and it's completely adhered the glitter into the fabric (like it's a big glitter silk screen)!
craftychicatotewithpaperglaze

Oh, and can you dig that Crafty Chica silver holographic glitter action??? I can't wait until Duncan launches that product line in July!

For those wondering, I used two coats and applied using the applicator tip starting on the outside edges and working my way in. On the second coat (after the first dried and cured), I applied a thicker layer over the heart, so I have a little of a 3-d effect goin' on. It's so awesome.
Read more ...

Sunday, March 23, 2008

The Good, The Bad and The Ugly (Studio, Part 2)

The Good.

So far, I've been able to organize MOST of my half-yard and under cotton "blender" fabrics by color:
Fat Quarters Ahoy!

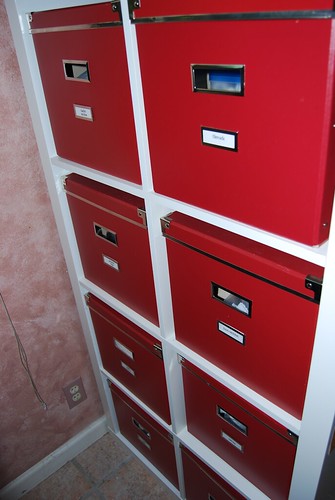
AND I've gotten my large-but-light supplies all packaged up and away, but easily accessible:
red storage boxes


The Bad.

Yeah. Need to fold and organize this better:
silk n batik tangle

I got started here,
my most-used or recently used prints
but I'm a little overwhelmed by:


The Ugly.

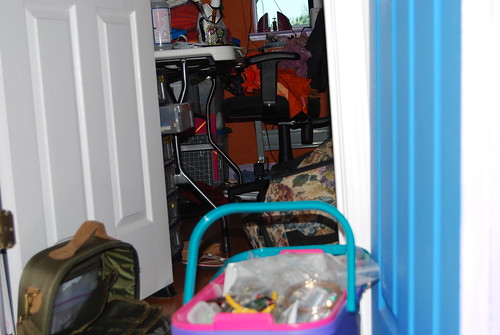
Three of the five bins of fabric I need to go through:
fabrics in bird room
Read more ...

Saturday, March 22, 2008

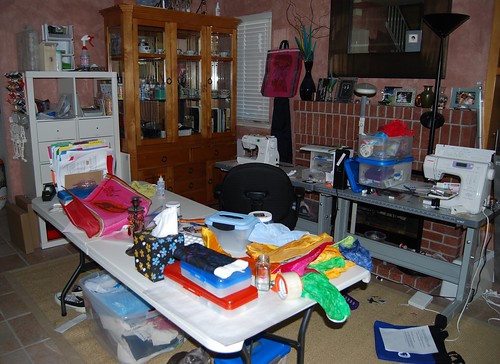
New & Bigger Studio / Work Space for 2008

Following in the footsteps of wonderful friends and fellow craftistas, Kathy Cano-Murillo (Crafty Chica) and Yoli Manzo (Sacred Snatch), I open my workspace (the part that isn't scattered throughout the house) to you - in all of its imperfect glory.

========================

When Ron and I purchased our home in 2000, we never thought we'd outgrow it! We have no children, but purchased a 3 bedroom home, thus allowing us to have a spacious home office and a dedicated guest room for friends and family.

HA!

Since that Spring day almost eight years ago, we've acquired a lot of stuff - the necessary tools of homeownership: a collection of saws, workbenches, potting benches and yard tools, including a lawnmower and a shop vac; too much furniture (we should have avoided the desire to furnish all at once); more animals: two re-homed macaws and their huge-ass cage and outdoor aviary, and a re-homed king snake with his 6' wide enclosure; and a home art business with enough fabric to open up my own shop.

Just a couple of years later, I was laid off (good job, awful people) and decided I'd do two things: 1) volunteer with animals, and 2) get myself an el cheapo sewing machine and finally learn to do this sewing thing right. At that point, I did most of my work in the classes I was taking and didn't have a "stash" to speak of. So I started out sharing the "guest" room, which we had decorated with fun stuff we found on our biennial Southwest driving trips. I discovered the wonders of pre-colored plaster and purchased some in terracotta and butter colors and went to work eradicating the orange peel textured walls. I bricked the floor with pavers (we've since removed them and Pergoed the whole house). We got rid of the bed and got an inflatable one that we could store for 11 or so months out of the year.


As the years went on, I was learning just about everything I could, starting with garment construction & pattern customization, and then quilting. Pretty soon, my $99 machine was making me nuts, and I splurged on a Janome Memory Craft 4800QC (quilter's companion), which I still love and bicker with regularly. Thanks to some awesome mentors and instructors, I began experimenting with fused art quilts and threadpainting. It didn't take long before Ron and I gave up the idea of even having space for guests on a temporary basis.


Fast forward to 2006 and 2007 when I started exhibiting and selling, and when my fabric stash of prints, hand dyes, batiks and silks reached critical mass and my tools and "toys" were spilling out into the hallway and office ... and bedroom ... and downstairs ....


It was time to relocate. Thanksgiving weekend 2007 was D-Day and I had to be out of my old studio FAST because I was trading spaces with ... our birds! It was not an option to NOT have a sleep cage assembled and ready for use by nightfall, so everything sort of got tossed into plastic storage bins and carried downstairs and out of the way. (Yes, we carried that big-ass bird cage up a flight of stairs. A good reason to powerlift at the gym.)

I made a trip or two to IKEA, thinking that one of their huge storage-shelf-wall-unit thingies with the new drawer/door inserts would be enough to hold my fabric stash.

(Yet another reason for the powerlifting.)

Not even close. I have given away quite a bit to Evie for catnip kitty quilt mats and dog toys, and I still have SIX large storage bins packed with "extra" fabric, and I don't even know what it was for! I have promised Evie's mom, Gale, a "Supermarket Sweep" day with my Asian prints, though, which should bring me down to five bins located in various rooms throughout the house.

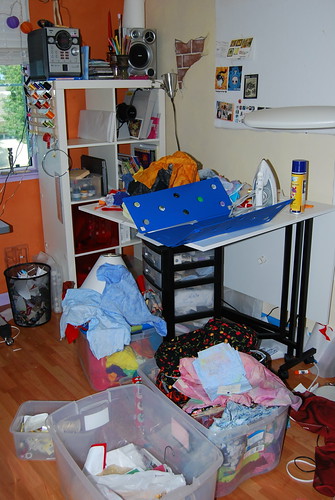
Anyway, here is where I stand (it doesn't look nearly as bad as it actually is 'cause most of the mess is still unsorted in bins...):
New Studio New Studio New Studio

As soon as Ron and I recover from the plague that's been going around this year, we'll be moving my cutting/setting table (out of our bedroom) into my space. I'm taking that china cabinet apart and moving it into our dining "room" (nook would be more appropriate) and heading back to IKEA for some open shelves for small supplies I use a lot and don't mind being out in the open like glues, brushes, jars of thread scraps and glitters. Oh yeah, and art too! I'll also use some of that wall space to hang my ironing board when I'm not using it.

Now if I could just figure out a way to kitten-proof an open floorspace like this (yeah. not happening.)
Read more ...

Friday, March 21, 2008

The Great Glue Debacle of 2008

I was surprised the other night when I perused my glue shelf (oh, shut up) and realized a key ingredient was missing.  I had industrial glue, wood glue, fabric glue, stretch fabric glue, gem glue, mod podge, glitter glue, krazy glue, hot glue and even solder ... but no white glue.  Hell, I didn’t even have a glue stick that wasn’t so old and dried out that it didn’t look like a vanilla bean!

The subject came up again in a message banter with a fellow artist and I decided I’d better take care of my glue deficiency before I went looking for it at midnight on a Saturday again.

I went to Michaels.  Although they don’t carry bookbinding glue (my newfound best friend), they did have a pretty good selection of the tacky white stuff.  I grabbed some Aleen’s classic Tacky Glue along with the fast-grab version and turned to get in line.  As always, it was snaking back through the floral department and everyone was looking mighty crabby.

This is not the first or even the fifth time I’ve reshelved stuff and, as I walked out without my stuff, thought, "Wal Mart isn’t THAT evil, is it?"
Read more ...

Thursday, March 20, 2008

non sequitur (NOT for the squeamish!)

I’ve told folks we have a snake. His name is Elvis and he’s a "lavender phase" California King.

When he was 11, his owner died in a car accident and he started bouncing from home to home. Being the suckers that we are, and because I love all critters whether they have two legs, four legs or no legs, we took him in.


He's a snake, so he eats mice, right? Well no matter what any macho asshole will tell you, it is NOT natural to throw a live mouse into a small cage with a predator. For the psychological welfare of the mouse and the physical welfare of the snake, we feed "Mice On Ice" ... after they’ve been thawed and brought back to body temp in a cup of warm water.

So last night, I wanted a ’nice cup of tea’ and found this sitting in the microwave:


I kept picturing that the tail could be used to "dunk" the mouse like a teabag.

I laughed so hard that I couldn’t stop laughing or coughing and made Ron take a photo.

For those who are icked out and still read the blog despite my warning, please know that I've spared you the details from the Exploding Mouse episode (the time Ron hit the "Cook" button instead of the "Defrost" button); and of course the What's That Smell debacle (when he forgot to remove an uneaten mouse from Elvis's feeding bin ... for a week).
Read more ...

Wednesday, March 19, 2008

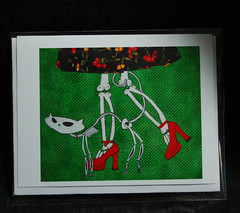
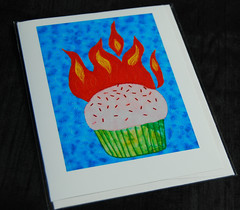
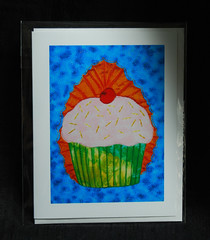
Skelekitty & Friends at Side Show Studios in Sacramento

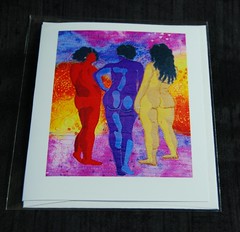
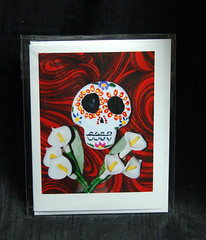
My greeting cards are now carried exclusively at Side Show Studios in Sacramento! To celebrate, I’ve also dropped the price from $5 down to just $4 each!

Each card is blank inside and since I believe in practicing safe stationery, it has its own little card condom (individually sealed in a cellophane envelope).

Designs available:


and the newest card...

Read more ...

Tuesday, March 18, 2008

Color Choices

My new favorite quote,

"Mexicans LOVE loud colors. In fact, the United States government recently came out with a study that proves that the colors that Mexicans use to paint their houses is the second leading cause of cataracts in the United States."


If you don’t already read "Ask a Mexican," you’re SO missing out! This guy is intelligent and irreverent - my favorite combination.
Read more ...

Monday, March 17, 2008

FOUND! (Why you self-centered, egotistical, attention mongering...)

FOUND IT! In the current issue of Midtown Monthly, there’s a photo of Mary Westmark with my stuff in the background. A few pages later, there’s something about Scary-Art Collective pal and super-awesome chica, Char Hall too! Char’s getting me a copy or 2. (Evie, we have an issue dogeared for you and the SAC press file!) Thanks to everyone who responded!

p.s. Don’t miss the article on Skinner’s art!

=================================

original post:

I heard from an awesomely hot chica and fellow artist/crafter (Kukaru Stationery and Vintage Vespa Vigilante) that there’s a photo of my work, albeit in the background, floating around in a local publication.

I’m looking for a copy paper/magazine (I think it’s Midtown Grid?) with the CoolCat article/blurb in it. If you have it, please let me know what issue it is!

Thanks!

Krissi
Read more ...

Saturday, March 15, 2008

Krissi's Faves #1: Fabrics / Why I Shop eQuilter.com First

Because 2% of every sale goes to charity. No joke. So far they’ve raised over $525,000!!!

That’s not the only reason though. They are family owned and, as a matter of fact, Luana Rubin, who co-started eQuilter with her hubby Paul, designed both the fabrics and the quilt pattern of my most coveted bed quilt (NO it’s STILL not for sale!) The kit she sent was awesome and the instructions impeccable.

eQuilter’s customer service is beyond excellent and their fabric, notions and thread selection is vast. I’ve been shopping with them since I started quilting in 2004, and they are always my first stop for fabric & thread shopping.

You might not think this is a big deal, but when I order stuff, I usually have a show deadline I'm trying to beat. I made the mistake of ordering from a very well-known TV personality’s catalog a few times last year and ALL three times, the products were back ordered for over 3 months ... EACH! No apologies and no warning until I got a backorder notice in the mail a week or two later. To add insult to injury, it was impossible to cancel via her website - which is how I ordered. Lesson learned - me no order there no mo'.


So go check out the eQuilter Charities. Then go buy yourself some cute fabric!

Oh, I also get cute stickers and a hand-written note on my packing slips. Not necessary of course, but a nice touch.

Happy shopping,

Krissi

p.s. If you want to ask a "what's your favorite" question, just e-mail me at art[at]krissisandvik[doc]com!
Read more ...

Skelekitty in the morning, Skelekitty in the evening...

Fun stuff for you - a project inspired by Ann and Alisa (who brought their own coffee and a french press on the Crafty Chica Cruise).


..

The "Welcome Home" mug (green) has the text, "GOOD MORNING!" on the reverse.

The "Goin’ Batty" mug has the text, "I go BATTY without coffee!"

The "Play Time!" mug has the text, "Just let Mommy get her coffee first..."

JUST ADDED! "Always Time for Love" has "I LOVE YOU (after I’ve had my coffee)" printed on it.

p.s. I brought my own tea and strainer on the cruise. LOL.
Read more ...

Friday, March 14, 2008

Oh, I am SO making this!

I have jewelery boxes, but my most-worn pieces never seem to make it back there, so I’m going to make one of these necklace organizers TODAY (in between sneezes)! To be decorated and otherwise Krissi-fied, of course:

Clicky on the picky to check out more from Craft Magazine, or just go to the tutorial from Daisy Janie!

*******

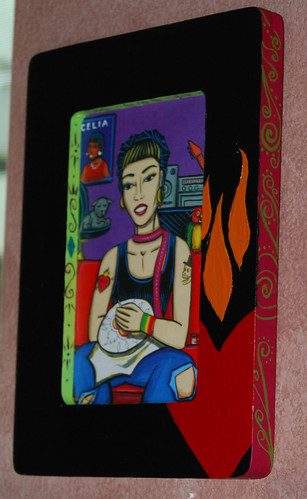
On a similar note (frames, mirrors)... We each got one of Kathy’s hand-sewn cards on the first night of the cruise. Here’s what I made yesterday & finished up this morning especially for my La Crafty Rockera card, which is my favorite of all the "La Crafty" chicas Patrick has painted! Of course she’s my favorite, I mean she has a kitty and a parrot and tattoos AND she’s painting (she needs some pink in her hair, though).

As she hangs in my studio:
lacraftyrockera-framedcustom frame for Crafty Rockera card

Everything was done free-hand using Golden brand liquid acrylics, my new favoriate paint (except the heart and flames were painted using heavy body artist acrylics for texture). There’s a little irridescent medium mixed in here and there too for a little extra fun.
Read more ...

Thursday, March 13, 2008

Crafty Chica Cruise - Swag & Shopping edition

Hey! So this cold of mine has gotten worse before it decided to get better, & my blogging is behind schedule. To tide everyone over until the Day 2 of the cruise recap, here's a sneak peek at what goodies I came home with!

purse
I understand my purse was about $5 more than some girls paid, but MINE has a BAT on it!
I didn't even know that was there when I heard this purse calling me....


DSC_0340
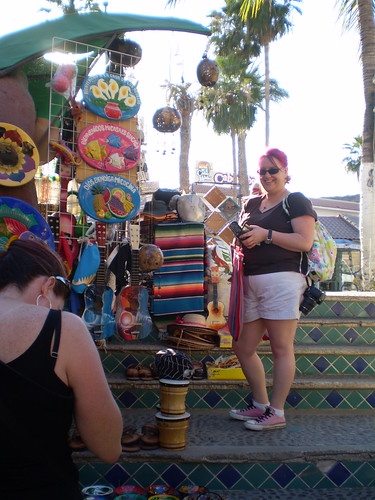
I know these are probably called "gringo bolsas" or something, but they are tough, light and you can take 'em to the beach! I also got a small pink one with the Virgen on it.


from Books Books in Cabo San Lucas
Ron asked me if I have to say Klaatu Barada Nikto! when opening the Necronomicon (and if I don't say that in the right order, will the book bite me on the nose?).

this is NOT pottery, Ann & Alisa!
The pottery I was insisted my friends NOT allow me to buy and me NOT buying the same pottery (photo by Alisa Abrenica) Ann and Alisa left me unsupervised for about 5 seconds, and that was all I needed.

shopping spoils
Yoli and I had a speed-shopping 40-minute stop into Casa Ramirez in Ensenada. There are still a few pieces that didn't make it into this photo!

and now....

SELECT SWAG!!
select swag
This isn't even NEAR all of it! The bumper sticker from Etsy that says, "My other car is a sewing machine" is already up in my studio. I think I need that on a license plate frame, though! In this pile of wonderful you'll find the Crafty Chica Loteria card game pieces, the Crafty Chica Collection (La Casa Loca) book, freebies from Etsy, Naughty Secretary Club, Cigar boxes (thanks Cindy and ...), Art Girlz goodness and much, much more! My "Enjoy Carne Asada" tee shirt is already in the wash! The box with the little nichos is one of the craft projects we worked on during the cruise -- I'll blog separately on the projects later.


language lesson
My favorite tidbit of swag ("¡Tomemos otro WEES-kee!")


Another photos of our tiaras and the custom puzzle games Kathy made us! (photo by Kathy Caño-Murillo)


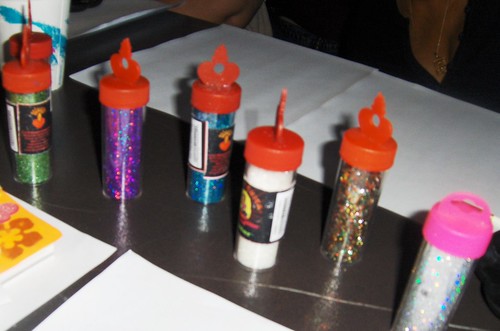
Some of Kathy's glitters (we weren't given our own stash of supplies 'cause they're still in development by Duncan)! The entire Crafty Chica line will be available at Michael's stores in CA, AZ, TX and a few other states on July 1!! The sparkle on the purple and silver glitters made even me, who eschews loose glitter, fall in love! (photo by Yoli Manzo)


More glitter and Crafty Chica paints! (Photo by Belén Rodriguez)


Glue and glossy varnish! (photo by Belén Rodriguez)

There was lots of other goodies to play with, too. So much in fact, that I didn't even get a chance to work with the stencils or stamps! Kathy is also coming out with a line of iron-on crystals by Duncan, which are WAY more affordable than the ones I use.

I CAN'T WAIT FOR JULY 1 TO GET HERE!
Read more ...

Wednesday, March 12, 2008

Pillowcase Tutorial (my first one!)

As promised, I am publishing my first blog tutorial. When I finally stop blogging long enough to update my website, I'll have a page that lists each tutorial by categories (to be determined) and that link back to my blogspot (official) blog.

This first tutorial assumes a basic level of sewing knowledge and ability to use a rotary cutter. I do see a need for a rotary cutting tutorial, so it's on my list of things to write up soon.

I am also working on putting a link to a .pdf download of all my instructions, so please hang in there until I can get it done!

Love, Krissi

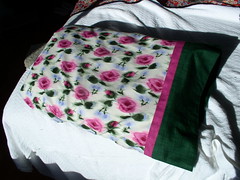
p.s. The pillowcase in the tutorial is not my favorite (read: I hate it - I didn't pick the fabrics) -- anybody want it?

And now, without further introduction...


INSIDE-OUT PILLOWCASE

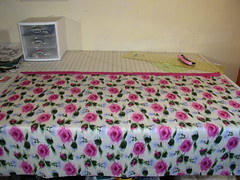
This is an awesome looking pillowcase and is one of the easiest to make, once you've seen how it's done. (All photos link back to my Flickr account so you can view them larger!)
pillowcases on guest bed

Instructions for this and similar cases are oot-n-aboot on the internet. I've seen them called "hot dog" pillowcases and "roll-sew-pull" pillowcases, should you want to Google for more information.

For one standard pillowcase here's what you'll need:
(just double the measurements if you're making 2)

  • Fabric A (body): ¾ yd
    (trimmed & squared to 41"high x 27"wide) watch those directional patterns!
  • Fabric B: (cuff): ¼ yd
    (trimmed & squared to 41" high x 10" wide)
  • Fabric C: (trim): ⅛ yd
    (trimmed & squared to 41" high x 3" wide)
  • coordiating construction thread (ALWAYS use 100% cotton thread on cotton fabric!)
  • optional: decorative rayon thread(s) & disolvable stabilizer for decorative stitching
FYI: I almost never use pins in my sewing but you won't want to try to do this project without 'em!
  1. Trim fabrics as indicated above.

    Even if your fabric measures correctly, you will want to square up the fabric with your rotary cutter, mat and ruler. If your measurements are off by a tiny bit, don't worry -- just make sure that pillow pairs match (so if you have 26.5" for one pillow, cut the second to 26.5" -- you can make up for the lost half inch by adding it to your cuffs!)

  2. Fold and press the trim fabric (3" x 41") in half longwise; wrong sides (WS) together
    contrast2
    set aside


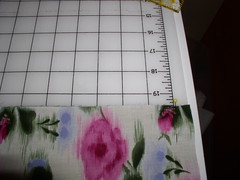
  3. Spread out fabric for your cuff (41"x10") right side (RS) up
    edge3


  4. Place body fabric RS up on top of cuff fabric and line up edges (pin if desired)
    layer1-1 later1-2


  5. Place folded and pressed trim fabric on top of body fabric, raw edges matching
    layer2-2
    remove pins and repin all three fabrics (four layers) together)
    layer2-4


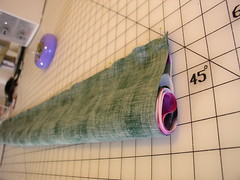
  6. Roll body fabric (this is the cool part!):
    layer2-4 rollin2
    stop when approx. 4"-5" of cuff fabric is exposed. DO NOT ROLL CUFF FABRIC.


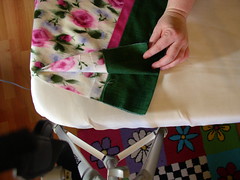
  7. Fold cuff fabric over "roll" and match raw edges
    foldnpin1
    Remove and replace pins
    foldnpin2 foldnpin3
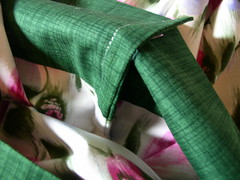
    and Voila! You have a fabric "wrap."
    foldnpin4

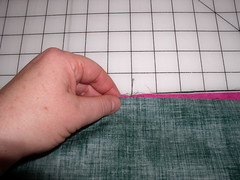
  8. Sew a 3/8" seam along the long edge
    seam1


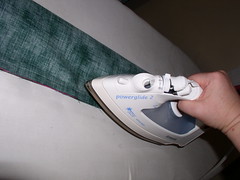
  9. Always SET YOUR SEAMS by pressing (lift and press with your iron on all newly stitched area - don't "rub" it on the fabric) Don't ask why you should set your seams, just do it - you'll love me for it later when you get amazing, professional results.
    set1
    Apologies for the state of my iron. I got it as a b-day present and dropped it a week later, but it still works! It's a Rowenta Powerglide2 WITHOUT the annoying auto-shutoff and it's the only iron for me! No-one carries those locally and I'm too lazy to order a new one online, so get used to seeing this poor dilapidated, but beloved iron!

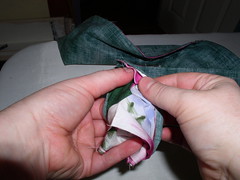
  10. Flip It, Baby!
    turn1 turn3 turn4
    The super-keeno reason to use this technique is that the four raw edges where the various fabrics meet is now enclosed inside of the cuff! No unraveling, no seams to finish!

  11. Press (don't "iron") all of your seams open and flat, using the tip of your iron and steam, if desired. Watch your fingers!
    press1


  12. Fold WS (yes, wrong sides!) together and match all raw edges for a French Seam!**
    french1-1
    Beginning at cuffed edge, stitch down pillow using a 1/4" seam allowance, turn at corner and sew to folded edge
    french1-2


  13. Set your seams!!!!!!

  14. Press seams open

  15. Turn your pillowcase inside out and press

  16. Using a 5/8" seam allowance, sew around the case side and bottom, encasing the raw edges (this is the inside of your pillowcase and will not be seen)
    french2-1

    here's what the seam looks like inside the finished pillowcase:
    frenchfinal


  17. Flip it right side out (I didn't need to remind you to set your seams first, right?) Put it on a pillow and enjoy!
    finalpillowcase

If you have a fancy machine, you can add decorative stitches to the trim fabric in between steps 11 and 12. One x-mas I made my nieces each a pillow case in their fave color with their names stitched on the trim fabric (yay for programmable machines with text stitches!) I've found that one or two layers of light to medium weight dissolvable stabilizer works well for me.

Here are a couple of the custom pillowcases I've made for our home.
other pillowcases

If you don't want to do a French Seam (and frankly, I don't know why ya wouldn't), a zig zag stitch may also be used to finish the raw edges and prevent unraveling.
zigzag finish

This case was made using a different pattern and is a testimonial to why (1) you MUST finish your raw edges and (2) this inside-out technique ROCKS!
bad finish
Read more ...