
This first tutorial assumes a basic level of sewing knowledge and ability to use a rotary cutter. I do see a need for a rotary cutting tutorial, so it's on my list of things to write up soon.
I am also working on putting a link to a .pdf download of all my instructions, so please hang in there until I can get it done!
Love, Krissi
p.s. The pillowcase in the tutorial is not my favorite (read: I hate it - I didn't pick the fabrics) -- anybody want it?
And now, without further introduction...
INSIDE-OUT PILLOWCASE
This is an awesome looking pillowcase and is one of the easiest to make, once you've seen how it's done. (All photos link back to my Flickr account so you can view them larger!)
Instructions for this and similar cases are oot-n-aboot on the internet. I've seen them called "hot dog" pillowcases and "roll-sew-pull" pillowcases, should you want to Google for more information.
For one standard pillowcase here's what you'll need:
(just double the measurements if you're making 2)
- Fabric A (body): ¾ yd
(trimmed & squared to 41"high x 27"wide) watch those directional patterns! - Fabric B: (cuff): ¼ yd
(trimmed & squared to 41" high x 10" wide) - Fabric C: (trim): ⅛ yd
(trimmed & squared to 41" high x 3" wide) - coordiating construction thread (ALWAYS use 100% cotton thread on cotton fabric!)
- optional: decorative rayon thread(s) & disolvable stabilizer for decorative stitching
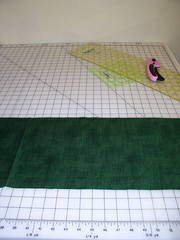
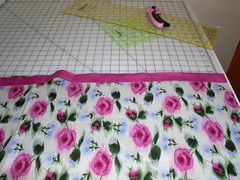
- Trim fabrics as indicated above.
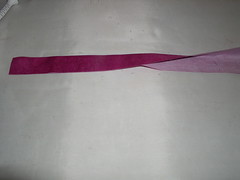
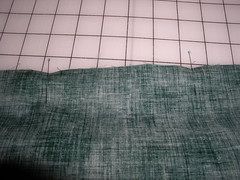
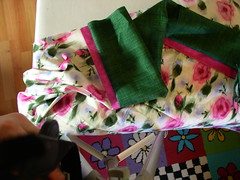
Even if your fabric measures correctly, you will want to square up the fabric with your rotary cutter, mat and ruler. If your measurements are off by a tiny bit, don't worry -- just make sure that pillow pairs match (so if you have 26.5" for one pillow, cut the second to 26.5" -- you can make up for the lost half inch by adding it to your cuffs!) - Fold and press the trim fabric (3" x 41") in half longwise; wrong sides (WS) together
set aside - Spread out fabric for your cuff (41"x10") right side (RS) up
- Place body fabric RS up on top of cuff fabric and line up edges (pin if desired)
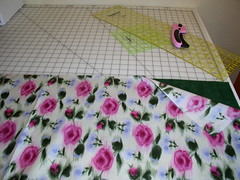

- Place folded and pressed trim fabric on top of body fabric, raw edges matching
remove pins and repin all three fabrics (four layers) together)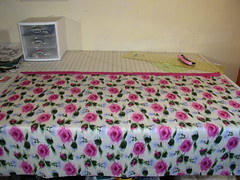
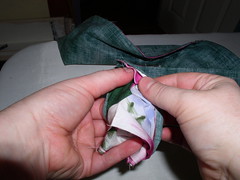
- Roll body fabric (this is the cool part!):
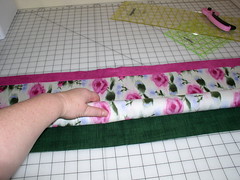
stop when approx. 4"-5" of cuff fabric is exposed. DO NOT ROLL CUFF FABRIC. - Fold cuff fabric over "roll" and match raw edges

Remove and replace pins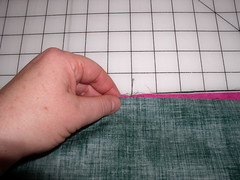
and Voila! You have a fabric "wrap."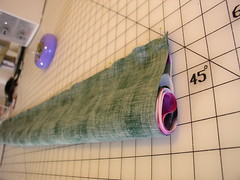
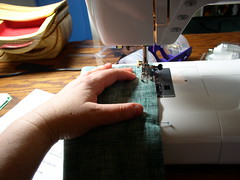
- Sew a 3/8" seam along the long edge
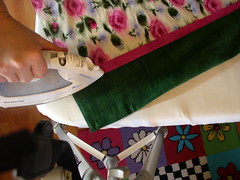
- Always SET YOUR SEAMS by pressing (lift and press with your iron on all newly stitched area - don't "rub" it on the fabric) Don't ask why you should set your seams, just do it - you'll love me for it later when you get amazing, professional results.
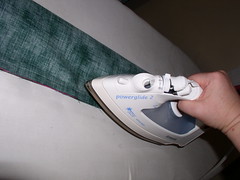
Apologies for the state of my iron. I got it as a b-day present and dropped it a week later, but it still works! It's a Rowenta Powerglide2 WITHOUT the annoying auto-shutoff and it's the only iron for me! No-one carries those locally and I'm too lazy to order a new one online, so get used to seeing this poor dilapidated, but beloved iron! - Flip It, Baby!

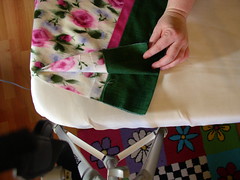
The super-keeno reason to use this technique is that the four raw edges where the various fabrics meet is now enclosed inside of the cuff! No unraveling, no seams to finish! - Press (don't "iron") all of your seams open and flat, using the tip of your iron and steam, if desired. Watch your fingers!
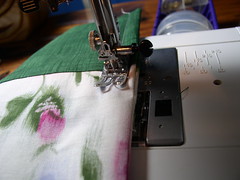
- Fold WS (yes, wrong sides!) together and match all raw edges for a French Seam!**
Beginning at cuffed edge, stitch down pillow using a 1/4" seam allowance, turn at corner and sew to folded edge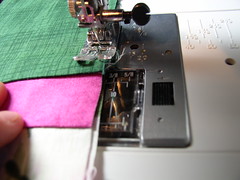
- Set your seams!!!!!!
- Press seams open
- Turn your pillowcase inside out and press
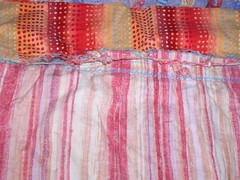
- Using a 5/8" seam allowance, sew around the case side and bottom, encasing the raw edges (this is the inside of your pillowcase and will not be seen)
here's what the seam looks like inside the finished pillowcase: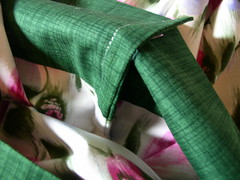
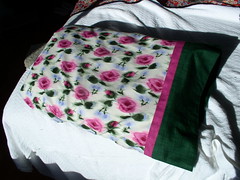
- Flip it right side out (I didn't need to remind you to set your seams first, right?) Put it on a pillow and enjoy!
If you have a fancy machine, you can add decorative stitches to the trim fabric in between steps 11 and 12. One x-mas I made my nieces each a pillow case in their fave color with their names stitched on the trim fabric (yay for programmable machines with text stitches!) I've found that one or two layers of light to medium weight dissolvable stabilizer works well for me.
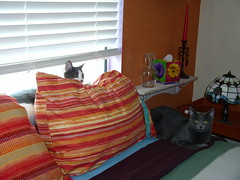
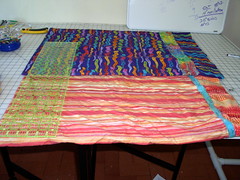
Here are a couple of the custom pillowcases I've made for our home.
If you don't want to do a French Seam (and frankly, I don't know why ya wouldn't), a zig zag stitch may also be used to finish the raw edges and prevent unraveling.
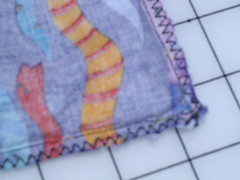
This case was made using a different pattern and is a testimonial to why (1) you MUST finish your raw edges and (2) this inside-out technique ROCKS!
I just wanted to say thank you for posting these pictures! I had the instructions to make a pillowcase but the whole 'hot dog and bun' thing had me scratching my head. Thanks to your pictures it finally clicked!
ReplyDelete