Monday, December 13, 2010

Falling In And Out Of Love (Denouncing Glittersniffer Cosmetics)

The following post was original written for my personal facebook profile yesterday.  However, since that profile is not public and I have several blog readers who also follow my hair and makeup recommendations, I am reposting it here.

Falling in and out of love (or, "dude, it's only make-up")
by Krissi Sandvik on Sunday, December 12, 2010 at 3:58pm


You know that awesome feeling you get when you find something special that you really love and you want to tell EVERYONE you know about it? I have; you know I have. You've even seen it if you follow any of my blogs, videos or even just my facebook status. Just a few things that you may have seen me fall in love with over the past 5 years include Hina's Tea (oh how sad I was when they closed their doors!), Golden brand's acrylic gel medium and fluid acrylic paints, Special Effects hair color, driving, wood burning, Moleskine journals... and Glittersniffer Cosmetics.

Three different formulations of Glittersniffer's pigment "A.D.D."
Notice the unblended chunks of pigment in the far right swatch,
typical of almost all of the pots I received in the last 3 or 4 months.
I have fallen out of love with only one of the above brands/items, Glittersniffer Cosmetics, and I am sad to say that it is not because I found something better, different or that I lost interest in all similar products. It is due, very simply, to the company losing sight of who and what made it so wonderful in the first place. I was quietly retreating, but when several of my friends sent me messages saying they purchased from Glittersniffer because I used her product, I decided to speak my mind. And so, dear friends and fans, I will no longer recommend Glittersniffer Cosmetics to you.

Specifically, I experienced a growing number of the following problems as Glittersniffer grew over the last six months:
Two jars in my "mattes" collection (too chalky to use) arrived
completely open; sifter was improperly inserted, preventing
lid from being secured. My final three orders (which were incorrect)
arrived with open jars and pigment spilled all over the box/envelope.
  • incorrect orders / incorrect "replacement" orders
  • substituted items without notice or option for refund
  • items never sent / "lost" packages
  • accepting payment for items out of stock offering only store credit (not refund); credit required to be used in conjunction with another order
  • inconsistency in formulations (visibly noticeable from batch to batch)
  • poorly mixed or unmixed pigments (aka "chunks" of color and chalky pigments)
  • multiple attempts at communications ignored
  • broken / open / unsecured jar lids
  • blaming others for errors and lost packages
I personally experienced all of these issues on multiple occasions and even brought these issues to the owner's attention, again on multiple occasions. I understand that running a small business is difficult and that mistakes happen. I run a small business and of course, I have made mistakes. However, I do my best to ensure that they never happen twice. I have turned away work if I feel overwhelmed or am unable to fulfill obligations to existing customers. In the case of Glittersniffer, I would receive an apology, sometimes a product I did not need or want and then it was back to business as usual on the next order. After my last 8 or 10 orders, I started to suspect that maybe this was a pattern.

I am not qualified to say that every experience was like mine (though I can assure you that this issue is quite wide-spread throughout at least 25 of her very long-term customers), nor am I telling you to boycott her items. However, I will say that if you do purchase, I hope that you do it of your own accord and not based on any recommendation I may have made in the past.

There are MANY cosmetics companies out there - some which are also 'cottage industry' businesses - from whom you might wish to purchase. Here is a very small list of companies from whom I have purchased in the past and with whom I continue to be happy (just type the names into Google - you can find them very easily):
  • Madd Style Cosmetics (new company this year)
  • Hi-Fi Cosmetics
  • Medusa's Make Up
  • Alima
  • Aromaleigh Cosmetics (no longer in business)
And I added another to my "faves" list in March 2011:
  • Brazen Cosmetics

Other companies from whom I have not personally purchased, but about whom I have heard good things:
  • Pure Luxe Cosmetics Fell prey to Glittersniffer Syndrome and is selling glow in the dark pigments (updated 3/28/2011)
  • Beauty From The Earth
  • Detrivoire Cosmetics
  • The All Natural Facekept her shop open during a 4-week absence, selling items not in stock (3/28/2011)
  • Shiro Cosmetics
  • Sugar Pill Cosmetics
  • Elohi Cosmetics - noted here for good product, but mixed reviews on customer service admitted to allowing people to smoke in enclosed space with product ingredients and packaging (3/29/2011)
    and, of course, there's
  • TKB Trading for bulk purchases and supplies
The 2-5 week turnaround time is the only reason Fyrinnae is not on this list. I understand why the production time is so long, but it's tough to recommend a company who takes that long to ship.

One final note: This is a description of my experiences only, and you are free to disagree. However, please keep your comments here civil and to the point. I know I may lose "friends" over this, but frankly, if I do, my response will be "it's only makeup and they clearly weren't my friends."

------------

Update (12/13/2010 - 2:20pm):  Yesterday, I set out to write a simple, clear post with the single purpose of letting my friends know that I had experienced ongoing and unaddressed problems with a company and was removing my recommendation.  I assure everyone that I had no idea the issue was so widespread or ran so deep.  While I did NOT set out to defame anyone or to bring anyone down, I cannot apologize for the avalanche this first post started since all I did was state a few facts about my personal experiences.  I cannot control that others had similar experiences as well.


With that said, while I empathize with everyone's anger and disappointment, I also request that you keep your comments constructive and restrain the urge to name-call others on this post (you can call me whatever names you like).  I'm not asking you to edit yourselves, just to post those more "subjective" expressions elsewhere so the point of this post stays on topic: the removal of my endorsement.


Thanks everyone.


Read more ...

Monday, November 22, 2010

The Sales Are Coming, Hooray, Hooray!

I have two new announcements about my shop, Krissi's Art Studio (home of Skelekitty and Friends) and one about the super-awesome fantastic group I work with, so let's get right to it, I know you all have pies to make and last-minute groceries to pick up!


GIFT CERTIFICATES ARE HERE!  

Starting this week and continuing until... well, whenever, Krissi's Art Studio will offer gift certificates for the most popular items in the shop (prints, wearable items), in standard dollar amounts ($10, $25, $40, $50, etc.) or in any amount you would like to give.  To view the certificates just go to my shop and click on the section marked GIFT CERTIFICATES.  For custom amounts, all you need to do is drop me an e-mail and we'll work it out. 

When you purchase a gift certificate, you will receive a receipt with the certificate number.  I will also provide you with a printed and signed certificate to present as a gift.  If you would prefer to have the certificate shipped directly to the third party, it's no problem, just specify the person's name and mailing address in the NOTES TO SELLER section when you purchase (please do not add the recipient as purchaser).

The rest of the details will be available in the listings, so keep your eyes peeled!


BLACK FRIDAY - CYBER MONDAY SALE!

 I couldn't decide on what deals to offer over the big shopping weekend, so I figured I'd just cut prices on everything!  Starting on Thanksgiving Day (yep, a day early, 'cause you might need an excuse to escape from the family to shop) I'll be offering coupons for deals in my shop.  EVERYTHING in my shop, including original art AND EVEN GIFT CERTIFICATES!  Dude, that means you can buy more gift for less money AND let them pick which one they want!  Here are the important codes:

Save 10% on purchases over $10 by entering coupon code SAVE10OVER10 when you check out.
Save 15% on purchases of $25 or more with coupon code SAVE15OVER25
Save 20% on $40 or more with coupon code SAVE20OVER40
Save 25% on $75 or more with coupon code SAVE25OVER75
Save 30% on $100 or more with coupon code SAVE30OVER100

The fine print:  Purchase amounts eligible for discounts are for product only and do not include shipping.  Coupon MUST be redeemed at the time of purchase - discounts will not be given after the fact.  Customer is responsible for entering the correct coupon code.  Codes are not limited to one-use-per-customer, but discounts are not cumulative on separate purchases.  I am a single-woman operation and a working artist - please don't tell me how cheap you can get stuff at WalMart - that's just insulting.  Thank you for buying handmade for the holidays!


GLITTER BITCHES HANDMADE!

All the working artisans known as the "Glitter Bitches" are offering various Mega-Shopping-Weekend sales, so be sure to drop by our blog to find out the details!
Read more ...

Sunday, November 14, 2010

Year Two With Dog - It's Still Bliss

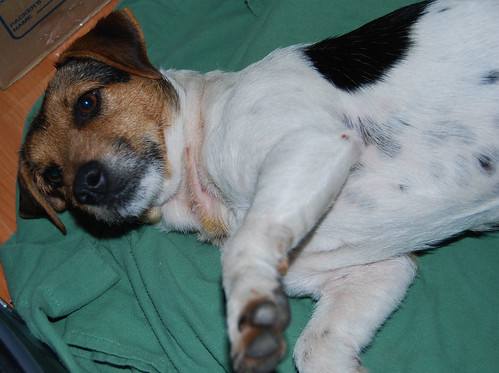
If you've been following my posts and photos and social networking around the web, then you know that Ron and I are the lucky "humans" to a very, VERY adorable Jack Russell Terrier named Abby.
A tired Jack Russell is a good Jack Russell
Abby loves to snuggle!

Today is the second anniversary of the day she found us on a hiking trail in Coloma (Sutter's Mill), California (and here are some links if you're interested in reading the original post and the one-year post).
super sweet face!
Abby, the first week with us: skinny & submissive with shock-collar scars.

Since then, the ride has been bumpy, stinky, muddy, snuggly, furry and pretty much completely wonderful. When we first had her, she didn't know how to play tug-o-war, bark, chase a ball or just enjoy being a dog.  Clearly, she had not been given boundaries or received positive feedback in her first "home."  Well, we took care of that in short order!
Abby's Graduation (Intermediate Obedience)
Graduation from Intermediate Obedience Training! YAY!

Ron and I often muse that now she must hear "GOOD DOG!" more in one day than she heard in the first two years of her life.  As a matter of fact, sometimes she even "helps" the trainer show other dogs how to behave!  Now she plays, growls like a terrier should, is a PERFECT watch dog, loves children, people in wheelchairs, dogs and pretty much everything life has to offer - including tug toys and balls!
Abby & Buddy!
She loves to play with her friends, like Buddy.

Oh, and she's even on Facebook. and has started posing for super-awesome artsy portraits.
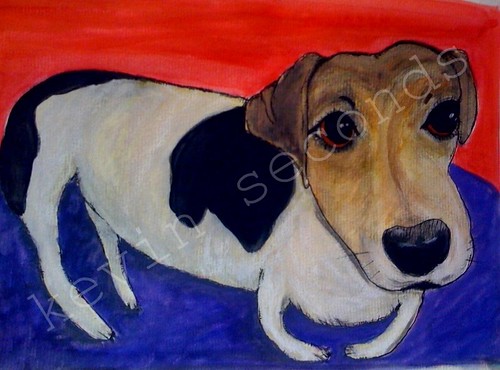
Most awesome portrait ever by Kev Seconds
Custom portrait of Abby by Kevin Seconds (and yeah, he'll paint your dog too!)

I'm not sure what "they" mean by it's a dog's life, when describing something bad, but I do know they certainly weren't talking about THIS dog!
Read more ...

Wednesday, October 27, 2010

formspring.me

Ask me anything about my art, makeup, hair or life! http://formspring.me/KrissisArt
Read more ...

Wednesday, October 20, 2010

In The Spirit

My GLAAD Spirit Day makeup
My GLAAD Spirit Day purple eyeshadow, all by Glittersniffer Cosmetics. 
Say, did you know she's running a GLAAD fundraiser?  Yep!  Check it out!


If you don't know about Spirit Day, you can read all about it here, but here is the short version:  Purple symbolizes 'spirit' on the rainbow flag, a symbol for LGBT Pride.  Wearing purple not only honors the three teenagers who recently took their own lives after experiencing anti-gay bullying, but it's a way to show every singly LGBT youth who face the same pressures and bullying, that there is a vast community of people who support them.

I live in Folsom, a pretty uptight little town 30 miles east of Sacramento CA (and about 2 hours from San Francisco, where I lived until my 30s).  In my neighborhood, I hear a lot about family values and how we need to "save the children" while people spread hate and fear with things like Proposition 8.  Oh, the irony.

Today, however, my faith in people may have been restored, if only a bit.  There were so many people just going about their regular business, albeit wearing an unusual amount of purple!  I asked a few if they were wearing it for the same reason I was (they all said they were!) and I'd venture to guess I made some new friends.


Oh, and if you don't know me and stuff like this matters to you: I am a straight, married woman in my 40s who believes that everyone is entitled to the same rights.  So there.  Take that.
Read more ...

Monday, October 18, 2010

FAQ: Can I Use That Image? (aka Copyright 101)

Intellectual property (patents, licenses, copyrights) is a pretty tough concept to get your mind around, but you are in luck.  As it happens, before I was a full time artist, I used to negotiate licensing agreements.  True story.  And since I received two almost identical inquiries involving this very subject in the last few months, I figured it warranted its own post.

In both cases, the requests boiled down to this:


they wanted to commission a piece of art from me and then sell reproductions of the image (one on jewelry, one as prints).


My short answer was "no" to both because, whether or not they purchase a physical painting from me, the image still belongs to me.  That's where the "intellectual" part of intellectual property comes in - the idea (and execution of that idea) is my property.  Yep.  No matter what they pay for the paintings themselves, such payment does not include the right to use the images.

Still a little confused?  No problem.

Think of it this way:  Let's say you go to Borders or your local book store (they still have those, right?) and you buy a copy of Harry Potter and The Deathly Hallows.  You own that physical book, that thing with pages (the "tangible property") - you paid for it.  You may put it on the shelf or dog-ear the corners, sell it in a garage sale or even, God forbid, burn it if you want to.  However, you don't own the rights to the IDEAS contained therein.  You may not make copies of the book and sell them.  You may not make a movie of the book.... unless of course you have permission from Ms. Rowling (customarily in the form of a license agreement and huge-ass amounts of cash going from you to her).

Art works very much in the same way.  Let's say you pay me for a custom painting of your cat.  No matter how much I charge you for that painting - you are only paying for my time, supplies and creativity, not for the rights to use the image.  So even if I charge you an exorbitant amount, you still may not make copies, prints, Christmas cards (not even for your own use) unless we have a written agreement where I specifically give you those rights (which would be under a License Agreement).  Yeah, I know, even though it's YOUR cat.  Even if I painted from a photo you took.

2011 ADDENDUM:  The reverse/reciprocal is also true: I have the right to do whatever I want with the image.  As the artist, I may create prints, cards or another painting OR I may license the rights to someone else to make items using the image: rubber stamps, posters, car wraps, whatever.  The recipient of the original has no rights outside of the ownership of the tangible, physical property (painting) and may not dictate what the artist may or may not do with the image.  Even if it's a painting of YOUR cat.  Even if it was painted from your photo. 

Another intellectual property tidbit: you need to enforce your intellectual property rights or you lose them.  That's why the Disney Corporation protects Mickey so vehemently.  It's also why I do not ever make exceptions - not even for friends.  I mean, you all saw The Godfather, right?  "It's not personal, Sonny. It's strictly business." 

Anyway, I hope this helped to give you a very brief overview of intellectual property as it pertains to questions I get asked pretty often.   If you have more questions, let me know!

Krissi
Read more ...

Tuesday, October 5, 2010

Make-Up Quickie (Blog Version): Brush Cleaner Recipes & Tips 'N' Hints!

I don't care if you clean your room, but you MUST clean your makeup brushes after every use.  However, it's not necessary to do a full wash every single day unless you are a professional makeup artist using your tools on others!  I usually wash my brushes (full scrubby wash with soap and warm running water) once a week if I wear makeup every day.

For between applications cleaning, I use a liquid brush cleaner which I spritz onto a clean white towel or directly onto the bristles and then wipe off my brush.  For stubborn or deep pigments (reds, blacks, some dark blues) I saturate the brush by dipping it half-way up the bristles into a small container with some cleanser and then squeeze the bristles in a clean towel or washcloth.

I'll tell you a secret.  Brush cleaners are EXPENSIVE and they're really no magic in them, so instead of using a commercial brush cleaner, I choose to make my own and spend my samoleans on MAKEUP!  Here are two of my personal favorite recipes:


Recipe #1: Krissi's First Brush Cleaner:
I've been using this recipe for months and LOVE it.

  • 1 Cup distilled or purified water
  • ¼ Cup isopropyl (rubbing) alcohol (70% or 90%)
  • 1 Tablespoon Dawn dish washing liquid
  • 1 Tablespoon leave-in spray conditioner (any brand)
  • 4-8 drops cold pressed lavender essential oil (do NOT use perfume oil or any other scented oil besides natural essential oil)

Pour water and alcohol into a clean glass dish.  Do not use unfiltered or tap water as bacteria could grow in that over time.  Add soap(s) & conditioner and stir gently with a clean utensil.  Add lavender oil until your preferred scent is achieved (lavender oil will act as an antimicrobial/antibacterial agent AND make your brushes smell pretty).  If the smell is stronger than you like, leave the product open for a few hours and the smell will dissipate.  Fill a small spray bottle (you will have LOTS of cleaner - just store the leftover in a clean container - I save my eye makeup remover bottles and clean them out).


Recipe #2: Gentle & Easy Brush Cleaner:
I found this recipe from Gina of Great Minds Shop Alike on YouTube - here is her original recipe:
  • ½ Bottle (8 oz.) Cetaphil (or Generic Version) - Cetaphil replaces both distilled water and leave-in conditioner
  • ¼ Cup Isopropyl (90%) or Ethyl (70%) Alcohol
  • ½ Tbsp. Shampoo
  • ½ T. Dish washing Soap
Mix in the same manner as previous recipe.  You may wish to put this in a spray bottle for daily use or, if the Cetaphil is too thick for your sprayer, in a pump bottle for convenience. I've been meaning to try this one out for a while and am making a batch TONIGHT!

***********
January 9, 2011: UPDATE!  I have been using the "Great Minds" recipe and LOVE it!  It's my new HG brush cleaner.  However, I tweaked the recipe just a bit and keep it in a spray bottle (the original recipe was a bit thick for that).  


Recipe #3: Krissi-fied version of the conditioning daily brush cleaner


  • ½ Bottle (8 oz./1 Cup) Cetaphil (or Generic Version) - Cetaphil replaces both distilled water and leave-in conditioner
  • ½ Cup Isopropyl (90%) or Ethyl (70%) Alcohol
  • 1 Cup distilled or purified water
  • ½ Tbsp. Shampoo
  • ½ T. Dish washing Soap
  • 10-12 drops cold pressed lavender essential oil
***********

Removing creams, concealers and stubborn piggies from synthetic brushes:  I know, I told you all to blend your NYX jumbo eye crayons and bases with a concealer brush, but didn't tell you how to get that junk OUT of your brush (especially if you've used black crayon - eep!).  Well, just put a little of your usual eye makeup remover (I like the 2-part oil-free kind from Neutrogena, myself) into a spray bottle and clean your 'greasy' brushes with this product first, then with your other brush cleaner.  That's a tip that seems totally obvious to me now, but I didn't figure it out on my own - I learned it from the fabulous Cora at Vintage or Tacky!

That's it!  For more makeup quickies, visit my makeup & hair page on Facebook.
Read more ...

Saturday, October 2, 2010

YAY! Bewbies!

For the entire month of October, 8x10" prints of my painting "Survivor" will be on sale for only $8.50.  This sale may not be combined with other offers, but there is no limit on the number of these you can purchase, so if you want 10 of 'em, I'm happy to package them all up for you!


"Survivor" features a pink breast cancer awareness ribbon with butterfly wings in shades of purple, on a bright green background with inspirational words. This painting was created for a friend's wife, a breast cancer survivor, and is a representation of her tattoo.

And as always, you can get deals on my other prints by buying multiples - there are 2 for $22, 3 for $33 and even 5 for $45 deals.

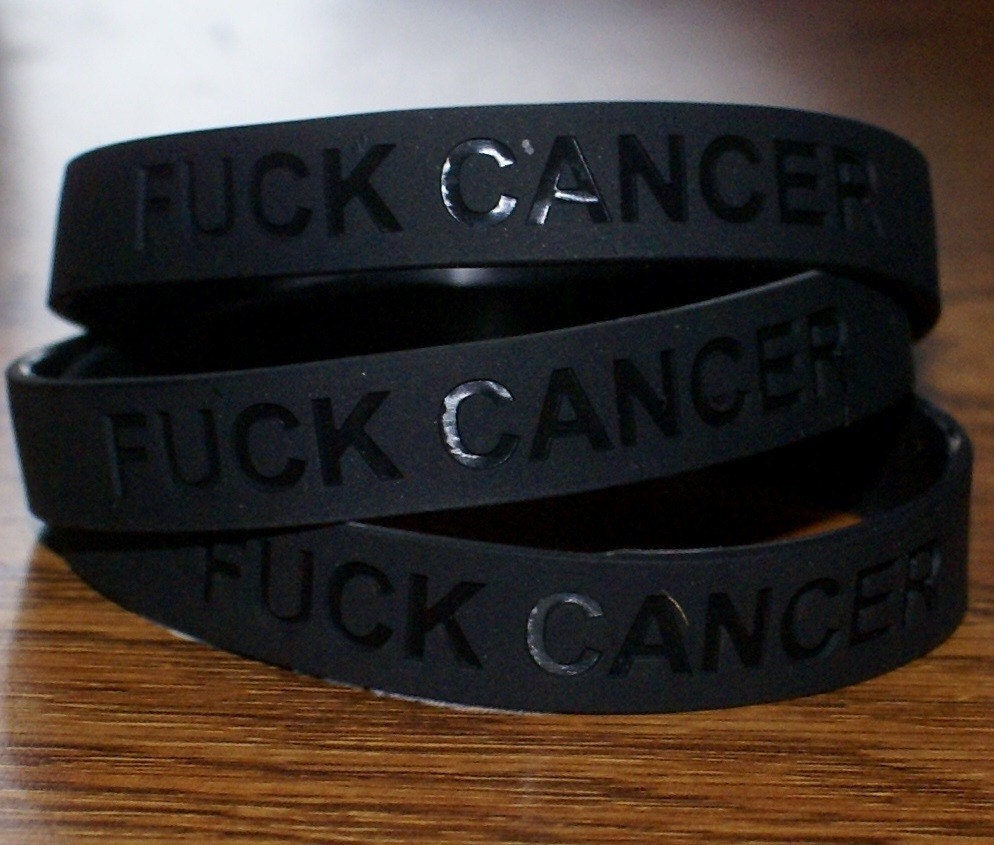
Oh, and speaking of cancer, my pal Mo Love of Madd Style fame is still running her Cancer Fund of America campaign!  ALL profits from listings in the CFA section of her shop will be donated.  She has LOTS of awesome lip products, goodies and... THESE babies!


Thanks for reading. Now go FEEL YOUR BOOBIES!
Read more ...

Wednesday, September 8, 2010

Krissi's F#@% Up Studio (Bloopers & Outtakes #1)

'Cause I'm just plain ol' silly most days.

Read more ...

Saturday, July 17, 2010

Revel in your Geekocity!

I understand there is now an "Embrace your Inner Geek" day (July 13th).

OK.  Fair enough....

But in all honesty, I'm not sure I HAVE an inner geek - I think everything geeky and dorky is pretty much out there for all to see.  I mean, I open my mouth and I'm sure people mentally label me DORK! within the first 2.25 minutes.  Maybe less.  I was called an egghead in college for reading Hamlet instead of watching the Superbowl but I figured I didn't go all the way to Oxford, England to do stuff I didn't like when I was in the US!

Of course, there are some who mistakenly label me cool, but I can say with some assurance that they're just as much of a doofus as I am and it is actually an attempt to reconcile their own feelings of being a complete and utter goober with the need to relate.  The cool label also comes from those who have their geek buried  deep within and are not giving it the hugs that it needs.  Heck, they may not even know it's there.

Of course, the worst label we geeks get isn't a word, it's a tone of voice.  Anger.  These people have no geek in them  and, fearing what they do not know, make fun of it - this geekless state is such a frightening concept that I dare not explore it any further.  I liken it to not having a soul.  ::shudder::

Anyway, no matter where your personal geek resides, find it and give it a hug.  And maybe a cupcake.  With sprinkles.

Now go make one of these:
River Song's book of spoilers, aka the TARDIS/time travel diary
Here.  I'll show you how.

Read more ...

Friday, July 16, 2010

Show N Tell / Stuff N Things (SNT2) #1

Hi all!

As you must certainly know by now, I love "stuff,"   My newest acquisition was given as a birthday present by my LSH (Long Suffering Husband) - a laptop equipped with a webcam!  That means I can start sharing my STUFF collection with all of you!  Hoorah!  Here is my first Show N Tell of Stuff N Things (SNT²).

Curtain please...


LINKS!  LINKS!  LINKS!
Website/shop (facebook fan page)


- Ant Farm Studio  (facebook) Skeleton Kitty box. Skullie yo-yo & painted snake
- KissZombies DIY  (facebook) Zombie/Skeleton hand hair clips
- Ms. Formaldehyde  (facebook) Plumeria hair clips
- Glittersniffer Cosmetics!  (facebook) pigment as nail polish
- Madd Style Designs - (facebook) lip balms
- Juli's Jewels - (facebook) 2-sided soldered/glass pendant (art by Krissi's Art Studio)


PLEASE NOTE: all of the items featured in this video were paid for (cash or in-kind), with the exception of the Skeleton Hand clips, which were a birthday gift and not given in return for a review.
Read more ...

Monday, July 5, 2010

FAQs Answered: How do you make your prints?

I get this question all the time (*cough* 50% of the time it's from people who don't want to do their own research *cough*).   I photograph, crop, color correct, digitally manipulate (if necessary to reposition aspects to fit in 8x10 aspect ratio) and print all of my pieces myself.
  • Camera: I have a Nikon D40X camera and use a tripod and a Tamron 18-270 lens with vibration control.
  • Software/hardware: I use a variety of software including Corel PaintShop Pro, Adobe Photoshop Elements and Gimp.  Sometimes I edit with a mouse and sometimes I use my Wacom Bamboo graphics tablet and pen.
  • Printer/inks: I use an Epson Stylus Photo printer with fade resistant pigment inks, professional photo paper and package using archival quality bags and backings (available at clearbags.com)
And sure, there are other easier and more cost effective ways to make prints, but my hand-made process allows me to keep an eye on the quality and to offer prints of each and every painting requested, not just the most popular ones.
Read more ...

Friday, May 21, 2010

First Public Art Project

One of my business goals for the year was to find and push the limits of my comfort zone.  Now it may not seem scary to you, but I was in a perpetual state of terror last year when I was talked into drawing Skelekitty live and in public for last year's "Chalk It Up to Sacramento" festival.My square for Body Tribe  While there were a few snotty comments within earshot (rude!), any irritation or humiliation I might have suffered was pretty short-lived, since the medium was chalk on sidewalks and therefore faded pretty quickly.

I'm not entirely sure if I'll be doing Chalk It Up again in 2010 - it will pretty much depend on whether I can find a good match for Skelekitty or one of my "Krissi's Art Studio" images.  If you have ideas for a potential match with a local business, let me (or the business) know, OK?

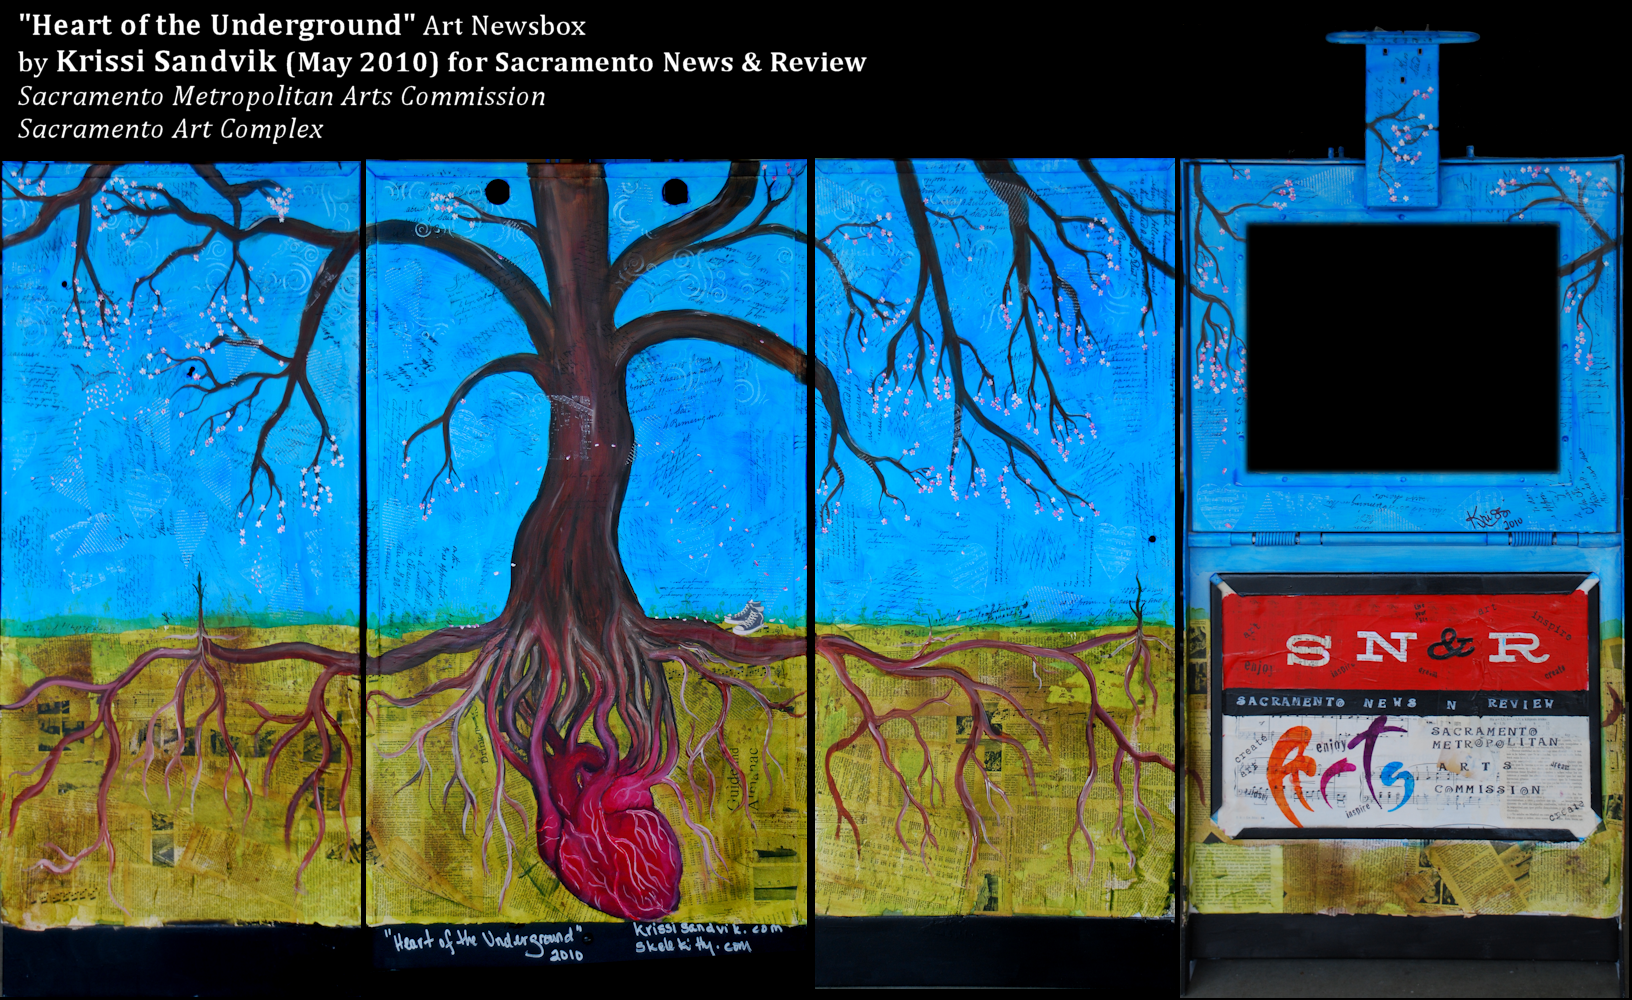
So this spring, when I heard that the Sacramento Art Complex were looking for local artists to paint  Sacramento News & Review newsboxes, I was totally on board and volunteered before the terror or reality of project scope entered my brain.  I had just under a month to pull this project off and, somehow, I managed:
my Art Newsbox for SN&R
[click for large version]
"Heart of the Underground" mixed-media art newsbox by Krissi Sandvik 2010.  "My inspiration for this piece was the Midtown art & music scene, which is the heart of our City of Trees. Drawing on various cultural images, I decided on a blossoming tree of life growing from a heart. This symbol of the city is surrounded by layered images of newsprint, handwriting and sheet music on a blue sky."


Several artists have asked me for the techniques I used to create this piece and, while I really would LOVE to provide everyone with a Krissified step-by-step tutorial in excruciating detail, the truth of the matter is that I'm behind on my commissions and this artist needs to get back to the stuff that pays the bills.  Besides, someone else has already written up a DIY; as a matter of fact, this is where I got the idea in the first place: DIY Custom Roundels by "nadaclue" on Z4Post.com

By the way, this dude is a paint chemist, so I had some well-placed faith in his approach.  I used all of his prep/priming techniques and products (which I found easily in the automotive section at my local OSH) except that  I did not bother to remove the original paint.  I did, however, sand the entire box with a couple of medium grit sandpapers and a palm sander before spraying the first layer of self-etching primer.  Rather than coating the box with a gloss white under the art, I replaced the sandable primer with a matte white primer by Rustoleum which gave me an even white surface that still promoted adhesion of my paints (yes, if you read the tutorial that is about 3-5 coats of just PRIMER!).

The actual painting / mixed-media work was created using the same products and techniques I use on all my art (except for the pyrography). After all of the hard work I put into this, including hand painting all of those little flowers (10 brushstrokes EACH), I was sure to seal this piece with the automotive gloss sealer he also used on his project.  Several coats. 

The entire project took most of a month to complete because of the huge amount of time for prep (1-2 days), the long drying time required by the glazing techniques I use and the fact that I'm SUPPOSED to have a life outside of my studio.  I'd say there was probably about 60 hours of work that went into this when all was said and done.

"Heart of the Underground" Art Newsbox - finalYou can see the original along with boxes painted by other local artists this weekend at the Sacramento Art Complex "Art Happens at The SAC" benefit and fundraiser - 2110 K Street in Midtown Sacramento.


UPDATE! My box is located on the corner of K & 16th Streets.  In case you want to stop by and give it some love (i.e., peel off stickers that weren't put there by SN&R).
Read more ...

Thursday, May 20, 2010

What made you try pyrography?

I've been fascinated with pyrography (literally, burn drawing – in my case on wood) for a while as a decorative craft, probably because my father was a woodworker when he wasn't practicing law. However, I didn't pick up an actual wood burner until 2006, when I took a mixed media class. Although wood burning was not the central theme of the course, it was something that I enjoyed and therefore continued to practice until it became part of my signature look. Over the last 4 years, I add dimension to all the pieces I have worked on ... well, the ones on burnable surfaces, at least.

Ask me anything about my art, makeup, hair or life!

Read more ...

Friday, April 23, 2010

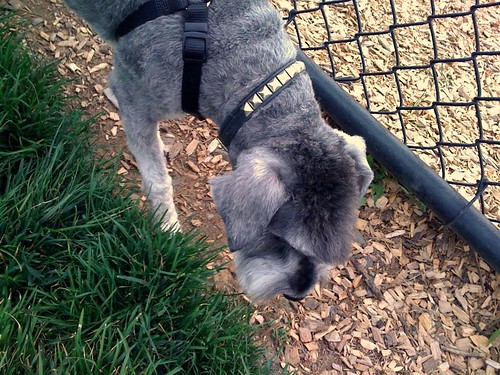
Schnauzer With A Mohawk

OK.  I know I have been remiss in posting, so to tide you all over while you wait for the good stuff - check out this awesome doggy from our local park.
Schnauzer with a mowhawk!

In the near future, you can expect full posts on:
  • The Crafty Chica Cruise
  • project updates
  • review on Glittersniffer Cosmetics! pigments and products
  • artists to watch
  • at least ONE new tutorial
  • Skelemobile update

and some posts about, on or by some of my readers.

Until then, my faithful readers, try to be as awesome as this pooch.  I know I will (try, that is).

xo

Krissi
Read more ...

Monday, March 22, 2010

OMG! How Did I NOT Know This Existed???

Did you (or perhaps your brother) build models when you were a kid?  Remember the super cool "water slide" decals that you used to put the Union colors on your Sopwith Camel?  (Oh, tidbit o' info, the British flag is only the "Union Jack" at sea - at all other times, it is the "Union Flag.")

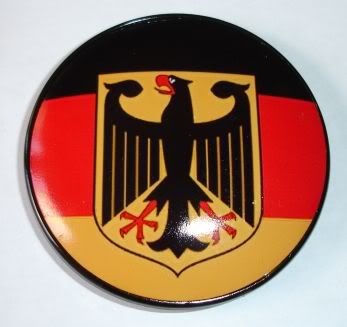
Well, now you can make your OWN water slide decals at home without any special sign making equipment.  All you need is an inkjet printer, a paper-backed film made for just such a purpose and some clear spray paint.  I found this amazing little piece of information while researching a DIY tutorial for customizing car "roundel" badges.  Chad used some sandpaper, elbow grease, primer and the decals to turn these:

into these!

As soon as my replacement roundels arrive (I found the oddly sized ones for the Z4 MC at Bavarian Autosport, but the two fender badges are on backorder for a couple weeks), I will be making custom badges for the new Skele-mobile.  Imagine, if you will, this photo replacing the usual blue & white logo badges:

YEAH, BABY!

OK, so I probably already knew that inkjet water-slide decal paper existed, but never actually saw it in any of my art/craft supply stores and none of my crafty friends introduced me to it.  So off I went to the link Chad provided on his tutorial to purchase some of the paper backed printer film and found some other goodies that were so awesome, that I almost fell out of my chair!

Temporary tattoo paper

Yeah, I know, this has been around forever too, but now you aren't just stuck with whatever flash-type tattoos get passed out at county fairs.  You can turn your own art into temporary tattoos!  Soon I can turn out new Skelekitty designs as temporary tattoos like *snap* that.  I plan to give these these out as freebies at art shows, for inclusion art and print orders and application to my local 'tween fans, and seriously, how much fun is that?


Rub on decal paper

Anyone who has scrapbooked or done even a small amount of mixed-media or collage projects has used or at least seen rub on decals.  They have nearly invisible edges (not like clear stickers or tape transfers), are easy to find in your local craft supply store and come in some really wonderful colors and intricate designs.

But what if you want to add text or an image you can't find?  Well, sure, you could go the tape transfer route, but what if you don't have a laser printer or access to a photocopier for a nice crisp transfer?  Well, you could print onto a clean transparency and then use it like a rub on, but again, the transfer isn't perfectly crisp.  Enter dry rub-on transfer paper which you can find in all kinds of online shops (there is also a line created specifically for use on wood!).  The only drawback of making your own over purchasing them from the stores (besides the obvious copyright issues) is that you can't make them in white.  Still...!  I'm looking forward to using it for adding custom text to my art projects.

Again, there are lots of companies in the US, Canada and the UK which offer these products.  I'm sure you can even buy them from some local print specialty shops.  When my orders arrive, I'll play around and post some tips on using them.

Enjoy!  Krissi

Have you created your own tattoos, stickers, rub-ons or auto decals?  Send me a link to your tutorial and I'll post it!
Read more ...

Friday, March 5, 2010

Swag From A Cross-Dressing Cat

I just opened a mail package from my pal Amy of Oblinaknit to find the  super cool hot pink custom "Zip It" and "Wristlet" I ordered!  When the sun comes back up tomorrow I'll take some snaps of the inside - I love the linings in both pieces, but the bees inside the wristlet are to DIE for!
oblinaknit goodies


She also sent along some cool swag, including:
  • a REALLY cute heart shaped white & pink keychain (is that perfect timing or what, 'cause I picked up what is going to become the Skelekitty-mobile today!). 
  • some FREAKIN' adorable 1" buttons and oversized postcards of her fabulous cross-dressing, fruity hat-wearing kitty, Ken.  
I'll be taking the pins (minus one for my denim jacket, of course) and the post cards with me to give away on the Crafty Chica Cruise next month.

...

But wait, do you think I give some away here too? (I know you'll say yes, but tell me how I should decide who gets 'em. AND BE FAIR!)

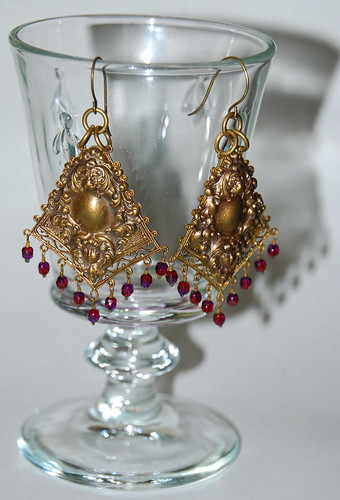
Oh, wait!!!  Before you go off on a commenting rampage asking for one of these super cute kitty diva pins/post cards, did I mention that Amy also makes jewelry as "Oblinaknit Bejeweled?"  Ken swiped these earrings off of her work table and mailed them to me for my birthday last June after I shamelessly drooled over them online.
Earrings by Amy Kozak
Read more ...

Sunday, February 28, 2010

Nifty Tip - Never Do Work Twice If You Can Do It Once

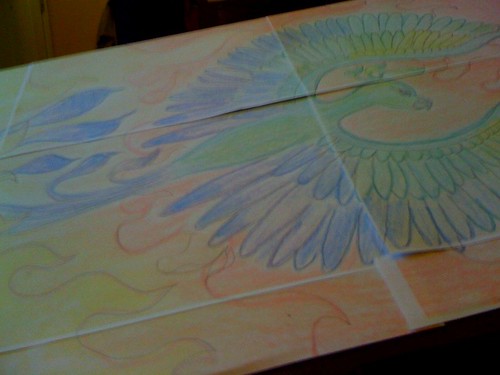
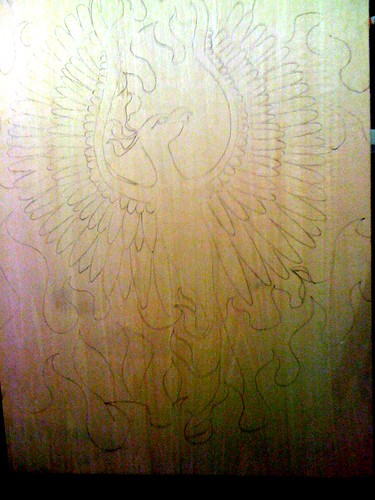
Phoenix color studySo as many of you may know, my beloved Moleskine sketchbook is where I work out most of my ideas as preliminary sketches and color studies.  Example: the sketch for my next painting, which is of a rising phoenix.

I was really happy (and surprised) that the first freehand sketch came out well and really didn't even want to think about trying to redraw it on a 17x24" wooden panel.  My strength lies in color and not in any actual drawing skill, so I knew that if I tried to draw it again, not to mention on a large scale, I'd scuff up the board, go through most of a new eraser and end up crying.

Instead, I scanned the sketchbook page into my computer and then resized it a bit.  Then I got all old school on it, using the "poster" layout to print the original 5x8" image across 9 sheets of paper.  A little bit of tape and voila!  My sketch is now 17x24" and ready to be transferred onto my wood panel.
How to transfer your 5x8" sketch onto a 17x24" panel.


I simply placed the image where I wanted it and taped down one edge to keep it from shifting.  Then I sandwiched a layer of wax-free graphite transfer paper  (purchased on a roll from my local art supply store) underneath and used small pieces of tape to hold them in place.  Using a hard pencil (2H or so), I just traced over the outline of the image, then removed the layers of paper and graphite paper.
Graphite transfer
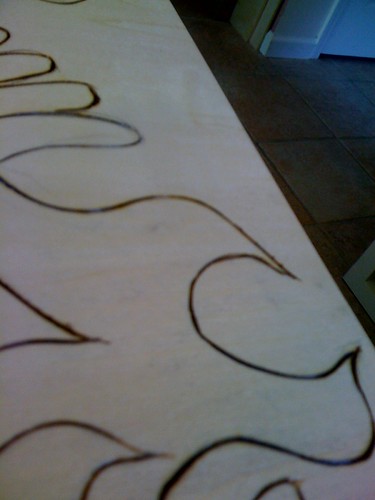
As you can see, the tracing leaves a light outline of the drawing which I can go over with a softer pencil for a nice clear outline (the graphite can rub off and become difficult to see if you rub over it with your hands).  After that, all I have to do is warm up the woodburner and go to town!

Oh, and you can use this technique on canvas boards and it works really nicely on gessoed canvasses too!


☠   ♡   ☠   ♡   ☠   ♡   ☠


UPDATE:

Pyrography in progress:
Pyrography in progress

Erase graphite & pencil markings:
Erase

Give it a light sanding:
Sand

Now get painting (after a few swatch tests, of course)!
Ta da!

TA DA!!!!
phoenix painting (18.24")
Read more ...

Friday, February 19, 2010

What I got today!

What I got today!The release date for Kathy Cano-Murillo's first novel, Waking Up In The Land of Glitter is March 1, but keep your eyes peeled for my review soon!
Read more ...

Wednesday, February 17, 2010

Most Requested List: Image Transfer Tutorial (packing tape version)

Y'all have been begging and bugging me for this for at least a year.  Here it is!

Packing Tape Image Transfers

Almost every single one of my mixed-media pieces has some kind of an image transfer in it.  Some are gel medium transfers (we'll do that another day, OK?), but most are packing tape transfers.  I prefer them because they are FAST and really easy.  If you goof up, you don't have to wait hours to fix your mistake.  Packing tape is also great for transfering text onto just about any surface you can imagine.

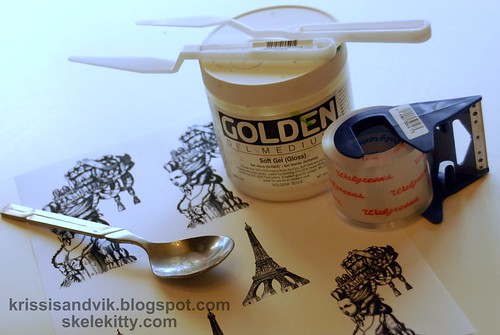
You will need:
  • laser printed* graphics** or text
  • brushes/spatulas
  • clear packing tape
  • a bone folder or spoon
  • gloss gel medium in soft or regular
  • scissors
  • a small bowl with water
  • paper towels
Tape Transfer tutorial*NOTE:  I use a pigment inkjet printer by Epson.  Pigment inks give an image transfer that is nearly as crisp as a laser jet or photocopier. If you use a printer with water soluble inks, you will get a faint transfer, if any, when using this technique.


**IMPORTANT:  NEVER EVER use copyrighted images (especially if they're mine).


Place a piece of packing tape carefully over your printed image. Avoid getting wrinkles or bubbles in or under your tape.Tape Transfer tutorial

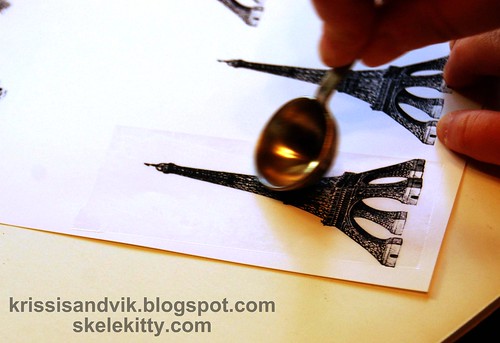
Using your bone folder or the smooth side of a spoon, burnish (rub!) the tape to ensure complete contact between the ink/paper and the adhesive.
Tape Transfer tutorial

Tear away the extra paper from the edges of your tape, turn your image over and peel away some of the paper from the back.  You do not need to peel off all of the paper, but removing some will help the water to penetrate and will make your life a lot easier about 2 steps down....
Tape Transfer tutorial

Submerge your image in a small bowl of room temp/cool water for a few minutes (5 to 10 is usually good, but if you forget it for a couple of hours, don't panic - it's all good).
Tape Transfer tutorial

Using only your fingers, gently rub the paper until it starts to pill up.  Continue to rub at all of the paper residue until it is completely gone.  Your tape will not be crystal clear, but you should not feel any rough spots or bits of paper left.
Tape Transfer tutorial

Once you have removed all of the paper residue, let your tape dry on a paper towel.
Tape Transfer tutorial

Trim up your image and do a dry fitting. Trim more if needed.
Tape Transfer tutorial

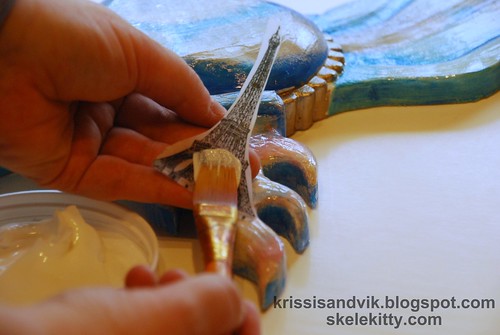
Spread a generous amount of gel medium on your working surface and brush some on the back of your image/tape.
Tape Transfer tutorial

The tricks (and the part where you get messy!):
  • Place your image to your working surface and put a little gel medium over the top to reduce friction.   
  • Using your fingers and starting from near the center of your image, press down firmly and rub out any bubbles.  
  • Continue to press and rub firmly working outward so that all of the gel medium is pressed out from under the tape (you'll be able to tell when there are no white spots under the tape).  
  • Run your fingers around the edges to ensure complete contact. You are going for as close to 100% contact between the tape and your working surface as you can achieve.  
This little trick will not only help eliminate the appearance of "bumps" around the edges of the tape, but will also reduce your drying time!

Troubleshooting tips for working on an uneven surface (like this lovely plaster heart here carved and mold poured by my pal and all around nice dude, Cesco). If you are working on an undulating surface, you may not be able to achieve 100% contact between the tape and your piece. So, here's what you do:
  • Lifting beneath the image
      1. Change your uneven surface into an even surface by adding gel medium and leveling it with a credit card or the edge of a spatula.  Let it dry, then start over with a new transfer (you don't want all the old gel medium gunking it up).
      2. Follow the instructions above, but use the side of your finger to press out the extra gel medium from beneath your image.  You will see white spots of gel medium where your image was previously lifting.  Pretend you don't see them.  Your drying time will be increased, but your image will be perfectly adhered in the end.
      • Lifting at the edges
        1. Since tape will not stretch to follow curves, try trimming the edges of your image if that is where the lifting is occurring
        2. A trick I learned for sewing curves: Rather than trimming away excess tape, try snipping inward toward your image in the problem area.  
        3. Use a trick similar to #2 under Lifting beneath the image - use light pressure around the edges and allow gel medium to take up the space between your tape edges and your working surface.
        4. Did you do a dry fitting?  Really?  Are you sure?  I don't think you did.  Either that, or you were in denial and thought this would fit (silly you).  Go back and resize your image and try again WITH A DRY FITTING THIS TIME.
          Trick #2 for keeping the edges from lifting:
          snip inward toward (not into) your image

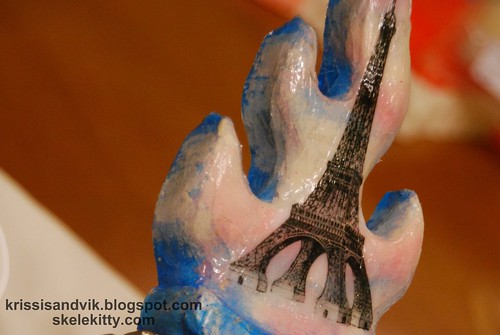
      Add a generous layer of gel medium over the top of the image to blend away the edges of the tape.  Your image will look cloudy/milky at first. Let it dry. Drying time can vary from a few minutes to a day or two depending on thickness of gel layers, porosity of your working surface, temperature and humidity.
      Tape Transfer tutorial


      Now GO FORTH AND TRANSFER THY IMAGES!
      Tape Transfer tutorial

      Here's a pic of the winged sacred heart I'm creating for my ol' school pal, Sam.  It's still in progress, but you can see several other tape image transfers (my apologies for the messy photo background).
      Tape Transfer tutorial


      Other stuff you can do with packing tape (I'll continue to update this as ideas come to me):
      • Using rubber stamps and Staz On or Archival inks, stamp onto the clear side of the tape and then follow the application instructions above (you know to let your ink dry fully first, right?  I didn't need to tell you that, did I?)  Oh, and you do stamp/transfers with tissue paper too, but you get a much different look.
      • For a "ghostly" looking transfer, use an inkjet printer to create your images.
      • To transfer larger images, you can "butt" the tape edges up against each to pull the ink, then do it again when putting down your image(s).  Or, if you're lucky and you can find it...
      • You can use the above techniques with clear CON-tact® paper for larger images!
      • Oh, and YES, you can do this technique with colored copies for a really cool effect.

      Read more ...

      Monday, February 8, 2010

      Piratical Pics

      I just thought I'd share a pic of the Jolly Jalepeño painting which I received from my pal Jill, proprietress of Swag Arts.  She bought this little baby before I'd even finished painting it last year! It looks like my spicy little skele-pirate painting is loving life in the galley.

      the Jolly Jalepeño at home
      It's always wonderful to see art get 'just the right' home, isn't it?

      So not only is Jill a collector of the piractical, she also creates it!  Check out her lovely handmade adornments for the rogue soul at Swag Arts, like Jack Sparrow costuming pieces, skull jewelery, cell phone tags and pirate swag.  And absolutely do NOT miss her shop section called "Depp Style" featuring pieces often seen adorning the man himself.

      Yummm.


      Oh and before I forget, YES, prints of the Jolly Jalepeño are available from my ArtFire shop!
      Read more ...

      Tuesday, February 2, 2010

      Mini Tutorial on Masking Off

      Did I ever post about the winged 'breast cancer survivor' heart I did for my High School pal, Michael Challand? No? Hm. Go figure. Well, here it is:
      Randolph / Challand breast cancer survivor heart
      He and his wife commissioned this in honor of their mothers, both of whom are breast cancer survivors. You can see more pictures of this piece and the other sacred hearts I've painted here

      I'm working on a new winged heart for a good friend of mine (actually, I'm working on three, but for the purposes of this tutorial, I'm going to focus on just one).  After chatting about "stuff,"  we came up with some rising phoenix imagery and I sketched this out as a visual for both of us to work from.
      concept sketch for plaster heart

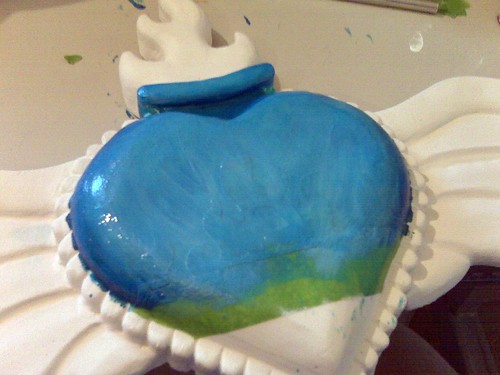
      I was really excited to try something new on these hearts, but as I looked at the design I'd created, I realized I'd also created a challenge as well.  The shading on the hearts is created using wet-on-wet techniques followed by layers of translucent/transparent glazes.  Given the transparency of the colors I plan to use for the flames, I realized there was no way I could paint them OVER the blue heart, so I decided to mask off the flame area and work on each section as if it were a separate piece.

      Anyway, long story short: I thought I would share.

      What you will need:
      • Something upon which to paint
      • Painter's masking tape
      • Soft pencil/crayon
      • Craft knife
      • Paint
      You can use any painter's tape for this, but I like the green tape, which gives a slightly sharper line than the blue tape.  Any brand is fine, but this is the one that auto painters seem to like.
      Masking Off Mini Tute - get it

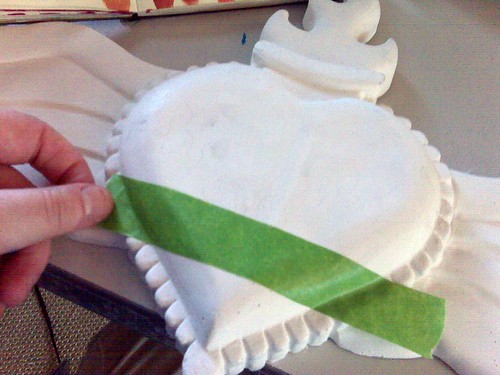
      Begin masking off the area you do not want to paint - in this case, I'm going to do the wet-on-wet blending of the blue background first, so I'm taping off the area where the flames will go. Press down firmly, smoothing out any air bubbles or gaps and making contact between the tape and your working surface.
      Masking Off Mini-Tute - tape it

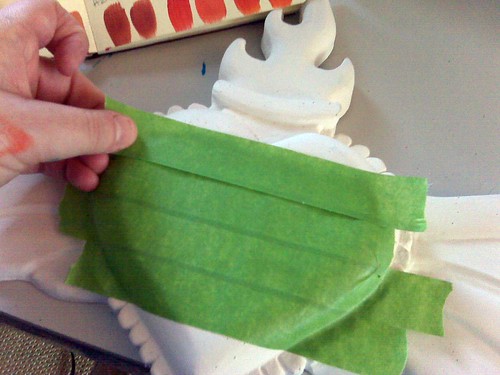
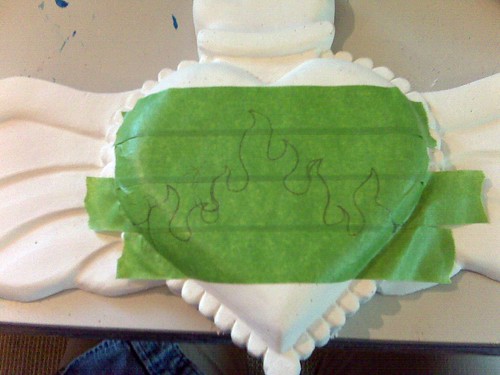
      Overlap layers of tape slightly until the entire area is covered.  (I am working from the bottom of the heart upwards so that when I peel the tape from the "flames" each strip of tape will pull the one on top of it.  It should all come off easily as one peice when I'm finished painting.)
      Masking Off Mini-Tute - layer it

      Sketch out your design using a soft pencil or crayon (avoid using any pens that may bleed or smear).
      Masking Off Mini-Tute - draw it

      Clearly outline your design.
      Masking Off Mini-Tute - draw it

      Using a sharp craft knife, carefully cut along the line of your design. Try not to press down more than is necessary to cut the tape or you will score your substrate/canvas. Use care when cutting edges of tape strips so you don't pull or drag it out of shape (tip: cut in the direction that the tape overlaps).
      Masking Off Mini-Tute - cut it

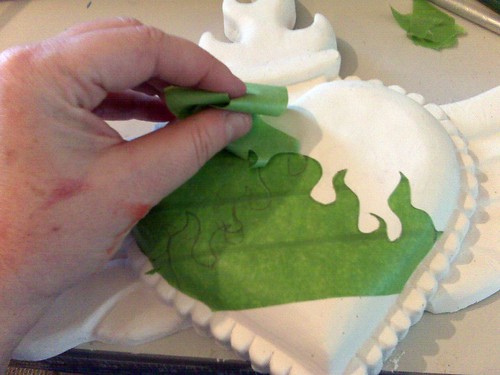
      VERY carefully begin to peel the tape from the area you are going to paint. Use the tip of your knife to hold down any points and/or to cut tape.
      Masking Off Mini-Tute - peel it

      Gently press down on all edges and any points of your design to prevent paint from bleeding beneath your design.
      Masking Off Mini-Tute - smooth it

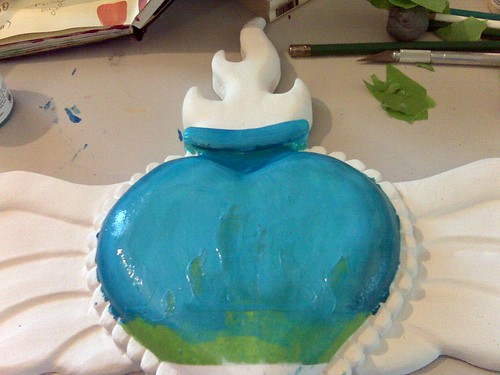
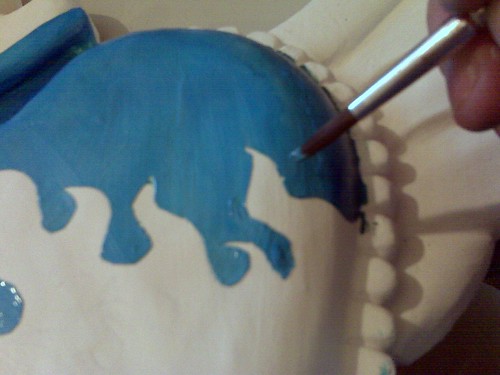
      To prevent bleeding, paint away from the tape rather than toward it as much as possible.
      Masking Off Mini-Tute - paint it

      If you are painting one layer of color, you would remove the tape while the paint is still tacky.  If you pull the tape off too early, the wet paint may bleed or smear.  If you wait too long and the paint dries, you may have difficulty removing the tape or you may peel off something you don't want to!

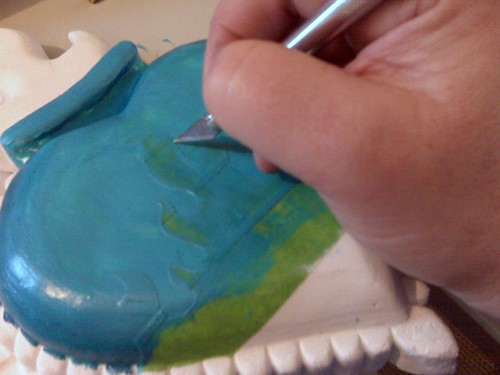
      Because I use multiple layering techniques, I take a slightly different approach.  Between each layer of paint, I carefully cut through the dried paint at the exact edge of the tape.  Yeah.  It takes a while to be this exacting.
      Masking Off Mini-Tute - trim it

      For this heart, I'm doing a second layer of wet-on-wet color blending - this one is white and manganese blue hue over the cobalt turquoise of the first layer.
      Masking Off Mini-Tute - blend it

      And a layer of manganese blue hue glaze:
      Masking Off Mini-Tute - glaze it

      Let the glaze set up so that is no longer wet, but is still tacky and start to very carefully peel up the tape.
      Masking Off Mini-Tute - peel it (again)

      Now take a look at the tape line - are there any smudges or missing chunks of paint that came up when you removed the tape?
      Masking Off Mini-Tute - inspect it

      Carefully scrape away any globs or smears. You could also touch these up with some gesso or paint at a later time (after everything has dried fully).
      Masking Off Mini-Tute - scrape it

      Touch up the spots where paint is missing.
      Masking Off Mini-Tute - retouch it

      Now admire your work!
      Masking Off Mini-Tute - admire it!

      Let it dry and get on with your project!

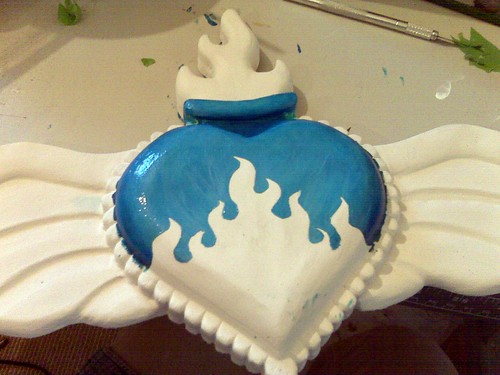
      Here's a peek at how it's coming along so far:
      Today's progress
      Read more ...