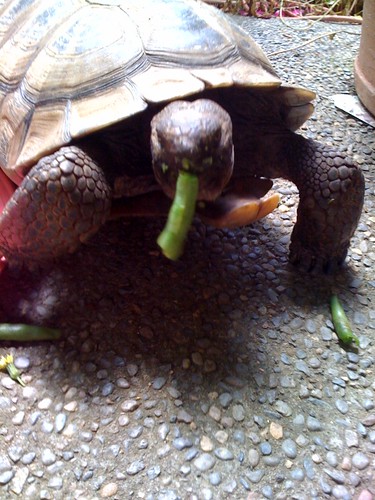
Whenever the sun comes out and I feel the touch of Spring (like today, though it was COLD), I wonder how many more days it will be until our tortoise wakes up....

Sunday, February 27, 2011
Thursday, February 24, 2011
Color Theory for Non-Artists Part I: Intro to the Color Wheel
I am writing a series on beginning color theory for my "other" interest, makeup. Since it's an obvious crossover, I thought I'd post here too. <3 Krissi Originally posted at http://www.facebook.com/KrissisMakeup. Click the badge in the sidebar to follow all of my makeup antics on facebook.
I get a lot of questions about how I choose my color combinations -not only with makeup, but with my art as well. Though I don't look at a physical color wheel every day, I do keep it in mind when deciding on my color combinations. Yes, I know. I already hear you asking, "Krissi, what the heck is this color wheel and how do you use it?" Well, I'm so glad you asked.
Since I'm doing this primarily for makeup, let's use Krissi's Colorful Wheel O' Piggies, shall we?
 This fun little tool was put together using 99% Madd Style Cosmetics pigments (only the 'primary red' is MAC - this color contains carmine and therefore isn't vegan and cannot be found in Mo's shop!)
Let's just start out with a basic discussion of color. Primary colors are defined as the three colors which, when their light waves are blended, produce white. Usually when artists think of primaries, they are the colors you use to achieve all other colors. The three primary colors are yellow, red and blue.
OK! Now we have a basic color wheel with which to work. Before we move forward with using the color wheel, why not go take a look at your pigment/eyeshadows and see if you can determine where on the color wheel your favorites fit. If you need some visual help, try printing out a sample color wheel (just Google "color wheel," click on images and choose the one you like best). There's no shame in a cheat sheet!
NEXT: Part II - Analogous and Complementary Colors
Read more ...
I get a lot of questions about how I choose my color combinations -not only with makeup, but with my art as well. Though I don't look at a physical color wheel every day, I do keep it in mind when deciding on my color combinations. Yes, I know. I already hear you asking, "Krissi, what the heck is this color wheel and how do you use it?" Well, I'm so glad you asked.
Since I'm doing this primarily for makeup, let's use Krissi's Colorful Wheel O' Piggies, shall we?

Let's just start out with a basic discussion of color. Primary colors are defined as the three colors which, when their light waves are blended, produce white. Usually when artists think of primaries, they are the colors you use to achieve all other colors. The three primary colors are yellow, red and blue.
There are other shades, tints, values and hues of these colors, but we'll save that discussion for their own blog posts.
 |
| Primary colors YELLOW (Princess Buttahcup), RED (Brash & Bold by MAC-contains carmine) and BLUE (Aja/Jem Coll. - look for this to MAYBE make an appearance in the permanent collection). |
Secondary colors (orange, purple/violet and green) are achieved by mixing two primaries together. Easy peasy lemon squeezy, right?
 |
ORANGE (Boognish) = yellow + red PURPLE (Electric Kool Aid) = red + blue GREEN (Frankenstein) = blue + yellow |
Tertiary colors are acheived by mixing a primary with one of its own secondary colors:
 |
| YELLOW-ORANGE (Blister In The Sun), RED-ORANGE (Strange Potion), RED-VIOLET/fuchsia (Magenta), BLUE-VIOLET/indigo (Nana's Tea Party), BLUE-GREEN/teal (Tron) and YELLOW-GREEN (Acid Bath) |
NEXT: Part II - Analogous and Complementary Colors
Saturday, February 19, 2011
The Art of Lasagna
My painting techniques -layering, using products that take a long time between steps- apparently go much deeper than just art. Every year in February, I undertake The Lasagna Process for Ron's birthday. For those who have been asking for YEARS, here are my "guidelines" for making my famous-to-those-who-have-eaten-it lasagna sauce and casserole. I have a hard time calling this a recipe because it changes each time I make it. If you're OCD and need a measured recipe, I highly recommend that you NOT read this!
Read more ...
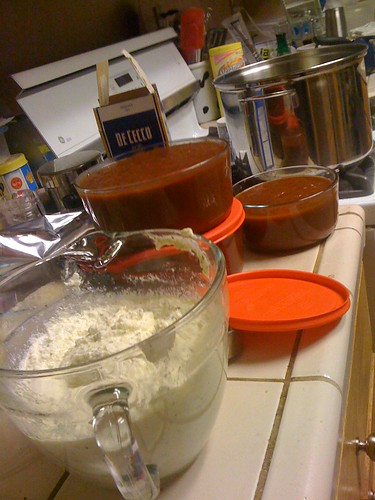
Use the freshest ingredients you can find. I purchase all of my canned goods, cheese (high-test ricotta and mozzarella - the super squishy balls--no "low fat" junk) and pasta at Mama Ann's Deli in El Dorado Hills, CA, but there are plenty of great supermarkets and Italian groceries/delis around these days. This is not a cheap endeavor - one of the reasons it only gets done once a year.
Perhaps only one ingredient is a bit of a surprise, but the real secret to this whole production is patience. It's a two day event to cook the sauce--plus another 24 hours to get a Krissified lasagna, but it's so worth it. (I always make more sauce than I need since it makes a great companion to any kind of pasta, chicken, etc. and freezes well.)
Perhaps only one ingredient is a bit of a surprise, but the real secret to this whole production is patience. It's a two day event to cook the sauce--plus another 24 hours to get a Krissified lasagna, but it's so worth it. (I always make more sauce than I need since it makes a great companion to any kind of pasta, chicken, etc. and freezes well.)
MY 2-day sauce:
Lasagna filling:
Bake
- Use whole, peeled Italian tomatoes (and get rid of as many seeds as you can while preserving the juice). Blend to chunky consistency with a hand blender.
- Add fresh garlic & basil (Ron prefers it without onion, but you can add it) and dried organic oregano & a spicy Italian herb mix.
- My biggest "secret:" Guinness. In years past I used wine, but it's too acidic when mixed with the tomatoes. I tried other beers, but the stout gives the sauce a certain body and "heft" you can't get with ale or lighter beers. Depending on the size of the batch, I use 1 to 2 bottles (about a bottle per big-ass lasagna).
- Cook the sauce down at a simmer, stirring regularly, for about 2 days (allowing it to cool/refrigerating overnight) until it has a nice thick, pizza sauce consistency.
- Let sauce cool before assembling.
- Add salt to taste about an hour or two before assembling the lasagna.
 |
| Ready, set, ASSEMBLE! |
Lasagna filling:
- Combine 3 Cups of ricotta cheese and add 2 beaten eggs, some dried parsley (a Tbsp or so) and a handful of freshly grated parmesan/romano blend. I purchase mine from the local Nugget grocery, cut them into chunks and blend them in my food processor.
- Slice, crumble or chop (I chop/crumble) about three fist-sized fresh mozzarella balls. If you're not using fresh, the water content will be lower and you may want to reduce the amount of cheese. Or not.
- Prepare the noodles in a well salted pot of boiling water with olive oil. Don't overcook the pasta - leave it a little more than al dente (just cooked enough to be flexible) since it will finish cooking and soak up extra liquid in the sauce when you bake it. For pasta that calls for 9 min, I usually cook it for 6. Lay the noodles on paper towels or tea towels to prevent sticking and to absorb the extra water.
- Layer noodles, ricotta filling, sauce, mozzarella and sprinkling of hard cheese blend and repeat. I do two layers in one pan that is wide and shallow and three layers in a pan that is deeper and narrower.
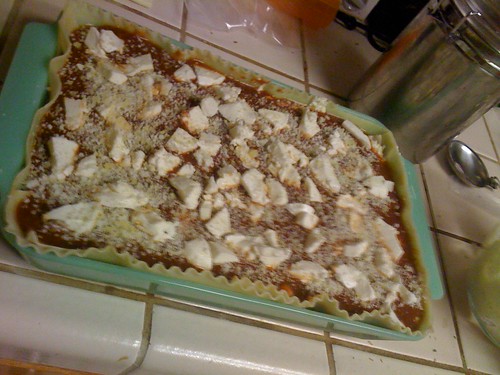 |
| My 2-layer lasagna - ready to go into the oven! |
- Another one of my secrets: assemble and bake @ 375 for about 30 minutes the day BEFORE you want to serve. Cool, wrap loosely in foil & refrigerate for about 24 hours.
- Bake 30 min @ 375 with foil. Remove foil and bake 25-40 minutes until top has achieved your desired crispiness.
- Allow casserole to rest for about 15 minutes before cutting.
- Oh, and watch out for the inevitable carb coma
Wednesday, February 9, 2011
Subscribe to:
Posts (Atom)