Sunday, February 28, 2010

Nifty Tip - Never Do Work Twice If You Can Do It Once

Phoenix color studySo as many of you may know, my beloved Moleskine sketchbook is where I work out most of my ideas as preliminary sketches and color studies.  Example: the sketch for my next painting, which is of a rising phoenix.

I was really happy (and surprised) that the first freehand sketch came out well and really didn't even want to think about trying to redraw it on a 17x24" wooden panel.  My strength lies in color and not in any actual drawing skill, so I knew that if I tried to draw it again, not to mention on a large scale, I'd scuff up the board, go through most of a new eraser and end up crying.

Instead, I scanned the sketchbook page into my computer and then resized it a bit.  Then I got all old school on it, using the "poster" layout to print the original 5x8" image across 9 sheets of paper.  A little bit of tape and voila!  My sketch is now 17x24" and ready to be transferred onto my wood panel.
How to transfer your 5x8" sketch onto a 17x24" panel.


I simply placed the image where I wanted it and taped down one edge to keep it from shifting.  Then I sandwiched a layer of wax-free graphite transfer paper  (purchased on a roll from my local art supply store) underneath and used small pieces of tape to hold them in place.  Using a hard pencil (2H or so), I just traced over the outline of the image, then removed the layers of paper and graphite paper.
Graphite transfer
As you can see, the tracing leaves a light outline of the drawing which I can go over with a softer pencil for a nice clear outline (the graphite can rub off and become difficult to see if you rub over it with your hands).  After that, all I have to do is warm up the woodburner and go to town!

Oh, and you can use this technique on canvas boards and it works really nicely on gessoed canvasses too!


☠   ♡   ☠   ♡   ☠   ♡   ☠


UPDATE:

Pyrography in progress:
Pyrography in progress

Erase graphite & pencil markings:
Erase

Give it a light sanding:
Sand

Now get painting (after a few swatch tests, of course)!
Ta da!

TA DA!!!!
phoenix painting (18.24")
Read more ...

Friday, February 19, 2010

What I got today!

What I got today!The release date for Kathy Cano-Murillo's first novel, Waking Up In The Land of Glitter is March 1, but keep your eyes peeled for my review soon!
Read more ...

Wednesday, February 17, 2010

Most Requested List: Image Transfer Tutorial (packing tape version)

Y'all have been begging and bugging me for this for at least a year.  Here it is!

Packing Tape Image Transfers

Almost every single one of my mixed-media pieces has some kind of an image transfer in it.  Some are gel medium transfers (we'll do that another day, OK?), but most are packing tape transfers.  I prefer them because they are FAST and really easy.  If you goof up, you don't have to wait hours to fix your mistake.  Packing tape is also great for transfering text onto just about any surface you can imagine.

You will need:
  • laser printed* graphics** or text
  • brushes/spatulas
  • clear packing tape
  • a bone folder or spoon
  • gloss gel medium in soft or regular
  • scissors
  • a small bowl with water
  • paper towels
Tape Transfer tutorial*NOTE:  I use a pigment inkjet printer by Epson.  Pigment inks give an image transfer that is nearly as crisp as a laser jet or photocopier. If you use a printer with water soluble inks, you will get a faint transfer, if any, when using this technique.


**IMPORTANT:  NEVER EVER use copyrighted images (especially if they're mine).


Place a piece of packing tape carefully over your printed image. Avoid getting wrinkles or bubbles in or under your tape.Tape Transfer tutorial

Using your bone folder or the smooth side of a spoon, burnish (rub!) the tape to ensure complete contact between the ink/paper and the adhesive.
Tape Transfer tutorial

Tear away the extra paper from the edges of your tape, turn your image over and peel away some of the paper from the back.  You do not need to peel off all of the paper, but removing some will help the water to penetrate and will make your life a lot easier about 2 steps down....
Tape Transfer tutorial

Submerge your image in a small bowl of room temp/cool water for a few minutes (5 to 10 is usually good, but if you forget it for a couple of hours, don't panic - it's all good).
Tape Transfer tutorial

Using only your fingers, gently rub the paper until it starts to pill up.  Continue to rub at all of the paper residue until it is completely gone.  Your tape will not be crystal clear, but you should not feel any rough spots or bits of paper left.
Tape Transfer tutorial

Once you have removed all of the paper residue, let your tape dry on a paper towel.
Tape Transfer tutorial

Trim up your image and do a dry fitting. Trim more if needed.
Tape Transfer tutorial

Spread a generous amount of gel medium on your working surface and brush some on the back of your image/tape.
Tape Transfer tutorial

The tricks (and the part where you get messy!):
  • Place your image to your working surface and put a little gel medium over the top to reduce friction.   
  • Using your fingers and starting from near the center of your image, press down firmly and rub out any bubbles.  
  • Continue to press and rub firmly working outward so that all of the gel medium is pressed out from under the tape (you'll be able to tell when there are no white spots under the tape).  
  • Run your fingers around the edges to ensure complete contact. You are going for as close to 100% contact between the tape and your working surface as you can achieve.  
This little trick will not only help eliminate the appearance of "bumps" around the edges of the tape, but will also reduce your drying time!

Troubleshooting tips for working on an uneven surface (like this lovely plaster heart here carved and mold poured by my pal and all around nice dude, Cesco). If you are working on an undulating surface, you may not be able to achieve 100% contact between the tape and your piece. So, here's what you do:
  • Lifting beneath the image
      1. Change your uneven surface into an even surface by adding gel medium and leveling it with a credit card or the edge of a spatula.  Let it dry, then start over with a new transfer (you don't want all the old gel medium gunking it up).
      2. Follow the instructions above, but use the side of your finger to press out the extra gel medium from beneath your image.  You will see white spots of gel medium where your image was previously lifting.  Pretend you don't see them.  Your drying time will be increased, but your image will be perfectly adhered in the end.
      • Lifting at the edges
        1. Since tape will not stretch to follow curves, try trimming the edges of your image if that is where the lifting is occurring
        2. A trick I learned for sewing curves: Rather than trimming away excess tape, try snipping inward toward your image in the problem area.  
        3. Use a trick similar to #2 under Lifting beneath the image - use light pressure around the edges and allow gel medium to take up the space between your tape edges and your working surface.
        4. Did you do a dry fitting?  Really?  Are you sure?  I don't think you did.  Either that, or you were in denial and thought this would fit (silly you).  Go back and resize your image and try again WITH A DRY FITTING THIS TIME.
          Trick #2 for keeping the edges from lifting:
          snip inward toward (not into) your image

      Add a generous layer of gel medium over the top of the image to blend away the edges of the tape.  Your image will look cloudy/milky at first. Let it dry. Drying time can vary from a few minutes to a day or two depending on thickness of gel layers, porosity of your working surface, temperature and humidity.
      Tape Transfer tutorial


      Now GO FORTH AND TRANSFER THY IMAGES!
      Tape Transfer tutorial

      Here's a pic of the winged sacred heart I'm creating for my ol' school pal, Sam.  It's still in progress, but you can see several other tape image transfers (my apologies for the messy photo background).
      Tape Transfer tutorial


      Other stuff you can do with packing tape (I'll continue to update this as ideas come to me):
      • Using rubber stamps and Staz On or Archival inks, stamp onto the clear side of the tape and then follow the application instructions above (you know to let your ink dry fully first, right?  I didn't need to tell you that, did I?)  Oh, and you do stamp/transfers with tissue paper too, but you get a much different look.
      • For a "ghostly" looking transfer, use an inkjet printer to create your images.
      • To transfer larger images, you can "butt" the tape edges up against each to pull the ink, then do it again when putting down your image(s).  Or, if you're lucky and you can find it...
      • You can use the above techniques with clear CON-tact® paper for larger images!
      • Oh, and YES, you can do this technique with colored copies for a really cool effect.

      Read more ...

      Monday, February 8, 2010

      Piratical Pics

      I just thought I'd share a pic of the Jolly Jalepeño painting which I received from my pal Jill, proprietress of Swag Arts.  She bought this little baby before I'd even finished painting it last year! It looks like my spicy little skele-pirate painting is loving life in the galley.

      the Jolly Jalepeño at home
      It's always wonderful to see art get 'just the right' home, isn't it?

      So not only is Jill a collector of the piractical, she also creates it!  Check out her lovely handmade adornments for the rogue soul at Swag Arts, like Jack Sparrow costuming pieces, skull jewelery, cell phone tags and pirate swag.  And absolutely do NOT miss her shop section called "Depp Style" featuring pieces often seen adorning the man himself.

      Yummm.


      Oh and before I forget, YES, prints of the Jolly Jalepeño are available from my ArtFire shop!
      Read more ...

      Tuesday, February 2, 2010

      Mini Tutorial on Masking Off

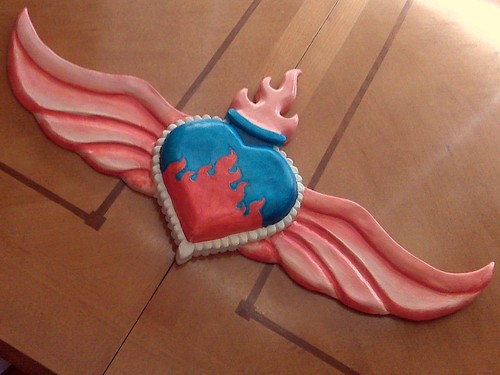
      Did I ever post about the winged 'breast cancer survivor' heart I did for my High School pal, Michael Challand? No? Hm. Go figure. Well, here it is:
      Randolph / Challand breast cancer survivor heart
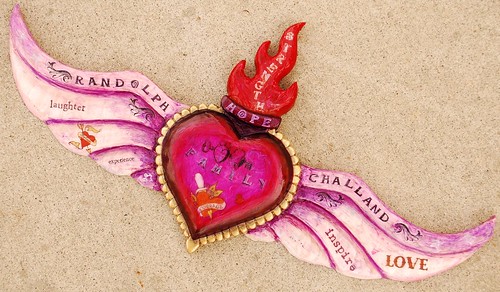
      He and his wife commissioned this in honor of their mothers, both of whom are breast cancer survivors. You can see more pictures of this piece and the other sacred hearts I've painted here

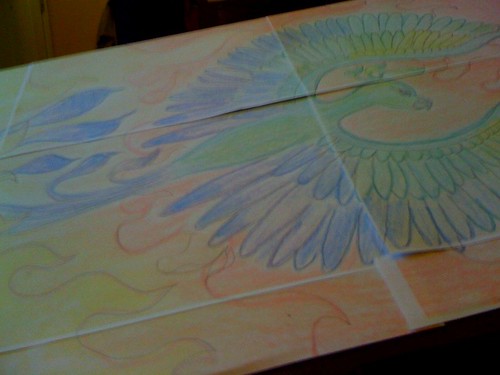
      I'm working on a new winged heart for a good friend of mine (actually, I'm working on three, but for the purposes of this tutorial, I'm going to focus on just one).  After chatting about "stuff,"  we came up with some rising phoenix imagery and I sketched this out as a visual for both of us to work from.
      concept sketch for plaster heart

      I was really excited to try something new on these hearts, but as I looked at the design I'd created, I realized I'd also created a challenge as well.  The shading on the hearts is created using wet-on-wet techniques followed by layers of translucent/transparent glazes.  Given the transparency of the colors I plan to use for the flames, I realized there was no way I could paint them OVER the blue heart, so I decided to mask off the flame area and work on each section as if it were a separate piece.

      Anyway, long story short: I thought I would share.
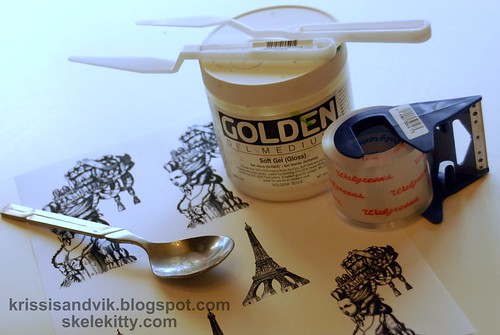
      What you will need:
      • Something upon which to paint
      • Painter's masking tape
      • Soft pencil/crayon
      • Craft knife
      • Paint
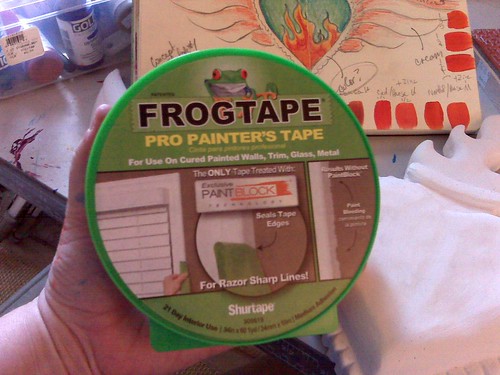
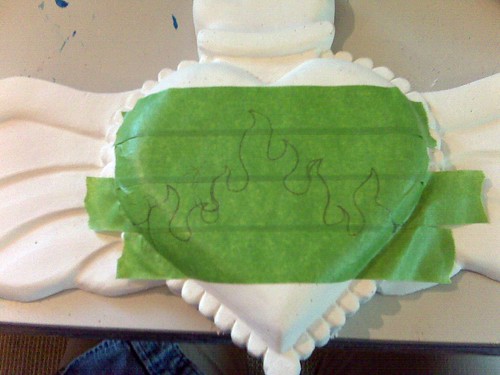
      You can use any painter's tape for this, but I like the green tape, which gives a slightly sharper line than the blue tape.  Any brand is fine, but this is the one that auto painters seem to like.
      Masking Off Mini Tute - get it

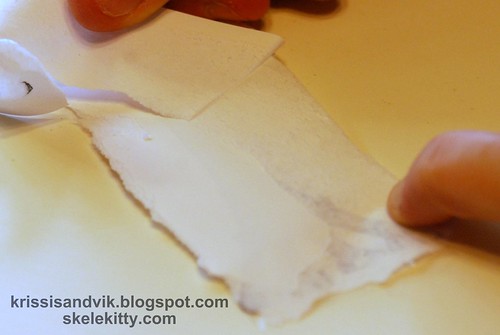
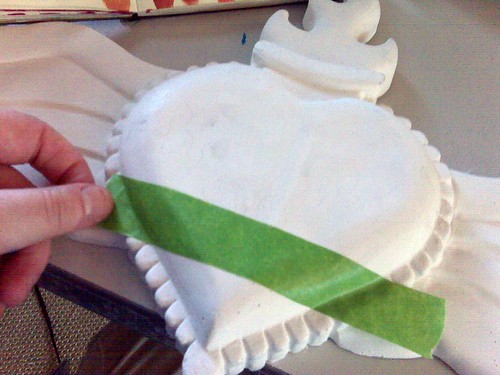
      Begin masking off the area you do not want to paint - in this case, I'm going to do the wet-on-wet blending of the blue background first, so I'm taping off the area where the flames will go. Press down firmly, smoothing out any air bubbles or gaps and making contact between the tape and your working surface.
      Masking Off Mini-Tute - tape it

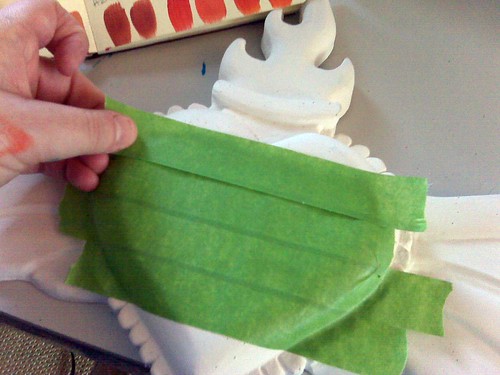
      Overlap layers of tape slightly until the entire area is covered.  (I am working from the bottom of the heart upwards so that when I peel the tape from the "flames" each strip of tape will pull the one on top of it.  It should all come off easily as one peice when I'm finished painting.)
      Masking Off Mini-Tute - layer it

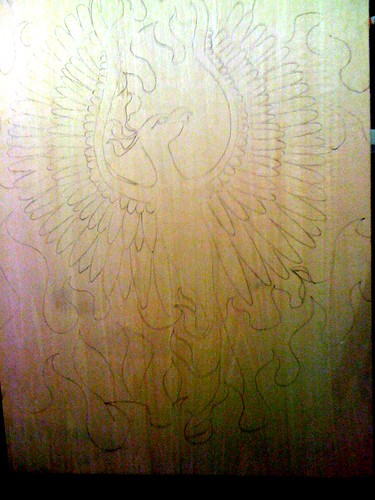
      Sketch out your design using a soft pencil or crayon (avoid using any pens that may bleed or smear).
      Masking Off Mini-Tute - draw it

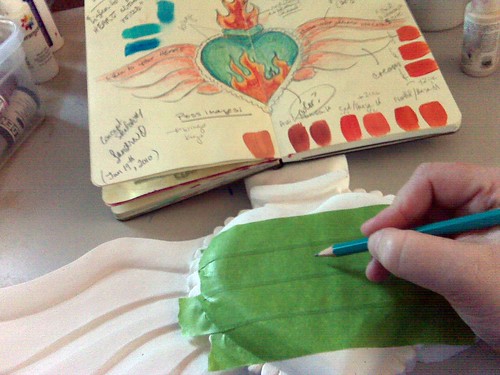
      Clearly outline your design.
      Masking Off Mini-Tute - draw it

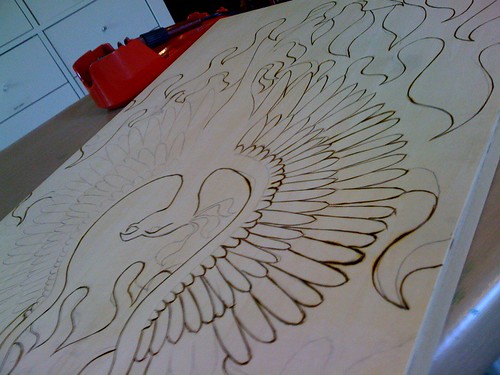
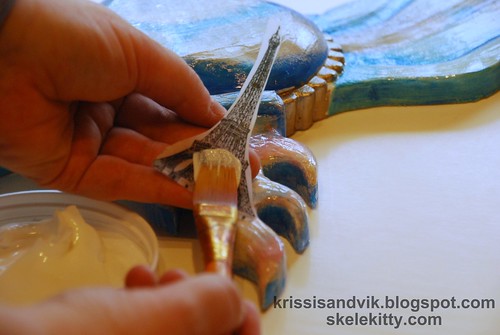
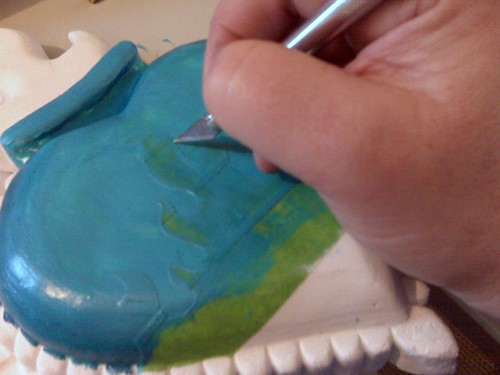
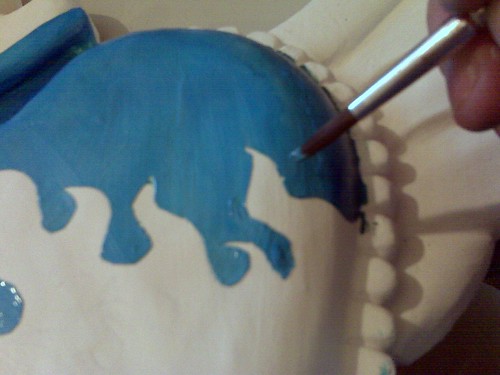
      Using a sharp craft knife, carefully cut along the line of your design. Try not to press down more than is necessary to cut the tape or you will score your substrate/canvas. Use care when cutting edges of tape strips so you don't pull or drag it out of shape (tip: cut in the direction that the tape overlaps).
      Masking Off Mini-Tute - cut it

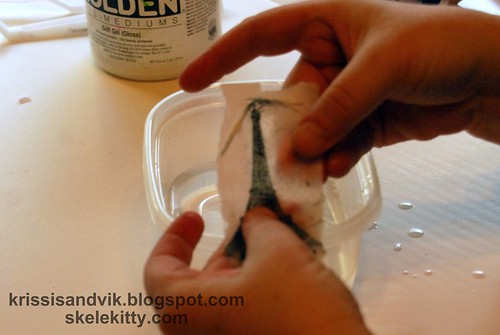
      VERY carefully begin to peel the tape from the area you are going to paint. Use the tip of your knife to hold down any points and/or to cut tape.
      Masking Off Mini-Tute - peel it

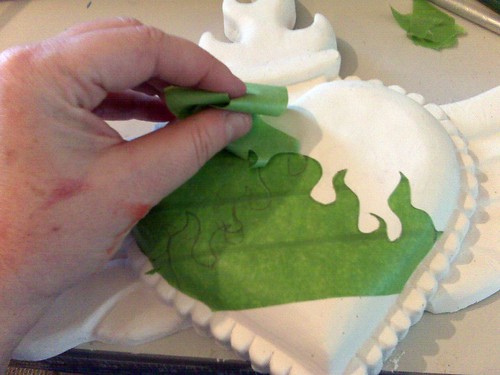
      Gently press down on all edges and any points of your design to prevent paint from bleeding beneath your design.
      Masking Off Mini-Tute - smooth it

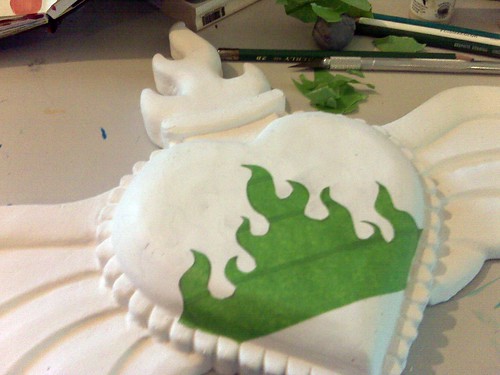
      To prevent bleeding, paint away from the tape rather than toward it as much as possible.
      Masking Off Mini-Tute - paint it

      If you are painting one layer of color, you would remove the tape while the paint is still tacky.  If you pull the tape off too early, the wet paint may bleed or smear.  If you wait too long and the paint dries, you may have difficulty removing the tape or you may peel off something you don't want to!

      Because I use multiple layering techniques, I take a slightly different approach.  Between each layer of paint, I carefully cut through the dried paint at the exact edge of the tape.  Yeah.  It takes a while to be this exacting.
      Masking Off Mini-Tute - trim it

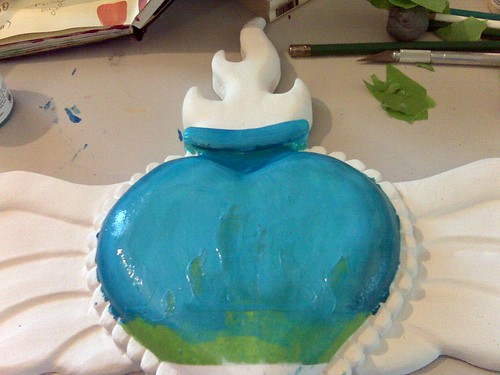
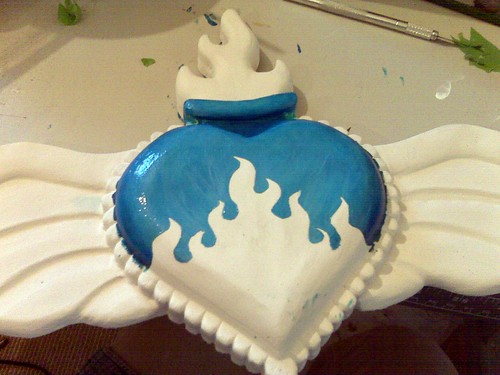
      For this heart, I'm doing a second layer of wet-on-wet color blending - this one is white and manganese blue hue over the cobalt turquoise of the first layer.
      Masking Off Mini-Tute - blend it

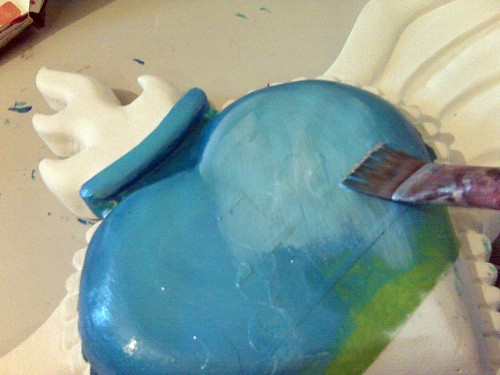
      And a layer of manganese blue hue glaze:
      Masking Off Mini-Tute - glaze it

      Let the glaze set up so that is no longer wet, but is still tacky and start to very carefully peel up the tape.
      Masking Off Mini-Tute - peel it (again)

      Now take a look at the tape line - are there any smudges or missing chunks of paint that came up when you removed the tape?
      Masking Off Mini-Tute - inspect it

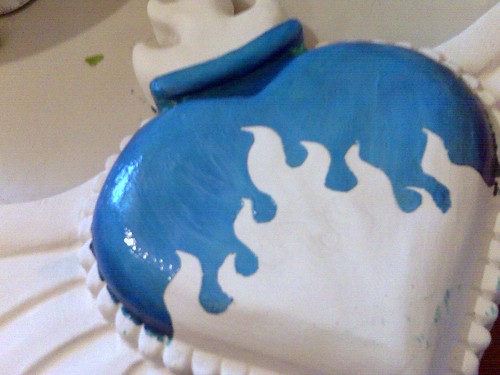
      Carefully scrape away any globs or smears. You could also touch these up with some gesso or paint at a later time (after everything has dried fully).
      Masking Off Mini-Tute - scrape it

      Touch up the spots where paint is missing.
      Masking Off Mini-Tute - retouch it

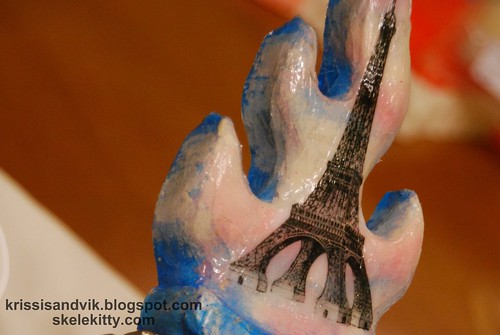
      Now admire your work!
      Masking Off Mini-Tute - admire it!

      Let it dry and get on with your project!

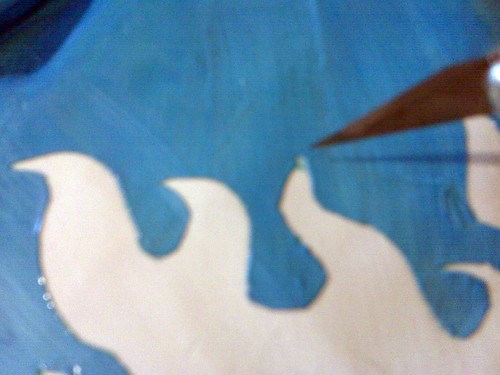
      Here's a peek at how it's coming along so far:
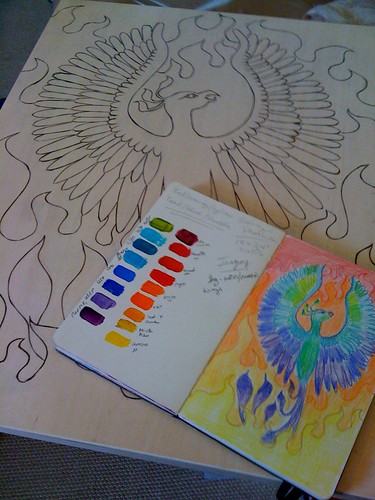
      Today's progress
      Read more ...