As I'm sure you all know, I do not fancy myself a jewelry designer by any stretch of the imagination, but I do love to make wearable mixed media art now and then.
 When I started working with this ring blank from Susan Lenart Kazmer's Art Mechanique line, I intended to do layers of tissue paper, resin, rub on decals, watch gears and clear mica pieces, but once I started looking at the 7 Gypsies tissue paper I'd just purchased, the project took on a life of its own.
What you'll need for this project:

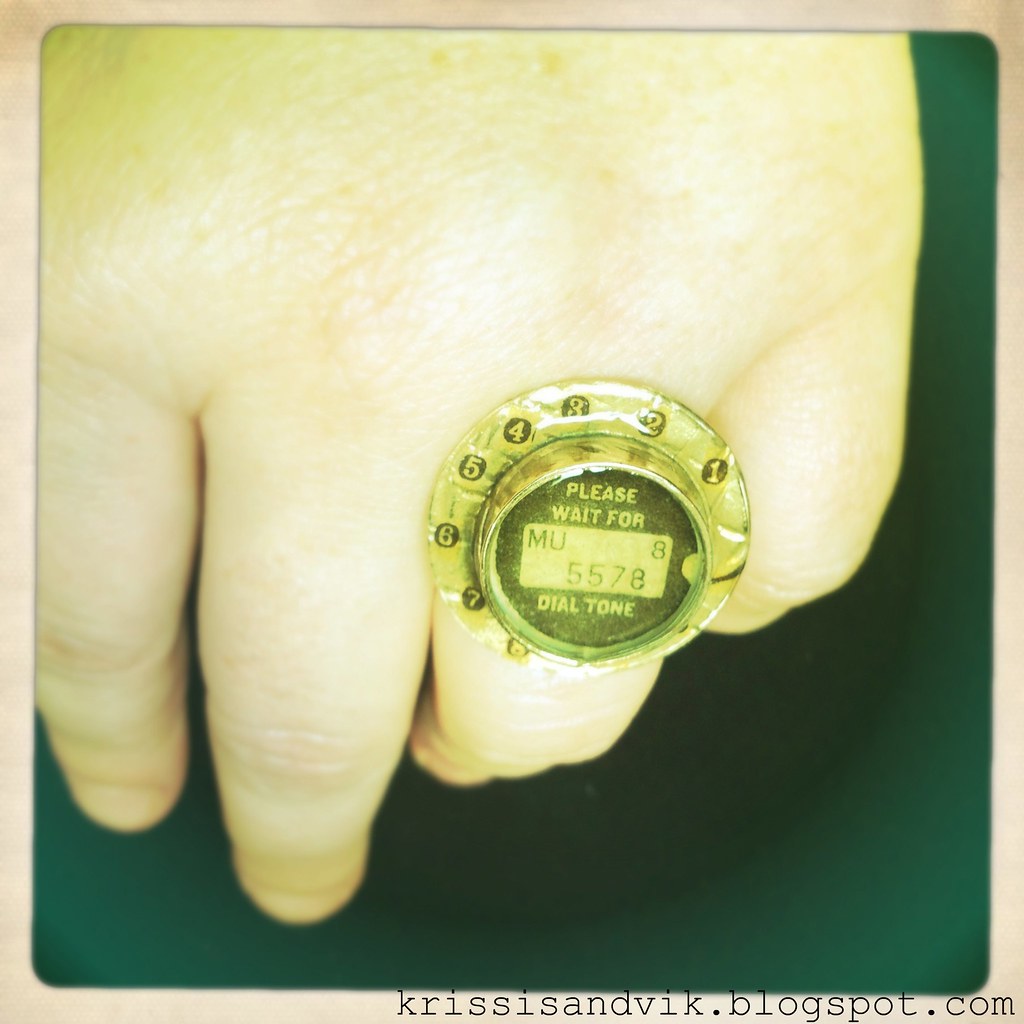
 This little center piece, which just happened to be the same size as the bezel, is what changed the direction of this piece - I realized while I was dry fitting it the first time, that this would make a fun "telephone."
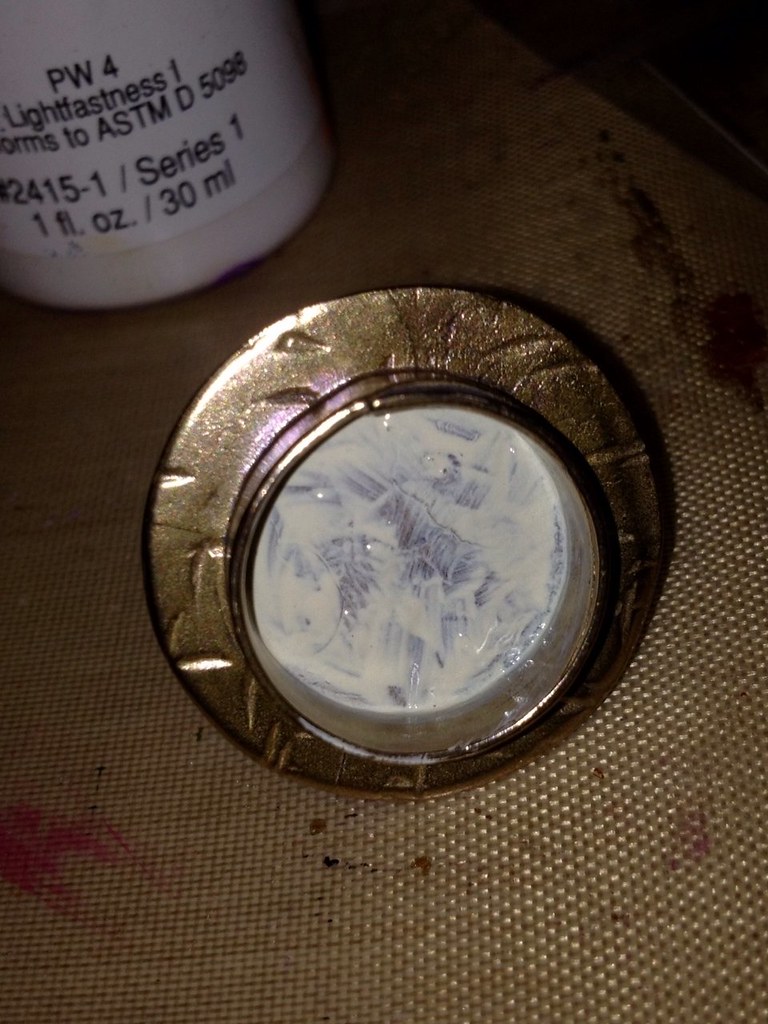
 Like the numbers, I affixed this piece of tissue paper to keep it from rotating or curling when I apply resin later. I used a clear sealant instead of glue - making sure that the unprinted portion of the tissue looked nice and evenly translucent.
Once the sealant is dry, mix up another batch of resin and place your ring somewhere so the bottom is level. You don't need a fancy fly-making rig like I have - just put a couple of popsicle sticks over a cup and place the ring on top. Voila!
Apply some resin around the edge, over the numbers and out to the edge. Next, use your palette knife to drip resin into the bezel. You could repeat the layering process and add another element in at this point, but I decided to pour the resin right up to the top of the bezel so it will dome nicely.
You can also bring any bubbles to the surface with a heat gun on low or a hair dryer, but be careful, especially if you've filled the bezel to the top.
 Allow your piece to cure for 24 hours before you move it and 3 days before you wear or ship it. I won't be shipping this one anywhere. I love it and am keeping it for my very own.
Crafty love,
Krissi
p.s. Please ask questions if you have any in the comments here - if I don't know the answer, I'll find out or make something really convincing up.
Read more ...
When I started working with this ring blank from Susan Lenart Kazmer's Art Mechanique line, I intended to do layers of tissue paper, resin, rub on decals, watch gears and clear mica pieces, but once I started looking at the 7 Gypsies tissue paper I'd just purchased, the project took on a life of its own.What you'll need for this project:
- Ring blank - this one is the ring bezel in bronze from the Art Mechanique line by Susan Lenart Kazmer - the flange around the edge was an integral design element.
- Numbers - I used 7 Gypsies Collage Tissue in "Numero", however, you can easily create your own numbers using a tape transfer technique and images of telephone dial numbers or old typewriter keys.
- Resin. I prefer 2-part jewelry grade epoxy resin with a 1:1 mix ratio like ICE or Luxe, both of which I use. Make sure you have plenty of measuring cups and stir sticks.
- Clear-drying adhesive or sealant/varnish
- A steady hand try practicing by playing some Operation with your little brother.
- Tools:
detail paintbrush or bamboo skewer
sharp, small scissors
something to hold your ring level - Acrylic craft paint (optional)
As always, start by opening all of your supplies and by cleaning your ring. I just use a little 90% rubbing alcohol.
When you are working with a deep bezel in a bronze or dark color like this, layers will show up better if you start with a brighter background. I just dabbed a little paint (I had Golden's Fluid Acrylics in Titan Buff on hand, but you can use any light colored acrylic craft or artist's paint).
While you wait for the paint to dry...
 |
| Don't sneeze. |
This was definitely the most difficult part of this project - cutting out the tissue paper and NOT blowing the teeny pieces across my worktable. I used a very sharp pair of spring handled Fiskars snips, which made cutting the delicate tissue without tearing much easier. I think it was worth the effort though, because the sepia tone of the paper blends well with the bronze of the ring blank.
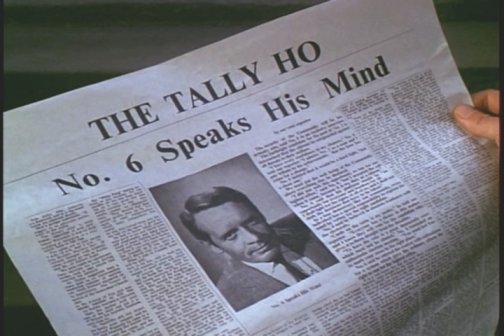
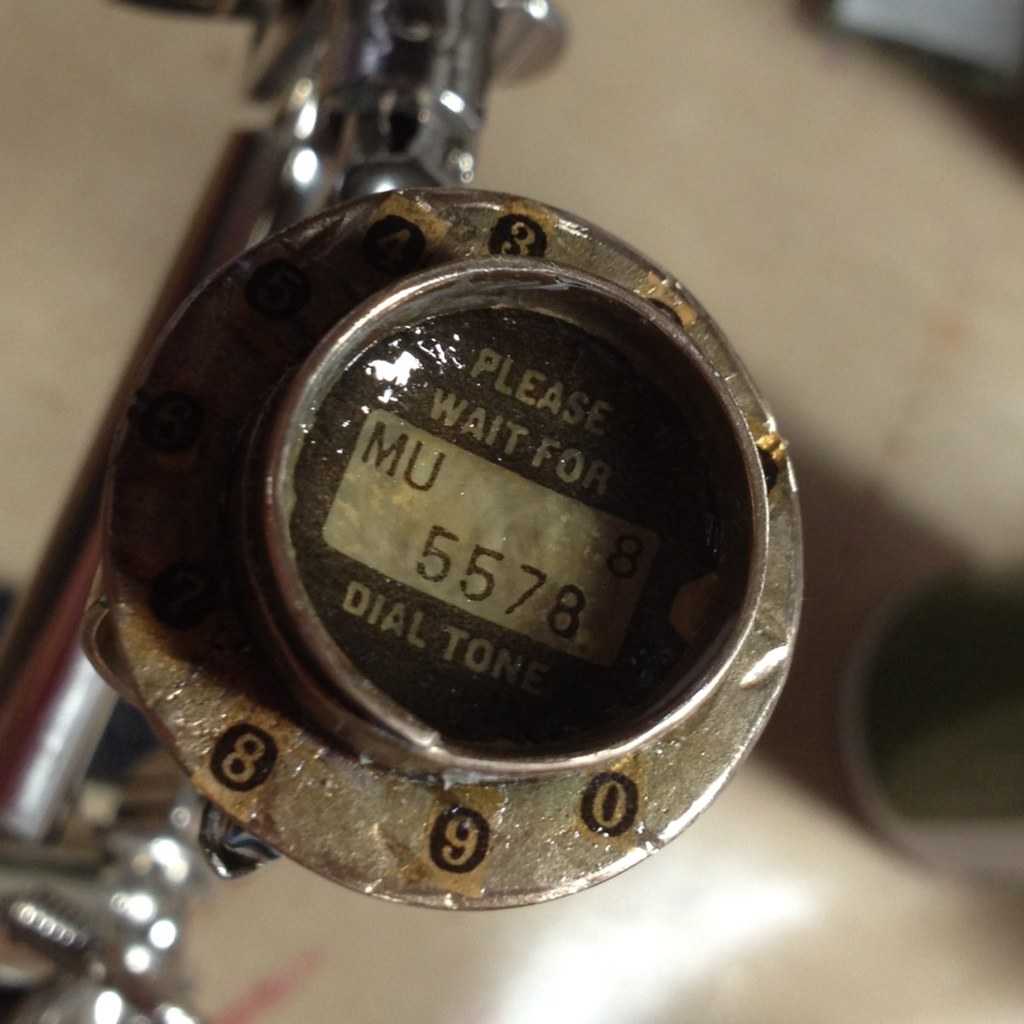
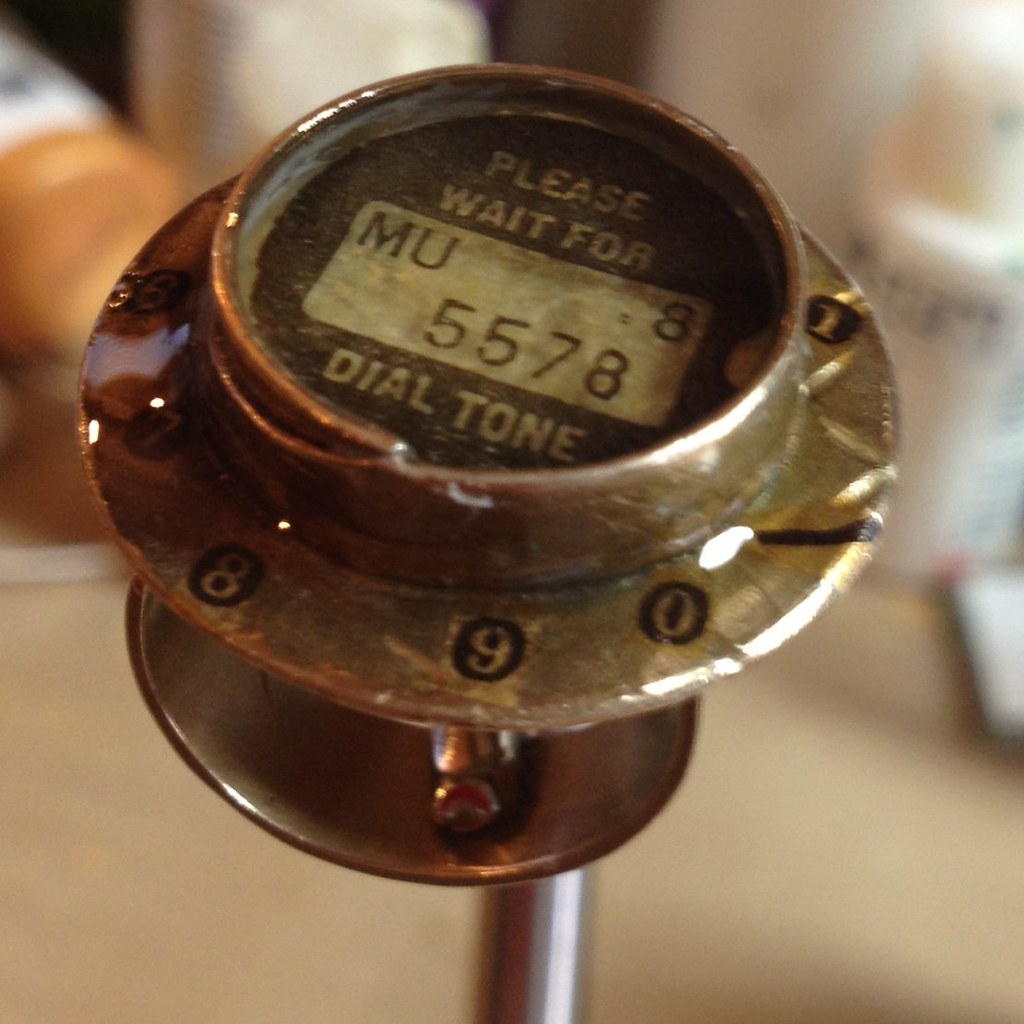
Before we go crazy gluing things all over the place, let's take a look at an actual rotary phone.
 |
| Those of you under 30 probably didn't have one of these in your house. |
 |
| magnifying glass is double plus good |
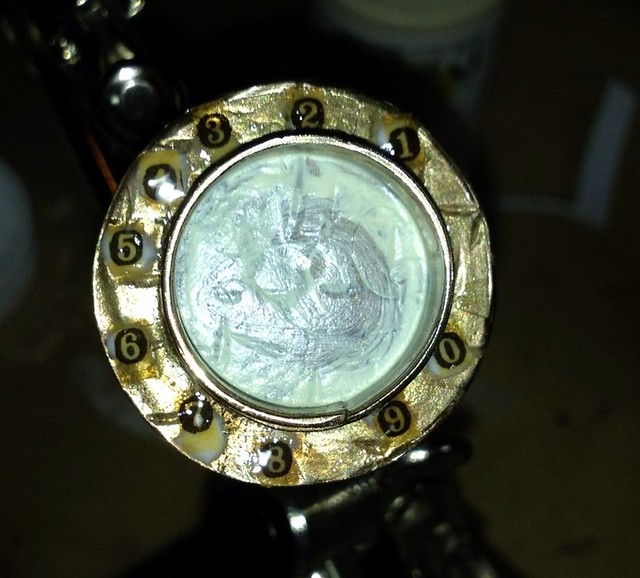
If you look at this like a clock, you'll see that the 3 and the 2 sit right on either side of 12 o'clock and the 8 and 9 sit, similarly, on either side of 6 o'clock. I know you're already noticing that the 5 and 6 are right at 9 o'clock and the 4 and 7 sit in the space left between (the 1 and 0 just drop in line).
I started off at the top of the "dial" with some glue dots to mark where the 2 & 3 would go.
I affixed the first two numbers (picking them up with a dampened/blotted detail brush) and tacking them down with some clear sealant - just enough to keep them from 'floating' around when I put down a layer of resin later. Then I moved to the 5 & 6 and then the 8 & 9 before placing the other numbers.
By dotting clear sealant over the top instead of my usual silicone glue, the tissue paper took on a "wet" appearance and blended in with the bronze of the ring bezel even better.
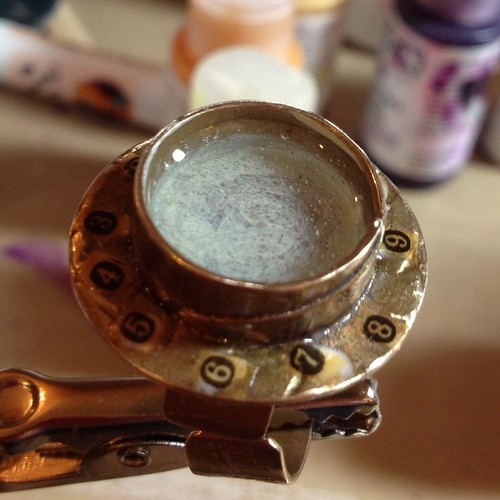
While the numbers dry, I'm going to bring the base of my bezel "up" by adding a layer of resin.
But first, a word on using resin:
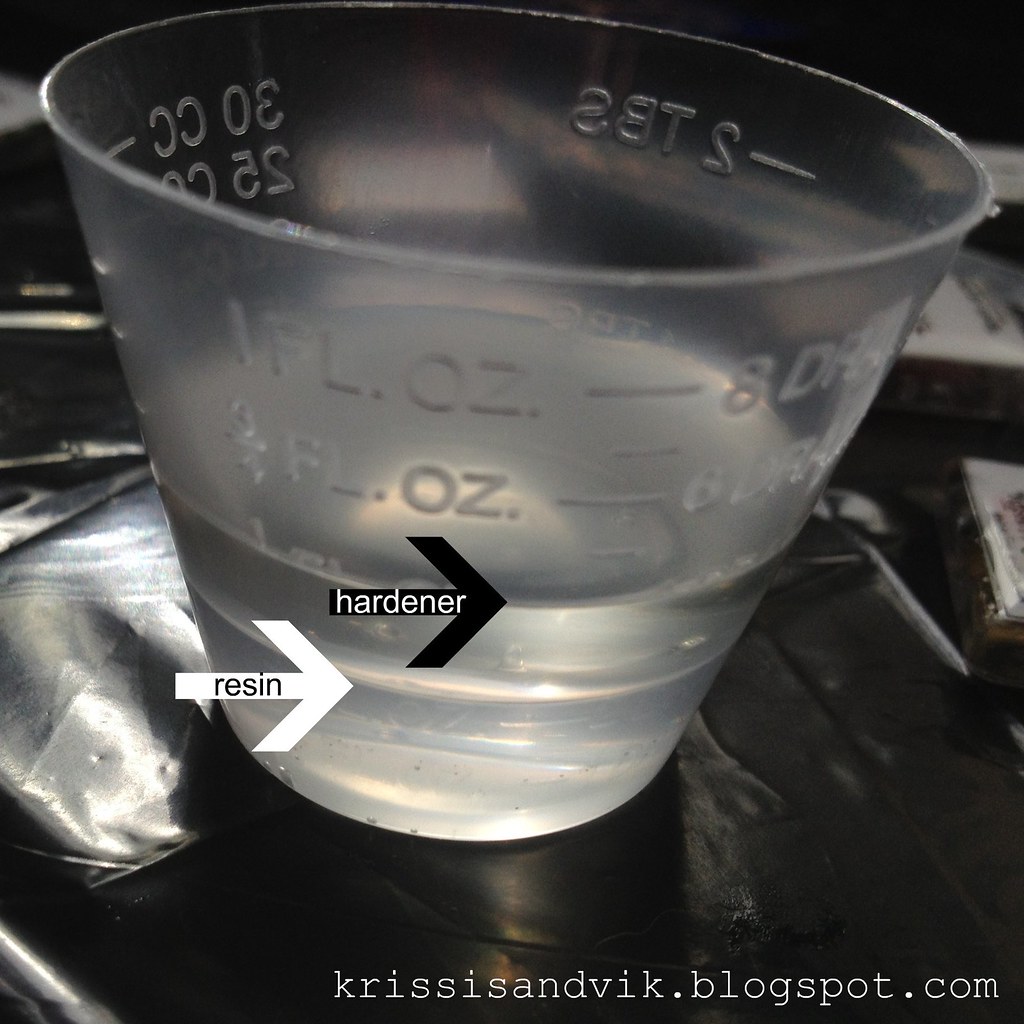
Mixing resin isn't as difficult (or as stinky) as it used to be, but there is definitely a trick to doing it well. I always try to work on a dry day - cold and rain don't mean that I can't pour resin, but it makes it that much more tricky. The MOST important rule - and it is a rule - is to follow the mixing ratio EXACTLY. Resin is not something you can just eyeball. It's best to mix an ounce at a time, but since I use resin in small amounts, it's not always cost effective. However, the smaller your batch, the more perfect your measurements need to be.
Add the resin first, adding drop by drop and letting the product level out between drops, until you reach your measurement exactly. In this case, 2 drams or 1/4 fluid oz.
Add the hardener next, again adding drop by drop until you reach the correct proportion. Since this resin has a a 1:1 ratio, I want EXACTLY 4 drams or 1/2 fluid oz.
Once you have your resin measured out, you can begin mixing. I've found one of the best tools is a plastic palette knife - they're plentiful and easy to clean off with rubbing alcohol and a paper towel. Unlike popsicle sticks, they are not porous and are not going to hold any humidity from the air (I learned this tip from jewelry designer Barbe SaintJohn, who uses a metal knife, and it has been a life saver).
I mix the two elements together by scraping the sides of the cup slowly and stirring gently for about a minute or so until the mixture turns from cloudy to clear. I don't worry too much about bubbles, they usually work their way out before I get to the piece. After mixing, I pour the resin into a clean mixing cup -a tip I learned from Annie Howes- being careful not to scrape the resin off the sides or bottom and screw up my nice homogeneous mixture.
At this point, you can release some of the bubbles by letting the resin rest for a minute, then tap the cup firmly on a table or other surface.
For small pieces like this, I just drip the resin into the bezel using my (cleaned) palette knife - you can control the amount of resin much better than by pouring directly from the cup.
You'll have plenty of extra resin, so plan ahead to do something with it. I coated some of my little handmade magnets with what I had left over from this batch.
Let this cure on a level surface overnight before moving to the next step.
 |
| I cut the tip off of a larger "5" to create a dial stop. Clever girl. |
Apply some resin around the edge, over the numbers and out to the edge. Next, use your palette knife to drip resin into the bezel. You could repeat the layering process and add another element in at this point, but I decided to pour the resin right up to the top of the bezel so it will dome nicely.
You can also bring any bubbles to the surface with a heat gun on low or a hair dryer, but be careful, especially if you've filled the bezel to the top.
Allow your piece to cure for 24 hours before you move it and 3 days before you wear or ship it. I won't be shipping this one anywhere. I love it and am keeping it for my very own. Crafty love,
Krissi
p.s. Please ask questions if you have any in the comments here - if I don't know the answer, I'll find out or make something really convincing up.