Showing posts with label crafty inspirations. Show all posts

Monday, April 8, 2013

Spring Forward In Time - Timey Wimey Piece and Print of the Week

It's Monday, and that means it's time for a new Print of the Week (and it's early since I'm not catching up on last night's episode of a show my husband won't watch).  But first...

Timey Wimey Weeping Angel
pendant
with watch gears
I was going through my supply stash recently and came across some Nunn Design 1" bezels I purchased at an expo a few years back.  I was doing a run of glass and resin pendants anyway, so I thought it would be a perfect time to do some resin layering in one of the bezels.

But which image should I use and what stuff should I layer in there?

We learned in the Doctor Who episode Blink that the Weeping Angels use time to "kill you nicely. No mess, no fuss. They just zap you into the past and let you live to death."  Then they feed off all of your life's stolen moments.  So yeah, it seemed obvious: one of my Weeping Angel paintings + timey wimey stuff (gears) = awesome.  I made one of these to see how you guys like them, but if I make more, each would be slightly different (and yes, of course you can get one custom made with a different Weeping Angel).

Sage Bee 8x10" print
Moving on to something a bit lighter (but wait!  We "lost" an hour recently!  Was it the Weeping Angels or daylight saving time?)  It's definitely feeling like here, which means sunshine, sneezing, blossoms and bees!  I'm celebrating the return of the honeybees by putting the Sage Bee print up as Print of the Week.  Sage Bee was one of the paintings I did for the Spring "Out There" nature-themed art show last April.

You know the deal by now: the 8x10's are 50% off (only $7.25), you don't need a coupon code, and the sale is good all week (I switch them out mid-day on Mondays).  You can always find the Print of the Week by clicking the link in my shop, or find all the sale items by clicking on OMG, ON SALE!!! (and I added some more pendants to the sale/clearance section last week!).

Oh yeah, and I'm working on something else to help you navigate the shop, but that will have to wait for another blog post.

Happy *ACHOO!* springtime!


Read more ...

Monday, November 12, 2012

Tutorials I Wish I Had Come Up With: Weeping Angel Barbie

I can't offer this project an introduction that adds anything, so I'll just post a teaser pic and the link right here.

"Weeping Angel" Barbie by Sarah at Wich-Crafting!
Yep.  There's a tutorial.
I can't believe what this woman was able to do with a hot glue gun!  
Read more ...

Saturday, February 25, 2012

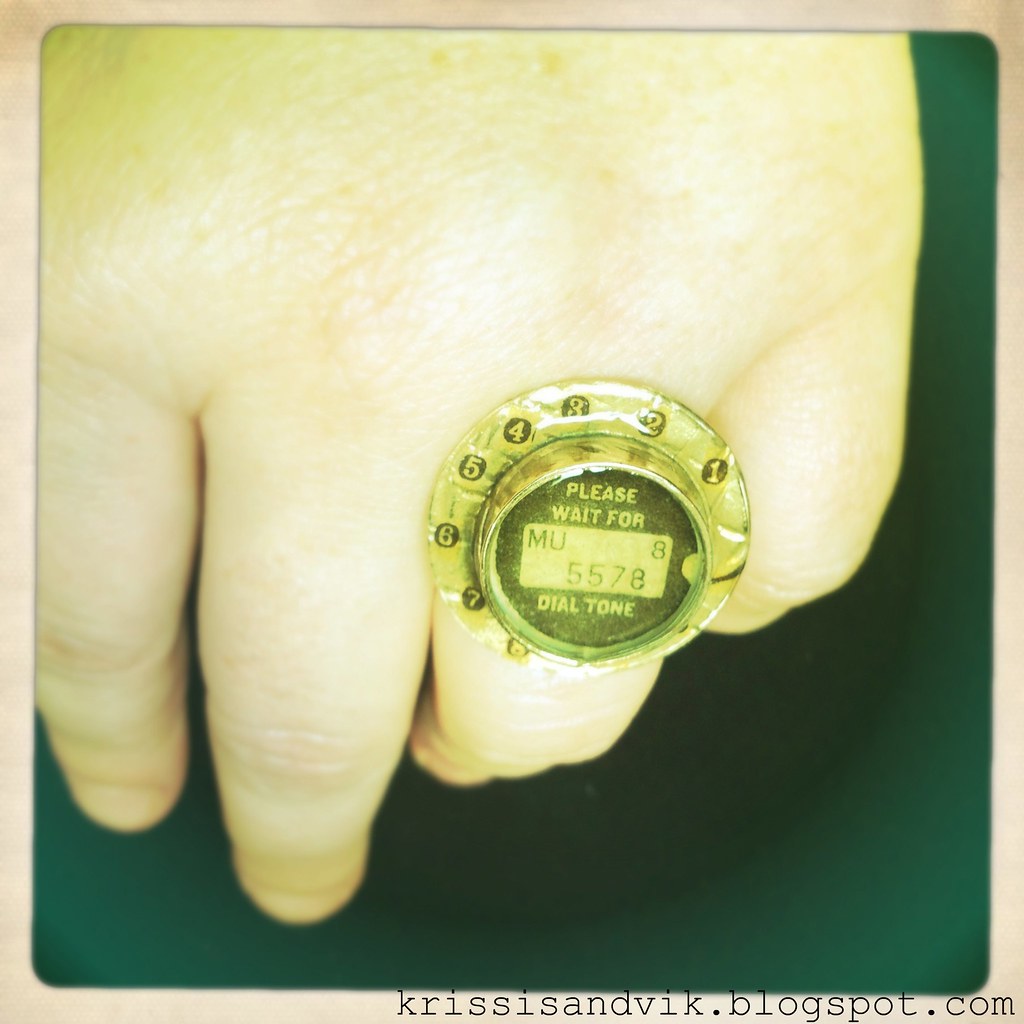
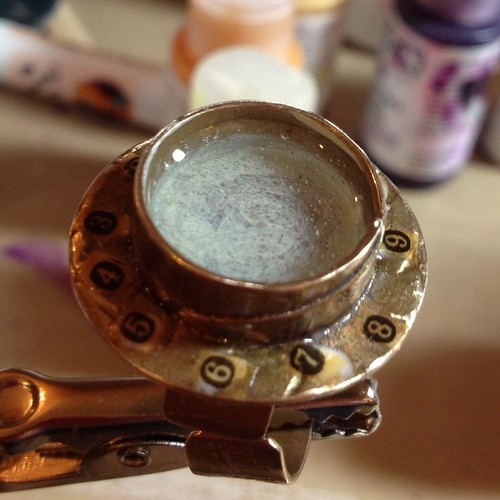
Telephone Ring (get it?) A Resin Tutorial

As I'm sure you all know, I do not fancy myself a jewelry designer by any stretch of the imagination, but I do love to make wearable mixed media art now and then.


When I started working with this ring blank from Susan Lenart Kazmer's Art Mechanique line, I intended to do layers of tissue paper, resin, rub on decals, watch gears and clear mica pieces, but once I started looking at the 7 Gypsies tissue paper I'd just purchased, the project took on a life of its own.

What you'll need for this project:
  • Ring blank - this one is the ring bezel in bronze from the Art Mechanique line by Susan Lenart Kazmer - the flange around the edge was an integral design element.
  • Numbers - I used 7 Gypsies Collage Tissue in "Numero", however, you can easily create your own numbers using a tape transfer technique and images of telephone dial numbers or old typewriter keys.
  • Resin.  I prefer 2-part jewelry grade epoxy resin with a 1:1 mix ratio like ICE or Luxe, both of which I use.  Make sure you have plenty of measuring cups and stir sticks.
  • Clear-drying adhesive or sealant/varnish
  • A steady hand  try practicing by playing some Operation with your little brother.
  • Tools:
    detail paintbrush or bamboo skewer
    sharp, small scissors
    something to hold your ring level
  • Acrylic craft paint (optional)
As always, start by opening all of your supplies and by cleaning your ring.  I just use a little 90% rubbing alcohol.

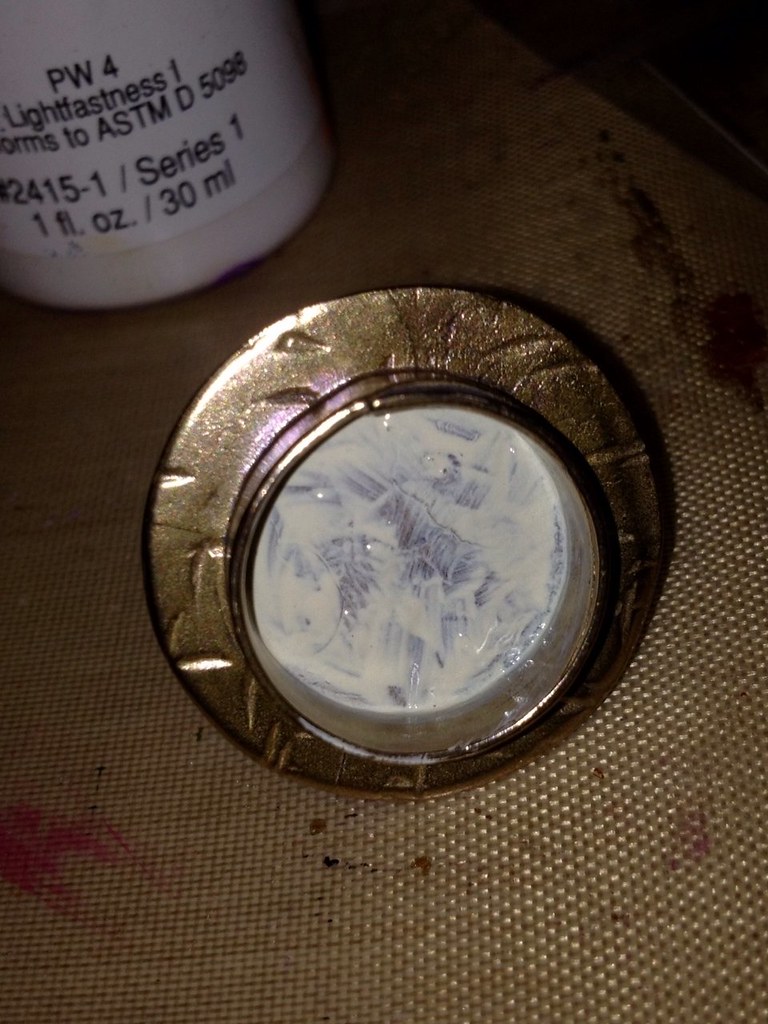
When you are working with a deep bezel in a bronze or dark color like this, layers will show up better if you start with a brighter background.  I just dabbed a little paint (I had Golden's Fluid Acrylics in Titan Buff on hand, but you can use any light colored acrylic craft or artist's paint).  

While you wait for the paint to dry...

Don't sneeze.


This was definitely the most difficult part of this project - cutting out the tissue paper and NOT blowing the teeny pieces across my worktable.  I used a very sharp pair of spring handled Fiskars snips, which made cutting the delicate tissue without tearing much easier. I think it was worth the effort though, because the sepia tone of the paper blends well with the bronze of the ring blank.  


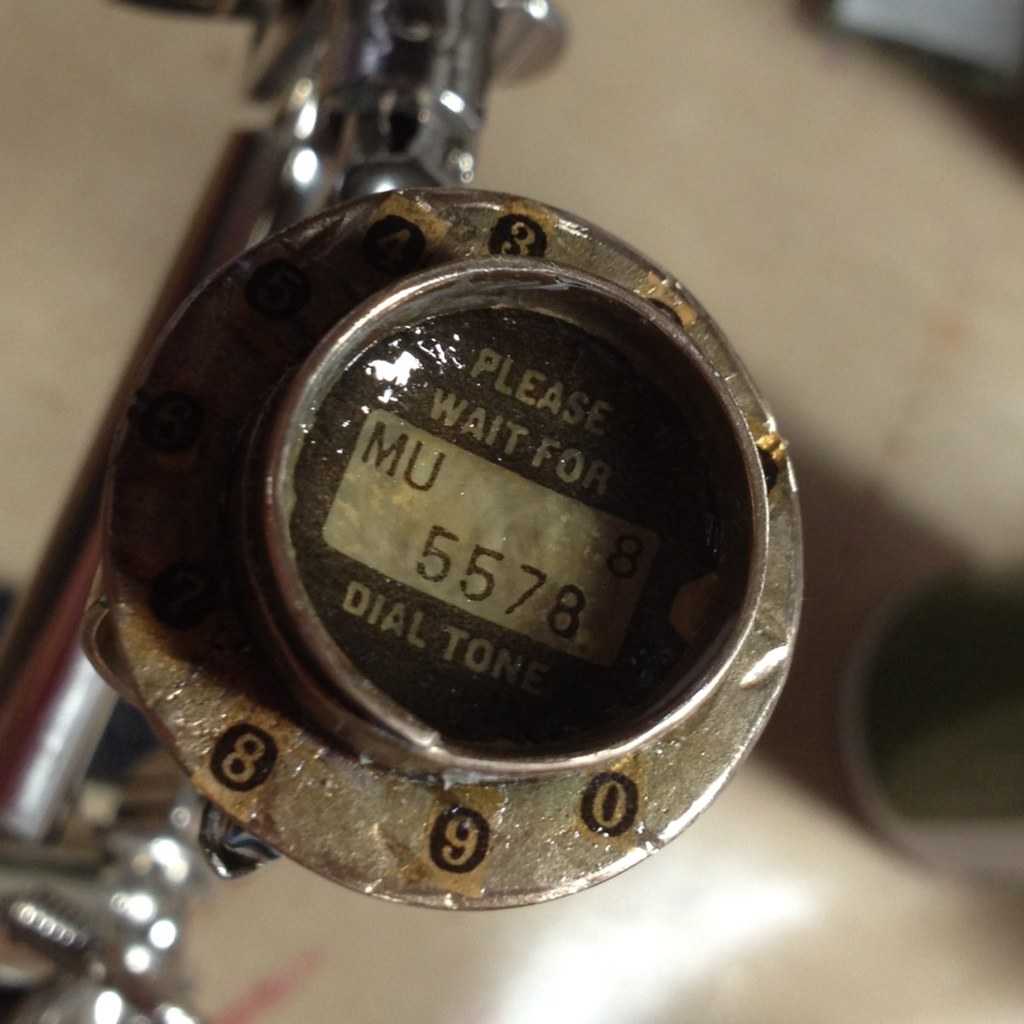
Before we go crazy gluing things all over the place, let's take a look at an actual rotary phone.
Those of you under 30 probably didn't have one of these in your house.
magnifying glass is double plus good
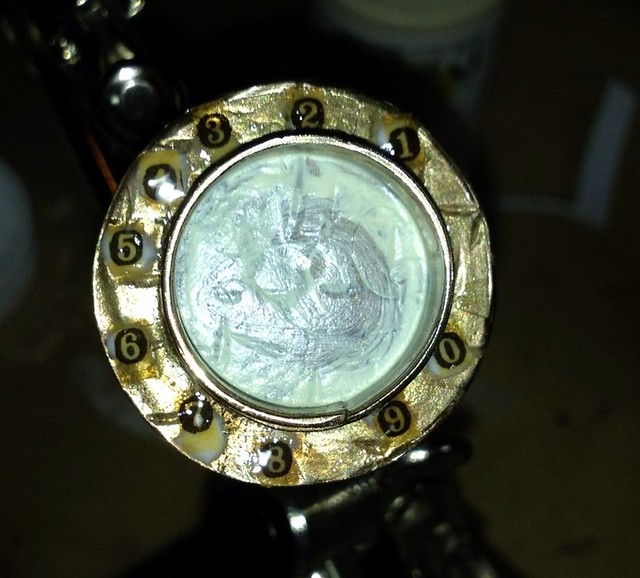
If you look at this like a clock, you'll see that the 3 and the 2 sit right on either side of 12 o'clock and the 8 and 9 sit, similarly, on either side of 6 o'clock.  I know you're already noticing that the 5 and 6 are right at 9 o'clock and the 4 and 7 sit in the space left between (the 1 and 0 just drop in line).

I started off at the top of the "dial" with some glue dots to mark where the 2 & 3 would go.  

I affixed the first two numbers (picking them up with a dampened/blotted detail brush) and tacking them down with some clear sealant - just enough to keep them from 'floating' around when I put down a layer of resin later.  Then I moved to the 5 & 6 and then the 8 & 9 before placing the other numbers.

By dotting clear sealant over the top instead of my usual silicone glue, the tissue paper took on a "wet" appearance and blended in with the bronze of the ring bezel even better.  

While the numbers dry, I'm going to bring the base of my bezel "up" by adding a layer of resin.  

But first, a word on using resin:

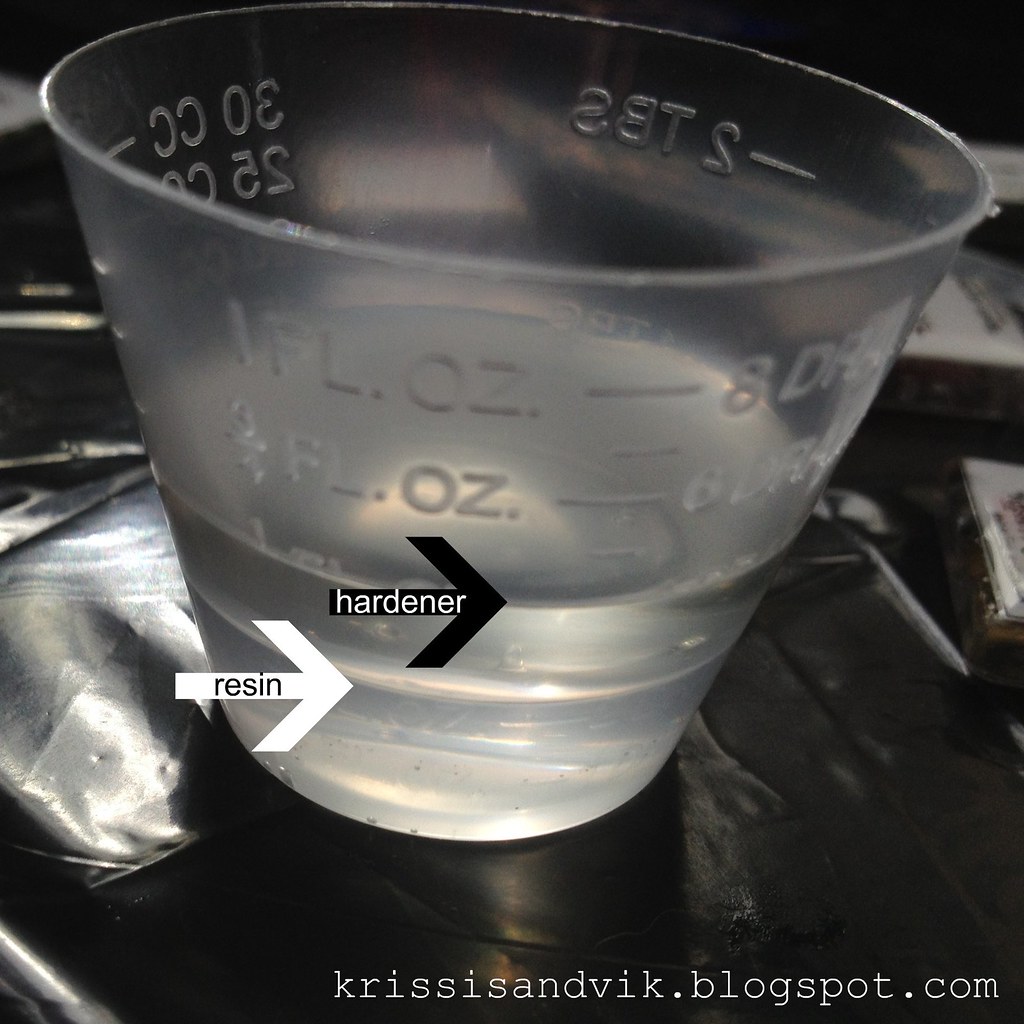
Mixing resin isn't as difficult (or as stinky) as it used to be, but there is definitely a trick to doing it well.  I always try to work on a dry day - cold and rain don't mean that I can't pour resin, but it makes it that much more tricky.  The MOST important rule - and it is a rule - is to follow the mixing ratio EXACTLY.  Resin is not something you can just eyeball.  It's best to mix an ounce at a time, but since I use resin in small amounts, it's not always cost effective.  However, the smaller your batch, the more perfect your measurements need to be.  

Add the resin first, adding drop by drop and letting the product level out between drops, until you reach your measurement exactly.  In this case, 2 drams or 1/4 fluid oz.

Add the hardener next, again adding drop by drop until you reach the correct proportion.  Since this resin has a a 1:1 ratio, I want EXACTLY 4 drams or 1/2 fluid oz.

Once you have your resin measured out, you can begin mixing.  I've found one of the best tools is a plastic palette knife - they're plentiful and easy to clean off with rubbing alcohol and a paper towel.  Unlike popsicle sticks, they are not porous and are not going to hold any humidity from the air (I learned this tip from jewelry designer Barbe SaintJohn, who uses a metal knife, and it has been a life saver).

I mix the two elements together by scraping the sides of the cup slowly and stirring gently for about a minute or so until the mixture turns from cloudy to clear.  I don't worry too much about bubbles, they usually work their way out before I get to the piece.  After mixing, I pour the resin into a clean mixing cup -a tip I learned from Annie Howes- being careful not to scrape the resin off the sides or bottom and screw up my nice homogeneous mixture.

At this point, you can release some of the bubbles by letting the resin rest for a minute, then tap the cup firmly on a table or other surface.  

For small pieces like this, I just drip the resin into the bezel using my (cleaned) palette knife - you can control the amount of resin much better than by pouring directly from the cup.

You'll have plenty of extra resin, so plan ahead to do something with it.  I coated some of my little handmade magnets with what I had left over from this batch.  

Let this cure on a level surface overnight before moving to the next step.


This little center piece, which just happened to be the same size as the bezel, is what changed the direction of this piece - I realized while I was dry fitting it the first time, that this would make a fun "telephone."

Like the numbers, I affixed this piece of tissue paper to keep it from rotating or curling when I apply resin later.  I used a clear sealant instead of glue - making sure that the unprinted portion of the tissue looked nice and evenly translucent.
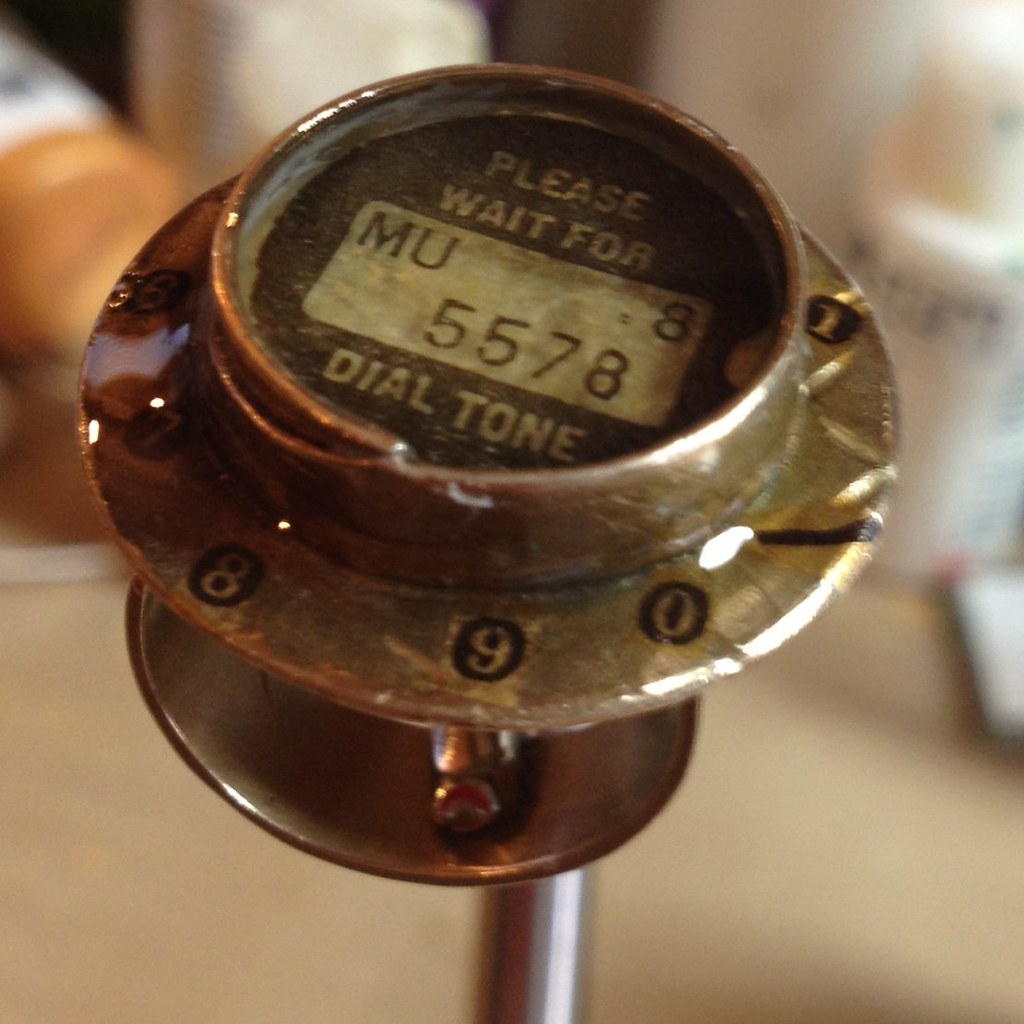


I cut the tip off of a larger "5" to
create a dial stop.  Clever girl.
Once the sealant is dry, mix up another batch of resin and place your ring somewhere so the bottom is level.  You don't need a fancy fly-making rig like I have - just put a couple of popsicle sticks over a cup and place the ring on top.  Voila!

Apply some resin around the edge, over the numbers and out to the edge.  Next, use your palette knife to drip resin into the bezel.  You could repeat the layering process and add another element in at this point, but I decided to pour the resin right up to the top of the bezel so it will dome nicely.

You can also bring any bubbles to the surface with a heat gun on low or a hair dryer, but be careful, especially if you've filled the bezel to the top.  

Allow your piece to cure for 24 hours before you move it and 3 days before you wear or ship it. I won't be shipping this one anywhere.  I love it and am keeping it for my very own.

Crafty love,

Krissi

p.s.  Please ask questions if you have any in the comments here - if I don't know the answer, I'll find out or make something really convincing up.


Read more ...

Tuesday, February 21, 2012

Yucca Flats, New Mexico

This is my new favorite blog.

It is not my favorite because it's written by two of my favorite artists, Wenchkin and Scott Krichau, who also happen to be my good friends. It's not because it often features a tripod Jack Russell Terror named "Pabst," and photos of New Mexico sunsets. Neither is it because you'll find free coloring pages and the occasional tutorial written conversationally with a twisted sense of humor and fun.  It's because when you add all those things together, you really DO end up with more than the sum of their parts.

"Two artists and one crazy dog in a busy Albuquerque neighborhood."
Read more ...

Friday, October 28, 2011

Sugar Skull Mask Tutorial!! Woo Hoo!

A little over a week ago, I was lamenting the loss of my muse on Facebook and Google+ in the hopes that someone would say something to spark my imagination. Most of my artist friends were also dealing with creative blocks, so we figured that our muses all took off with the 'blue flu' (or whatever prompts inspirational goddesses to go AWOL for a day).

Luckily for me, my friend Betty called me with a request and challenge.  Could I make her five Día de los Muertos style sugar skull masks.  *LIGHT BULB!* I sure could!


My friend and hairdresser, Betty, and I talk about Mexican folk art and culture constantly.  Her heritage is Mexican, while I first became enamored with all things Mexico when I lived in San Francisco's Mission District, a vibrant neighborhood with a large Latino population. I really love Day of the Dead, which mixes both Aztec and Spanish beliefs and cultures into something new and wonderful. This holiday particularly appealed to me as it focuses on death as a part of life and not as something to be feared.  Well this year, Betty is teaching a series of classes (she teaches for Paul Mitchell) with a hair/fashion show.  In Mexico City. On Dia de los Muertos, and she asked me to make some sugar skull masks for the models!  Woo hoo! Here's how YOU can make them too:

You will need:
  • Mask - plastic, Papier-mâché, or even ceramic if you are creating a wall decoration
  • Rubbing alcohol
  • Glue - choose one that is appropriate to the substrate of your mask
  • GLITTER! - lots of it in lots of colors!   You can use just about any type of glitter (loose or glitter-glue).  DO NOT USE antique German glass glitter or any glitter made of glass.  It will be near your face (and eyes), so let's not go blind, m'kay?
  • Paintbrushes for glue, watertoothpickspaper towelsfluffy paintbrush for brushing away loose glitter
Optional supplies:
  • Plastic primer
  • Clear/white glitter spray (I didn't use this, but will point out where you could)
  • Glitter tray or folded paper to return loose glitter to jars
  • Dryer sheets <--- secret weapon when using glitter!
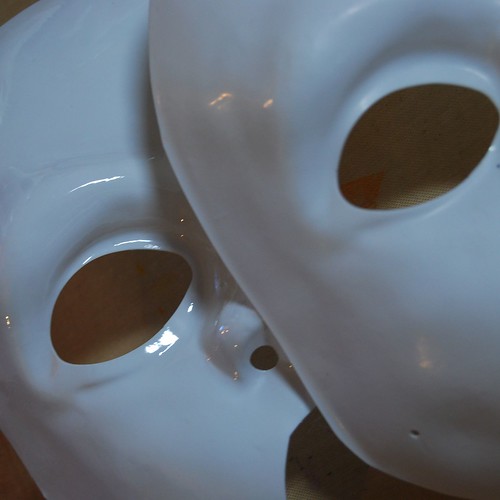
Betty chose some 1/2 face 'Phantom of the Opera' style masks, but you could use eye masks or full face masks if you prefer.  You could use plastic, papier mache, fabric masks or even ceramic ones for a cool wall hanging.

primer
unprimed mask (left) and mask with adhesion
promoter and matte white primer (right)
1.  Remove the elastics and set them aside, then clean the masks with some rubbing alcohol to remove any residue or fingerprints.

1a.  OPTIONAL STEP - skip if you just need the mask for one night.  Since these masks will be packed and taken with Betty to Mexico, I chose to prep my masks to ensure the best contact between the products and the mask.  I started with an adhesion promoter for plastics (from the auto section of my local hardware store) and then added a layer of matte white primer for plastics (don't use gloss or you'll be back where you started).

blackbase1b. OPTIONAL STEP: You could spray your entire mask with clear glitter spray at this point to give the entire face a "sugary" look!

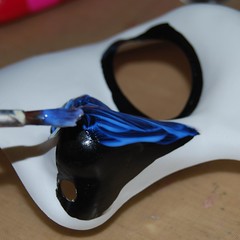
2.  Paint or sketch an outline of the shapes you want to create.  Painting your shapes first helps to make sure the glue goes where you want (working with white glue on a white mask is a bit confusing).  Also, pre-painting helps to prevent the white from peeking through the spaces in the glitter, I painted the nose and around the eyes with black paint (I tried at first with sharpies, but they were a bit trickier on the "topography" of the mask - a brush is more forgiving).

IMPORTANT TIPS! 
  • If using loose glitter and glitter glue, START WITH LOOSE GLITTER first
  • WORK FROM DARK TO LIGHT COLORS!  It's much easier to get a grain or two of yellow out of your black sections than to get black out of your yellow, etc.  Trust me on this one.

glue3.  Brush your glue over the DRY painted area (a brush gives you more control and precision than squeezing from the bottle).  I chose a flexible fabric glue for gems and beads, because I expect the masks to flex a bit during travel.  Most people would get great results just using a good quality white craft glue.

IMPORTANT TIP!  WORK WITH ONE COLOR OF LOOSE GLITTER AT A TIME.  Don't paint glue on for more than one color of glitter.


4.  Pour that glitter on!

Crafty Chica Be-Bob Black glitter
by Duncan Crafts
Tips - using a glitter funnel/tray is very helpful (mine is a Tidy Tray which I scored for a few bucks at a craft show), but if you don't have one, you can use a piece of paper, folded in the center to return unused glitter to the bottle.  Want another tip?  Rub a dryer sheet over the surface of your funnel tray or paper before sprinkling glitter - it will keep the glitter from sticking and return more to the bottle for you to use later!

5.  Repeat for each color of loose glitter.
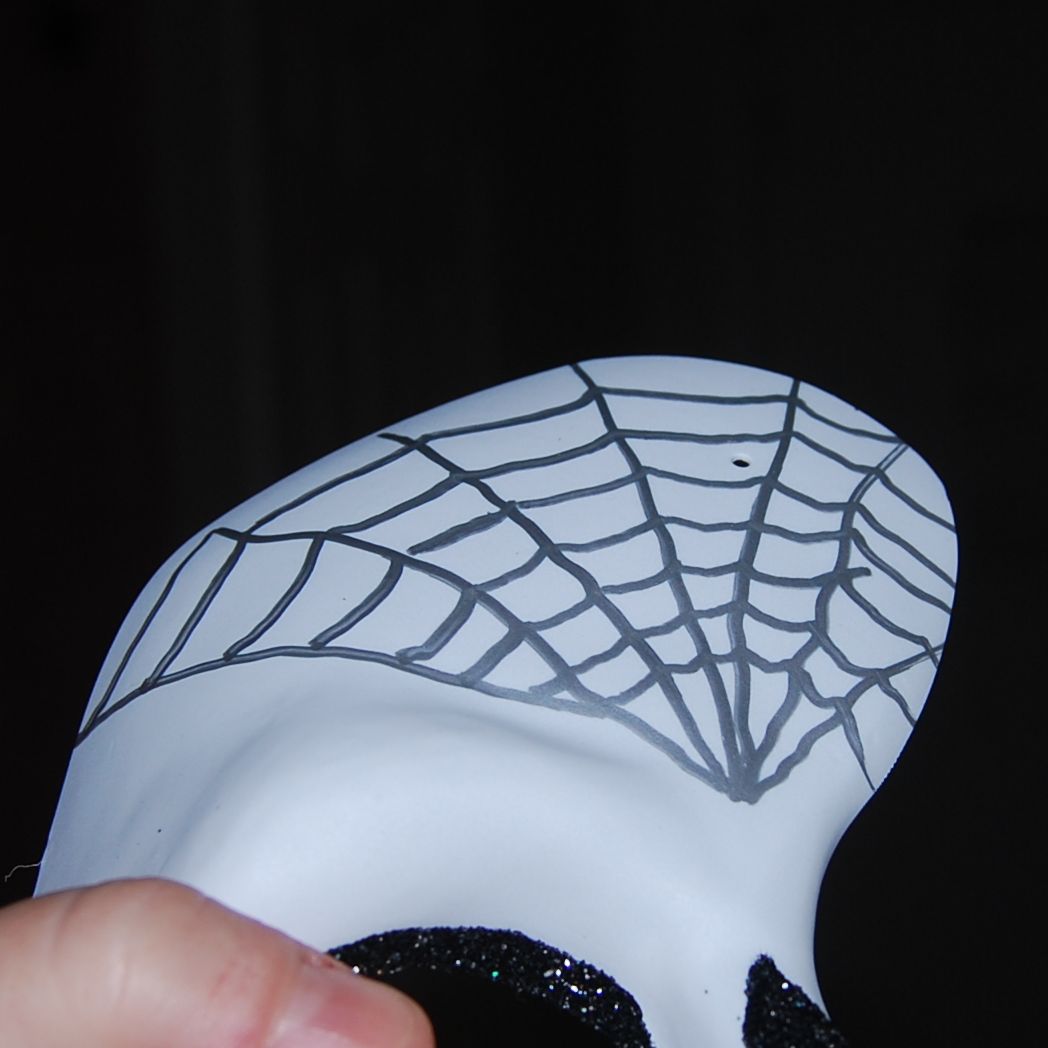
pattern traced with a silver Sharpie
Glue painted over spiderweb pattern
Pour that glitter!
This is Tulip (by Duncan) superfine holographic silver washable glitter.
I could NOT live without this product.


6.  Did you miss a spot?  No worries!  Just pick up some glue on a toothpick or bamboo skewer and fill in the blank spots, then add more glitter.
I love bamboo skewers and keep them in my craft drawer at all times.
This glitter is Crafty Chica's Pop Star Purple by Duncan
Let the loose glitter set/dry between layers OR if using glitter glue next, you can move on immediately.

8.  When you re finished with your loose glitter application for the day, you can start applying glitter glues.
I love glitter glues and swear by Ranger's "Stickles" glitters;
while the bottles are small, they last a long time and are very fine
 and acid-free.  You can find them at most crafting or scrapbooking shops.
Sometimes I like to blend colors together, like the yellow, orange and red in the flames.
Once again, toothpicks and bamboo skewers are VERY helpful!  Just run them back and forth in the glitter and you end up with an artsy fartsy look.

9.  After everything dries (I let it dry overnight), brush off the loose glitter with a fluffy paintbrush.

10.  If you like, you can add some silk or crepe paper flowers.  I attached these with a little hot glue and some E6000 (because they were traveling to Mexico - yours will be fine if you use hot glue).
A few flowers from the Dollar Store and a plastic skull from the Halloween section at my local craft shop!
Leaves and flowers from the Dollar Store, and a plastic skull bead glued to a butterfly from my local craft store.


THAT'S IT!  Now you can just reattach your elastics and rock the party!

Let me know if you have any questions - I'm happy to answer them here.

Read more ...

Friday, October 7, 2011

Looking For A Few Good Bloggers

I know, it's sort of cruel to get you hooked on a tutorial that's spread across six entries and then leave you hanging with nothing on a Friday.

Except I didn't.

where empowered people get inspired
Every Friday, I publish an Ask Krissi's Art Studio column on Modern Rosies, a blog on September 1st, 2011 by bag designer Brooke Van Gory.  Brooke wanted to bring all of her creative friends together in a single place where they could share DIY, art and handmade tips, tutorials, indie business information, product picks, recipes and more. And boy, oh boy, our first month has been great!  So far our "Union Riveters" (the main behind-the-scenes collaborators) have published a recipe for "Chocolate Frogs," sewing tips & tutorials, a how-to on painting and modifying toys, an eye-opening article on animal products in cosmetics, some serious money-saving tips and plenty more awesome information.

We are also looking for articles from other members of the DIY community (that's where you come in).  So ask yourself, what do you know how to do that would interest the majority of people who either make/buy handmade or are handy fix-it types?  If it's:
  • Focused on the DIY/handmade movement
  • Instructive (tutorial/how-to, tips, techniques or product reviews) 
  • Related to house & home, automotive, craft, art, indie business issues or computers
Write it up and send it (with photos attached) to us at modernrosies@gmail.com.

Well?

What are you waiting for??

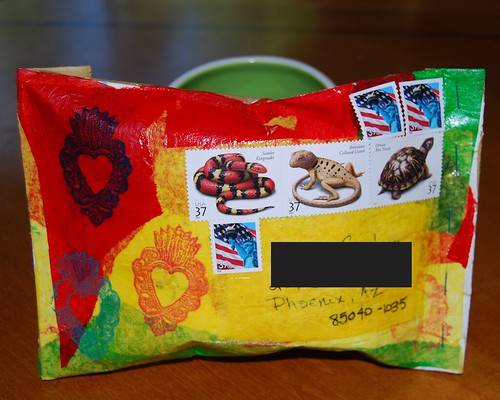
Oh yeah, and go read today's tutorial from your's truly.  It's how to upcycle a padded mailer with leftover scraps of paper.

Read more ...

Tuesday, September 20, 2011

Marketing Tidbit: Play A Little

Have some fun with your customers - invite them over to play once in a while.  Laugh a little.  There doesn't need to be a payoff, a prize or a giveaway for them every time they come to visit.  Sometimes, it's enough just to hang out with you and goof off for a while.


Halloween-themed free downloadable coloring page
from Kittycrossbones over on Facebook
for you, your kids, your friends, whatever

Some marketing isn't going to have an immediate and direct effect on your bottom line, but it does build up your likeability, which is a huge part of what handmade is all about.  Besides, even if nothing comes of your evil plan for world domination through free coloring pages, it's worth doing for the smiles.
Read more ...

Thursday, March 31, 2011

Where the HELL Have You Been? Do You Know What Time It Is!?

I know I haven't been over here blogging all that much lately, but I don't want you to think it's because I don't love you all.  Amidst and amongst the usual excuses of the colder, darker, wetter winter season, I have been working on some fun stuff.

Glitter Bitches Handmade logo
(art by Wenchkin)
Life of a Glitter Bitch - My team, Glitter Bitches Handmade has been crazy busy over the past year since we first formed.  Initially, we figured we'd simply cross promote across our fan bases and give a few things away as a group.  After we added four new members at the end of last year, the group started to morph into a full fledged "guild." We expanded our presence on Facebook and opened an ArtFire shop to cover our growing administrative expenses like mailing prizes, business cards and promotional items.

Around the time we were setting up our shop, our good friend and fellow Glitter Bitch Kim Mayhew of Ant Farm Studio** was diagnosed with an aggressive form of uterine cancer - and there she was, with no insurance.  Well if you don't already know this, you can knock a Bitch down, but she'll get right back up again.  Fighting.  Hard.  So we started adding items to the shop to raise money to help Kim out.  The Teal Ribbon Fund, as it came to be known, has been a runaway success, thanks in large part to Kim's friends and the DIY community who turned out in force.  We even list items donated by some well-known non-Bitch artists & crafters as weekly featured Guest Artisans - Honorary Bitches, if you will.
**you can find Kim online at Got-Ants.com, on Facebook or in her ArtFire shop!

Hmmm.... Let's see, what else?  Oh, one of our members, ArJay of Kiss Zombies, has started up an inspiration contest series to help spark creativity in our collective fan base.  The current round ends on April 7th - Fabulous Prizes are a definite possibility if you enter....

Glitter Bitches Handmade Inspiration Contest
"Bitch Favorite" Prize
2" Pendant of Old Growth (detail)
(ends Thursday, April 7th
check here for details on how to enter)
Random prize:Loco Folko Vampire PEZ dispenser
by Kim Mayhew of Ant Farm Studio


Anyone may enter, as long as they follow the rules ArJay has set forth here:  INSPIRATION CONTEST GUIDELINES AND RULES.  The "Bitch Favorite" entry will win my twinchie pendant (doesn't Brooke look cute modeling her twinchie Glitter Bitches pendant?), and a random winner will receive one of Kim's awesome "Loco Folko" PEZ dispensers - I have a few of them myself and love them.


Art Stuff - I have been working on a few new pieces, but they are mostly in the sketch phase or are "secret" and not available for public consumption.  Yet.  Sorry, but that's just part of the deal I struck.  I've been keeping up on my prints and pendants (which were featured in December on Rings & Things' blog), with earrings in the works.  The prints and jewelry have become a very popular (and affordable!) way for people to collect my art.

Oh! And my new business cards came in yesterday!  Next week's shipments will have them.

I've been replacing the headers in my sites with the newer, more Krissified image.  This blog is next.


Makeup - It was a weird winter and several indie makeup companies have been outed for a lot of bad/unsafe/unethical practices, which makes me sad for the good companies out there.  However, I have tried to focus on the fun part of makeup, rather than turning into a Mean Makeup Girl.

For those of you who want to see what I do when I'm painting my face, you can follow it on my relatively new Facebook page: Krissi's Makeup Studio.  I will remind you that I am not a makeup artist; I am an artist who likes makeup.  However, there is some cool (to me anyway) stuff over there like my series of tutorials on the color wheel called Beginning Color Theory for Non-Artists (so cool, in fact, that I am in the process of copying them all over to this blog too).


Life - I continue to spend just about every day enjoying the life as a Jack Russell Terrier's human.  Abby keeps me sane and happy.  I am THRILLED that the clear weather is finally upon us so that we can take more breaks during the day and get outside to take pictures and dig for voles (I do the former, she the latter).
Me in my 2007 Z4M Coupe at Thunderhill

Finally, I have started tracking my car.  For those of you who don't know what that means, it means that I take my car to the racetrack (yes, a real one, not an oval) and run it around.  Fast.  As I write this entry, I am preparing for my second track day on Friday, April 1st at Thunderhill Raceway here in Central California.  It would appear that the Skelekitty has a need for speed....


Enjoy the Spring and I'll really TRY to check in over here more often.  In the meantime, you voyeurs can spy on me over on Facebook.
Read more ...

Friday, February 19, 2010

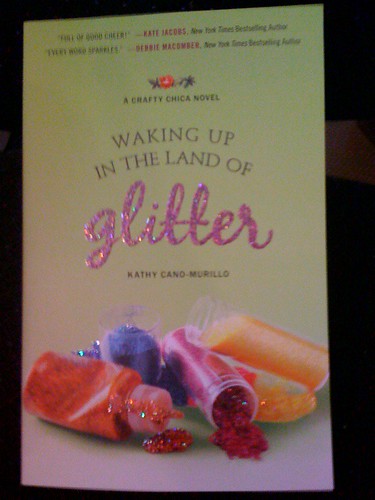
What I got today!

What I got today!The release date for Kathy Cano-Murillo's first novel, Waking Up In The Land of Glitter is March 1, but keep your eyes peeled for my review soon!
Read more ...

Thursday, December 24, 2009

Is It Competition or A Future "Intern?"

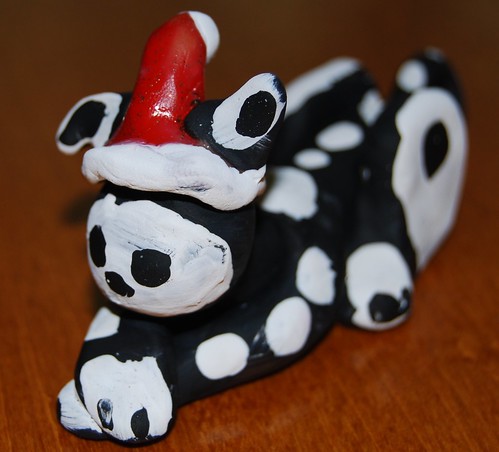
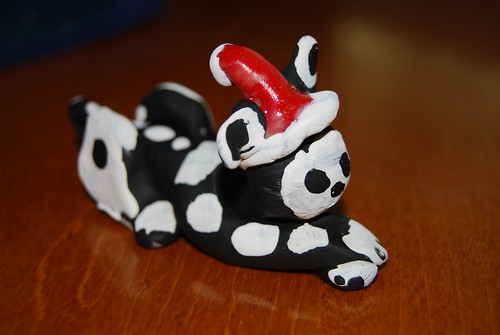
You may recall some posts Skelekitty and I wrote earlier this year about my neighbors' daughter, Santana, who hand-sculpted me a pink haired kitty and dressed as Skelekitty for Halloween this past year.  She's a cool kid for sure, who loves animals and is a bit of a bookworm (sound familiar?).

She has done it again and, of course, I had to blog about it.  Santana and her brother Grant just came by to give me this little treasure (mostly Grant played with Abby and laughed when Santana and I rolled our collective eyes seeing he wasn't wearing shoes)!

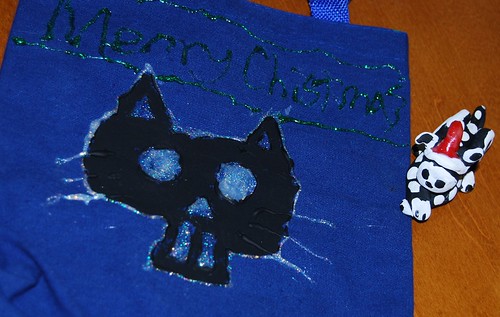
Skelekitty Santa by Santana P.

The mini-tote was hand-decorated with a great deal of glittery goodness (and a kitty, of course). The Skelekitty figurine was hand-sculpted AND hand-painted by Santana herself and, if I do say so, I'm not entirely sure I could have done any better myself!
Skelekitty Santa by Santana P.

Skelekitty Santa by Santana P.

I wonder how her Mom would feel about her daughter going into indentured servitude ... *cough* err, I mean "an internship" making Skelekitty figurines? LOL.
Read more ...

Saturday, December 12, 2009

Oh Duct Tape! How Do I Love Thee...


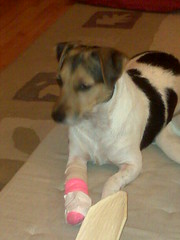
As some of you may have heard, my little Jack Russell Terror Abby, recently had surgery to remove a small (probably benign) mass from one of her toes and is wearing a very large pressure bandage for at least a week.

Just to make the experience more fun for everyone, we have to keep the bandage dry during a deluge. We started off wrapping her bandaged paw in Saran wrap and Scotch tape every time she had to pee, looked like she had to pee or we thought she needed to go outside and pee.  It got old REALLY fast.

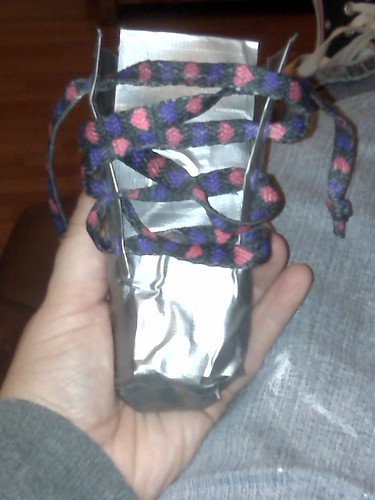
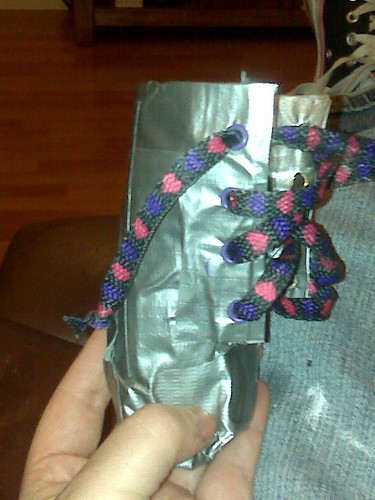
I looked up doggie shoes and bandage covers.  At $30-60, they just weren't going to happen (we are already closer to $900 than $800 on this round of health care for our "free" dog).  I decided to google "DIY dog waterproof boot" and found this awesome tutorial to make doggie shoes out of DUCT TAPE on my favorite place to geek out on DIY projects, Instructables.com.  So for less than $1 of tape, my Crop A Dile & a few grommets and an old shoelace, I now have a reusable, easy-to-use waterproof doggie bandage protection!

Homemade waterproof doggie boot!


When I took Abby in for her bandage change this morning, I had the entire staff cracking up.


** Update: 12/15/09: I am happy to say that ABBY GETS TO KEEP HER TOE!!! The weird mystery mass was an inflamed squamous papilloma (a  very expensive wart). Lab said our vet (the wonderful Jodi Van Tyne, DVM) got the entire mass. If it recurs, we'll at least know what it is.
Read more ...

Friday, September 18, 2009

Art Journaling, or "NOW I get it!"

Art journaling is all the rage with mixed media folks these days, but I'll admit that I've never been one to use an art journal.  Frankly, I just didn't see the point of creating a little book of art drawings that I wouldn't be able to hang on the wall. I mean, let's face it, I'm clearly not the kind of person who feels a need to keep much of anything to myself.  Besides, art is for sharing.  Even the most emotional paintings I make just for me, like the canvases I painted to work through my kitty Finnegan's death, often end up finding new homes.

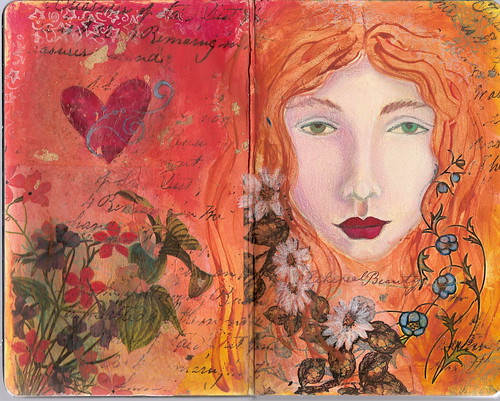
However, once I started to look at my little Moleskine sketch journal as a place to test out techniques, exercise my brain, play with imagery and plain ol' PRACTICE DRAWING, stuff started to happen.
Final journal page

It's pretty.  However, it's not something I want to put on a more permanent canvas for a gallery as a representation of my personal style, but I got ideas for other paintings while I was working on this.  So yeah.  I get it now.  Art journaling.  Neato.

p.s.  Testing out one of the images as my banner for a few days, but I'm not settled on anything yet.
Read more ...

Tuesday, September 15, 2009

A New Name & Maybe A New Look

Hi everyone!  As I'm sure you have all noticed by now, the name Krissi's Stitchery really doesn't really reflect this blog or the medium of my work anymore.  Therefore, the name, along with the old banner, has gone bye bye:
and has been replaced with the name "Krissi's Studio" (tagline yet to be determined).  Skelekitty's blog, "Skelekitty and Friends," may get a little makeover, but the name and content will continue on as-is.

I thought maybe some of you would have opinions (ahem, or rather, "I KNOW"), so this is your chance to vote on possible backgrounds for the blog.

INSTRUCTIONS (not really much):

  1. I am looking for something that captures my artistic style & sense of fun, as well as the spirit of my blog's content.
  2. Remember that text will be covering a good portion of the image
  3. Post your likes, dislikes, suggestions in the comments section, on Flickr, under the facebook post (if you're reading from there) or send me an e-mail.  Whatever form of communication you like is fine with me.

And now, in no particular order (click on images to view details):
1. Image16

2. Image9

3. Image10

4. Image2

5. Image6

6. Image18

7. Image17

8.Image20

9. Image19

10.Image21

11. Image8

12, Image15

13. Image11

14. Image12

I started with a few and then got totally overwhelmed and ran out of steam.  Therefore, if you would like to suggest another (non-Skelekitty) image, please feel free to write your candidate in!
Read more ...