
He and his wife commissioned this in honor of their mothers, both of whom are breast cancer survivors. You can see more pictures of this piece and the other sacred hearts I've painted here.
I'm working on a new winged heart for a good friend of mine (actually, I'm working on three, but for the purposes of this tutorial, I'm going to focus on just one). After chatting about "stuff," we came up with some rising phoenix imagery and I sketched this out as a visual for both of us to work from.

I was really excited to try something new on these hearts, but as I looked at the design I'd created, I realized I'd also created a challenge as well. The shading on the hearts is created using wet-on-wet techniques followed by layers of translucent/transparent glazes. Given the transparency of the colors I plan to use for the flames, I realized there was no way I could paint them OVER the blue heart, so I decided to mask off the flame area and work on each section as if it were a separate piece.
Anyway, long story short: I thought I would share.
What you will need:
- Something upon which to paint
- Painter's masking tape
- Soft pencil/crayon
- Craft knife
- Paint

Begin masking off the area you do not want to paint - in this case, I'm going to do the wet-on-wet blending of the blue background first, so I'm taping off the area where the flames will go. Press down firmly, smoothing out any air bubbles or gaps and making contact between the tape and your working surface.
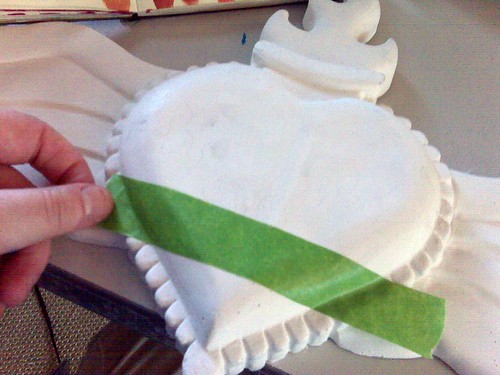
Overlap layers of tape slightly until the entire area is covered. (I am working from the bottom of the heart upwards so that when I peel the tape from the "flames" each strip of tape will pull the one on top of it. It should all come off easily as one peice when I'm finished painting.)
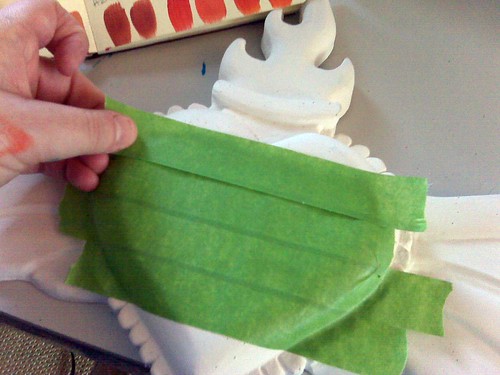
Sketch out your design using a soft pencil or crayon (avoid using any pens that may bleed or smear).

Clearly outline your design.
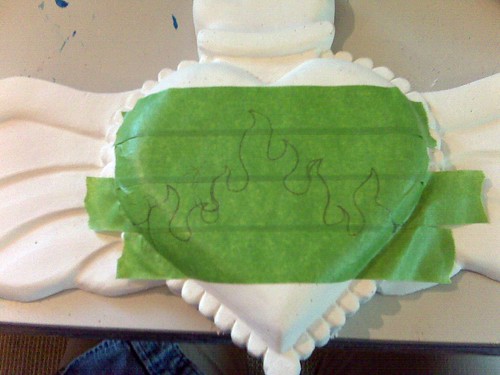
Using a sharp craft knife, carefully cut along the line of your design. Try not to press down more than is necessary to cut the tape or you will score your substrate/canvas. Use care when cutting edges of tape strips so you don't pull or drag it out of shape (tip: cut in the direction that the tape overlaps).

VERY carefully begin to peel the tape from the area you are going to paint. Use the tip of your knife to hold down any points and/or to cut tape.
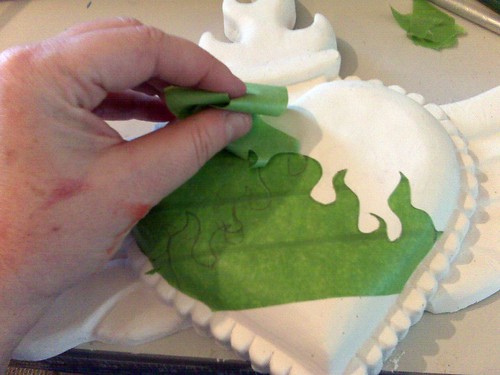
Gently press down on all edges and any points of your design to prevent paint from bleeding beneath your design.

To prevent bleeding, paint away from the tape rather than toward it as much as possible.
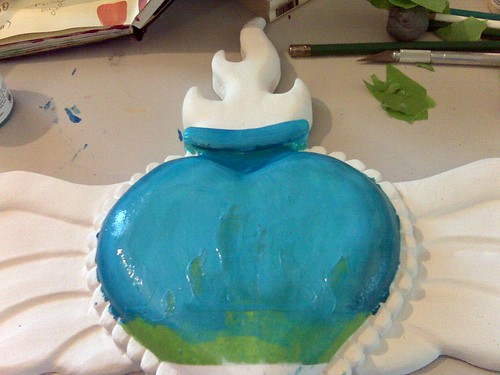
If you are painting one layer of color, you would remove the tape while the paint is still tacky. If you pull the tape off too early, the wet paint may bleed or smear. If you wait too long and the paint dries, you may have difficulty removing the tape or you may peel off something you don't want to!
Because I use multiple layering techniques, I take a slightly different approach. Between each layer of paint, I carefully cut through the dried paint at the exact edge of the tape. Yeah. It takes a while to be this exacting.
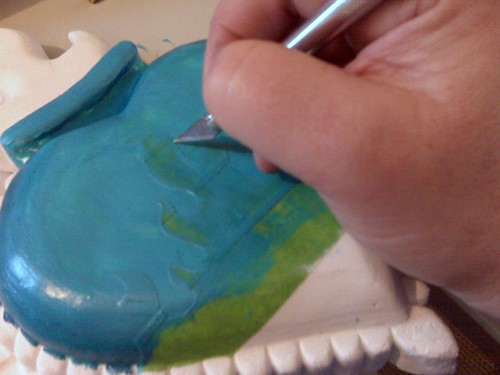
For this heart, I'm doing a second layer of wet-on-wet color blending - this one is white and manganese blue hue over the cobalt turquoise of the first layer.

And a layer of manganese blue hue glaze:
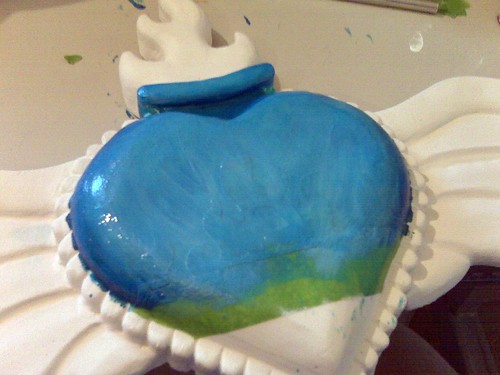
Let the glaze set up so that is no longer wet, but is still tacky and start to very carefully peel up the tape.

Now take a look at the tape line - are there any smudges or missing chunks of paint that came up when you removed the tape?

Carefully scrape away any globs or smears. You could also touch these up with some gesso or paint at a later time (after everything has dried fully).

Touch up the spots where paint is missing.
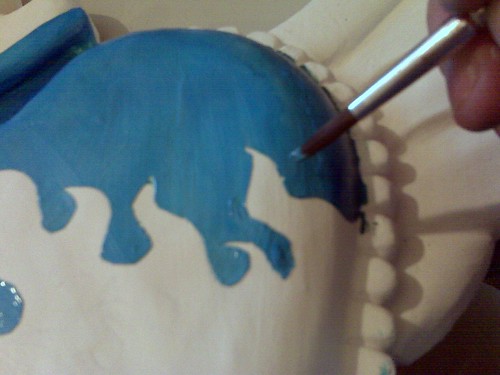
Now admire your work!
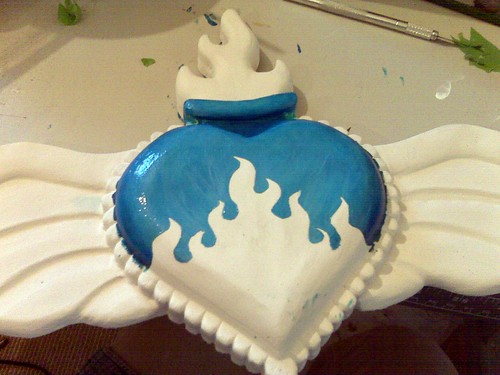
Let it dry and get on with your project!
Here's a peek at how it's coming along so far:


Awesome Tutorial!
ReplyDeleteMs. K. -- this is awesome! Thanks for sharing the technique! You ROCK!
ReplyDeleteThanks Pamela and Jim!!!
ReplyDeleteSo cool. Makes me want to run out and get some tape...
ReplyDeleteGreat tips and tricks! Green tape? I had never heard of green. I would also love to learn about your molds and how you make these plaster hearts. Maybe it's here in your blog somewhere, I'll have to go look! Be well... Tj.
ReplyDeleteTJ - So would I - LOL!
ReplyDeleteThe hearts are created by my friend, follow artist and generally awesome dude, Frank Pamies of "Cesco's Muertos." He creates original sculptures in terra cotta and then makes molds from them then pours the blanks using plaster or hydrostone.
You can find more of his work and craft supplies in his Etsy shop at http://cesco.etsy.com
I love this tut! Oh... the ideas....
ReplyDeleteVery cool tutorial!!!
ReplyDelete