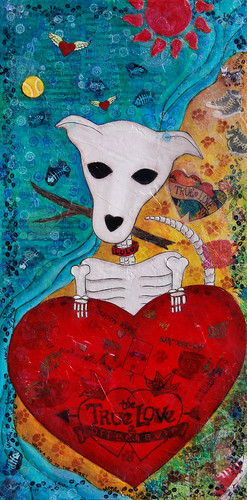
Tuesday, April 28, 2009

CONTEST: How do you "break the rules?"

I was inspired by two related posts by fellow craftistas.  The first was by Jenny Hart of Sublime Stitching showing us her embroidery "backside" with all the lumps and bumps that were unfit for normal viewing.  The second was by Rachel, AKA "Average Jane Crafter" talking about how she felt empowered to knot on the back of her work when she discovered Jenny does it (it's a hardcore embroidery no-no).

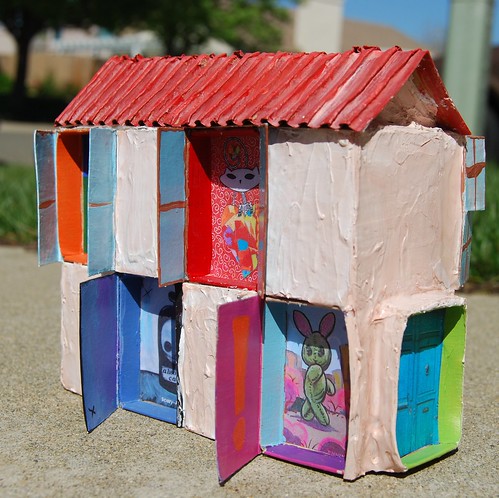
Geez.  I always start out trying to follow instructions, but somewhere I veer off into my own world.  For example, I was given a challenge to create my idea of a perfect neighborhood using an altered book or chipboard house shapes, like this awesome example by one of my artist friends:


Here's mine:
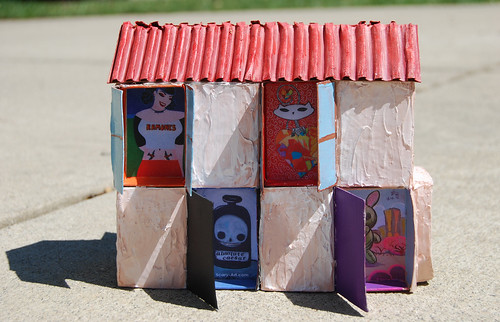
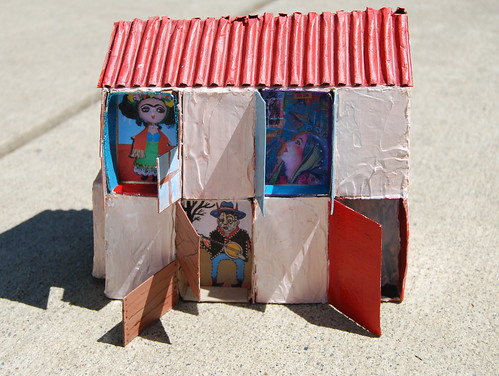
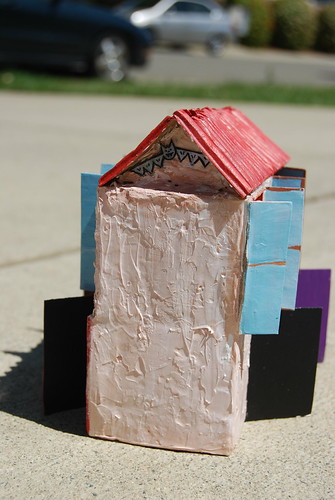
Matchbox Artist Lofts
(pssst! I did a tutorial on how to make this here.)

I think my Mother would be proud to know that I've finally given up on following the rules at all costs (I was a very serious child).

This line of thinking got me off onto yet another tangent:  A lot of people think some crafters can actually attain creative perfection somehow (yes, people have actually told me they think I don't screw pieces up).  Trust me, I've screwed up PLENTY of stuff.  Not only do I make gargantuan messessss, but the back of my art quilts (before I put the backing on) look a lot like thread vomit.

Welcome Home Skelekitty quilt

So I figured that if I can admit that the ankle tattoo on this quilt was a cover-up (ink from the shoes ran onto the leg during the final pressing), then YOU, my friends, can tell me a secret or two.

DETAIL: Welcome Home Skelekitty quilt


So tell me either:
  • What colossal errors have you made??  What did you learn from it, how did you recover and if you successfully covered it up, how? 
  • What "rules" (like "never knot on the back of your embroidery") do you break and why?
or
  • Show off your "backside" - you know, the dark underbelly of your arts and crafts, such as the messy and unfinished "inside" of this pillowcase (my very first sewing project):
    bad finish
Post your stories here (and don't forget links to your photos!).  In exchange, you will receive:
  1. the knowledge that you've empowered and liberated a fellow crafter by admitting what you do "wrong"
  2. the relief that comes with letting go of dirty little secrets AND
  3. an opportunity to win a set of six hand embellished note cards!
Let's give it a week, shall we?  All posts must be in before the morning of Wednesday, May 6th, 2009, then I'll choose a winner at random.  CONTEST CLOSED!

Oh, and be honest!  Let's see what we can learn from each other!

Be crafty,

Krissi
Read more ...

Sunday, April 26, 2009

Recycled Mailer (padded envelope) Tutorial & Day 12 of DVM!

Hi all! About a year or more ago, I recycled one of those padded mailers for a swap I was participating in and, of course, photographed it:
Recycling is FUN!
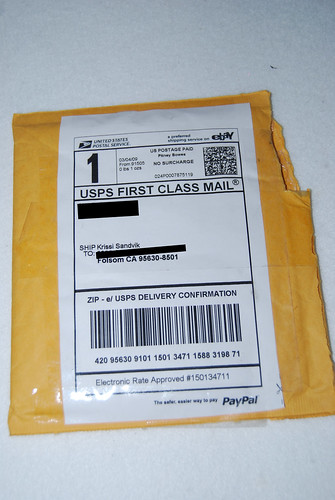
I get a lot of hits on this particular photo and receive e-mails every now and then asking how I did it. I figured, it being "Earth Week" and all, this would be a great time to tell everyone (plus, I needed to cover up a used mailer for Rikki's Loteria pendant, so I had one to photograph!).

Altered/Recycled Padded Mailer (Tutorial)
Of course you've saved padded mailers. Well, go find one.

Altered/Recycled Padded Mailer (Tutorial)
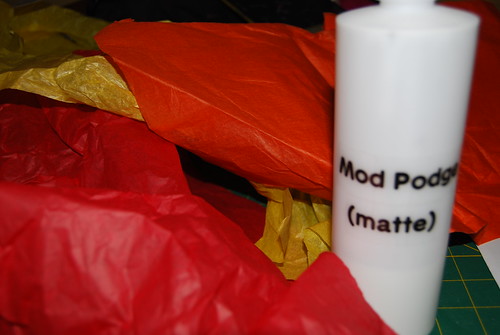
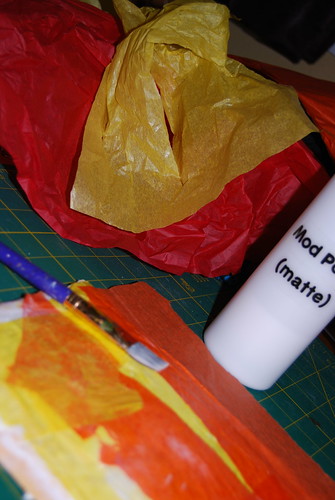
While you're in there, get some white glue or decoupage medium, a brush, your white paint (or gesso) and some pretty tissue papers (you could also use decorative paper scraps).

Altered/Recycled Padded Mailer (Tutorial)
Tear off any glossy tape and labels that are easily removable (you don't really even need to do this, but it helps the decoupage stick). Prime your envelope with white craft paint or gesso (mostly this is just to give an even look to the piece and ensure that old labels are covered).

Altered/Recycled Padded Mailer (Tutorial)
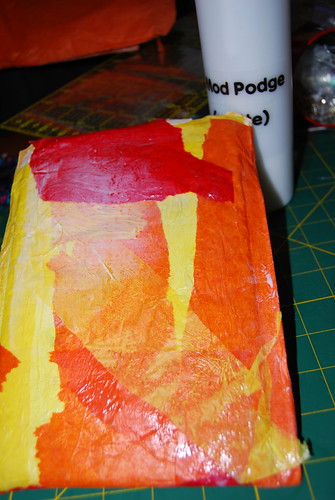
Start with one side of the envelope and coat a small area with decoupage medium. Add pieces of tissue paper and recoat with glue/decoupage medium.

Altered/Recycled Padded Mailer (Tutorial)
Keep going....

Altered/Recycled Padded Mailer (Tutorial)
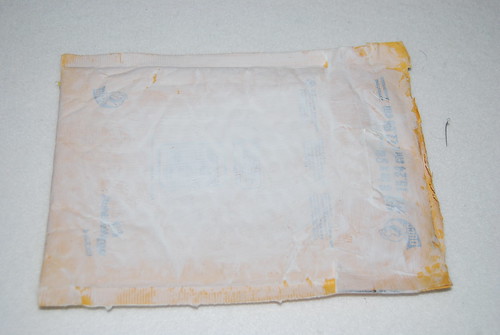
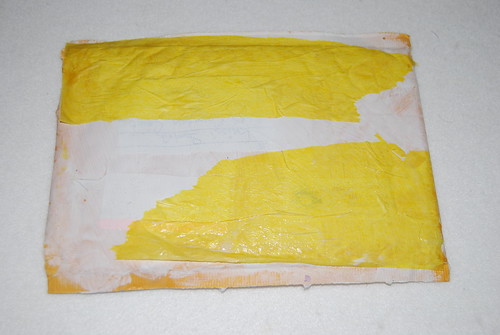
OK... That looks pretty good. Let it dry, then do the back side (optional, but totally cool looking).

How to...
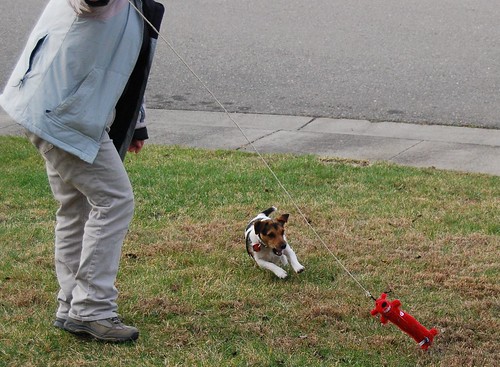
You can work on the back while the front is still wet if you have a non-stick craft sheet, but I use the drying time as an excuse to play with my dog.

Once both sides are dry, you can address, fill and send your mailer, but I like to decorate mine even more:

Altered/Recycled Padded Mailer (Tutorial)
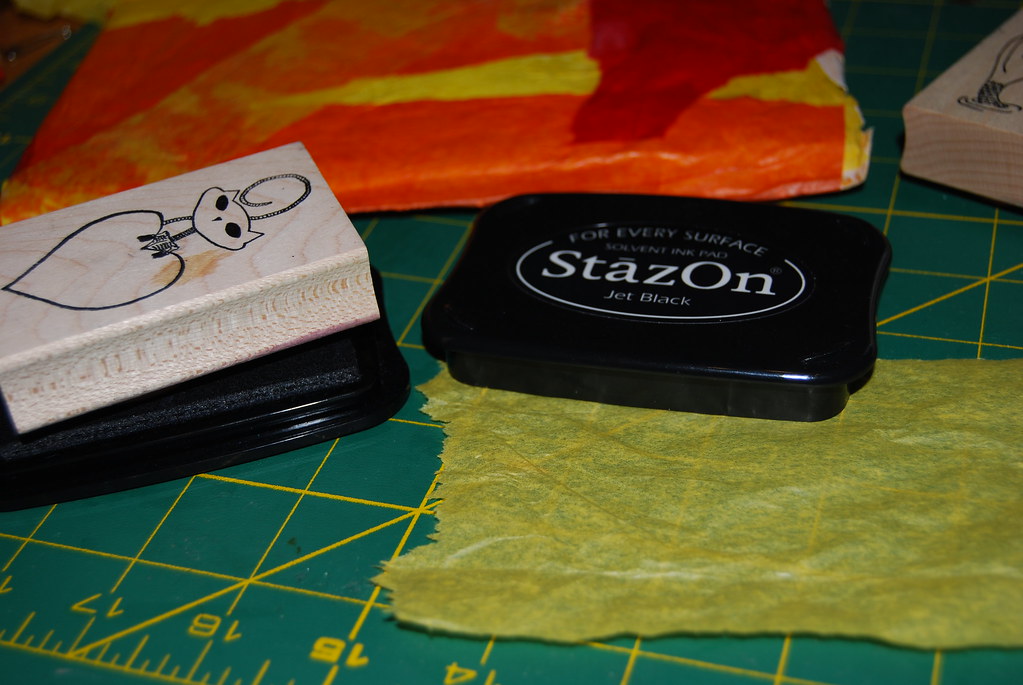
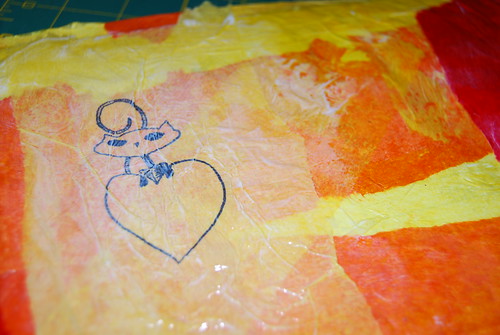
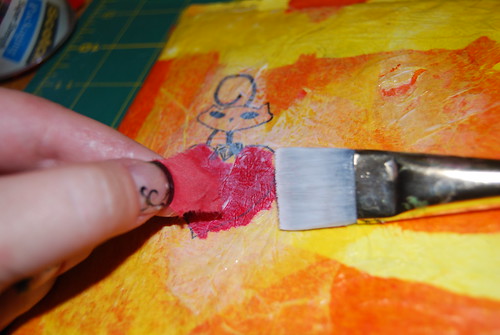
Using your favorite stamps (of course they're your Skelekitty ones!), and some Staz On or other permanent ink, stamp an image onto a piece of tissue paper...
Altered/Recycled Padded Mailer (Tutorial)
...then affix it to the envelope. This technique will give you a better stamp impression than if you stamp directly onto the lumpy envelope.

Altered/Recycled Padded Mailer (Tutorial)
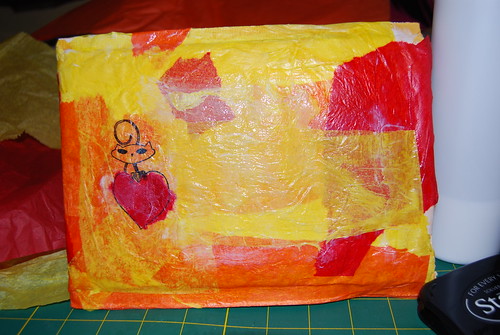
Don't be afraid to get a little silly.

Altered/Recycled Padded Mailer (Tutorial)
And it's finished! No... wait....

Altered/Recycled Padded Mailer (Tutorial)
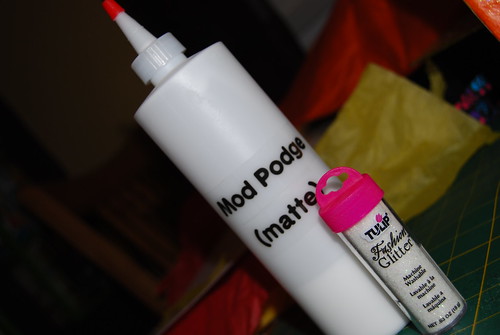
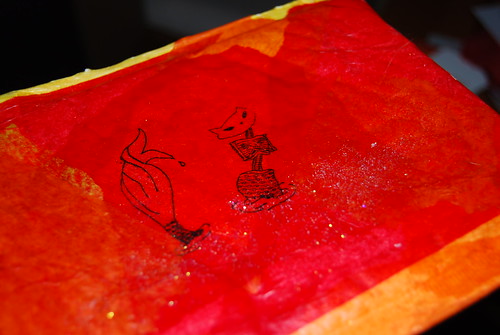
YES! It still needs a little sparkle! (I got the idea of adding iridescent glitter to mod podge from Kathy Murillo, The Crafty Chica!)


Altered/Recycled Padded Mailer (Tutorial)
NOW it's finished! (This, obviously, is the back of the envelope - sorry, just not going to give everyone Rikki's address!!!)

If you make one, I'd love to see it, so be sure to post a link here!
Read more ...

Saturday, April 25, 2009

The Creativity Continues - Days 10 & 11

We all need a creative space. You know, a little spot in which to glue stuff to other stuff. I've realized that no matter how much space I'm given, my creative essentials (the aforementioned "stuff") fills it and overflows into the rest of the house. I am beginning to suspect that art and craft supplies are, in fact, gaseous substances and not solids as previously thought.

So, yesterday, for the tenth day in a row of the DaVinci Mode Challenge, I started reorganizing the supplies in my studio. I moved collections out of the small drawers they had outgrown and put them into large boxes, moved my fabrics to the back of the studio and my mixed media things up front where I can find them easily. I still have a lot more to do, but I'm happy with the changes I've made so far. Besides the resulting organization, I am reminded of a lot of supplies I'd forgotten about!

Today, for day 11, I went to my local bead store (not only is it within walking distance and well-stocked with cool stuff, but I also have a wholesale account there AND occasionally see my friend Rain). Since I figured I'd better do something about the goal I stated for day 9, I bought a few supplies for my pendant & earring kits.

This evening, I also prettified and reused a mailer WHILE taking photos for a tutorial (I'll post that tomorrow). The last recycled mailer I did looked like this:
Recycling is FUN!


OK, time to spend some time with the family! Oh, and my friend Keith (KeeF to me), on whom I put much eyeliner in the 80's, is coming to visit me tomorrow! YAY!
Read more ...

Friday, April 24, 2009

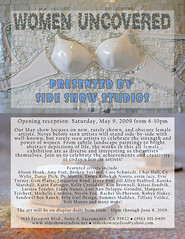
Women Uncovered!


May-2009-flyer
Originally uploaded by sideshowstudios
Call for new and emerging female artists. Come on, let somebody ELSE see your art!
Read more ...

Thursday, April 23, 2009

Days 8 and 9 of the DaVinci Challenge

I'm still going strong with Stacy McQueen's challenge to stay in "DaVinci Mode" for 30 days, but I took it down a notch over the last two days to regroup and plan some new stuff.

Yesterday evening, I spent some time sketching out three ideas for new Skelekitty paintings to be shown at Side Show Studios and Body Tribe
in May and June, respectively. Two are planned for Side Show's "Women Uncovered" show and the subject(s) are still under wraps. The third is a large and I do mean LARGE piece that I'm doing for the Body Tribe/Born Free USA "Big Cat/Little Cat" benefit show - that's all the hint you get ... for now.

Today, Stacy posted a great challenge, of which this is a portion:

We all have a BIG creative dream. You know what it is. It's that little itch in your soul. It's where the aroma of regret lingers. It's the SHOULD if I COULD that lives in your heart. It's a secret passion you dare not speak outloud, a fantasy you pull out only on special occasions.
* * *


Perhaps today, we’ll let go of fear, self doubt, stop asking HOW we’ll do it, and we’ll just BEGIN. Perhaps we can use the Da Vinci Mode Challenge to make daily micro movements on our biggest dream of all. Like that man who ate a car, not all at once, but over time, he did it spoonful by spoonful. Perhaps that's how we'll approach our great big hairy beautiful creative project. One day, one spoonful at a time.

Why not DECLARE IT here in Day 9 topic?! There's MAGIC in beginning...

My BIG creative dream? You may have guessed it already, but I'll declare it just the same: I want Skelekitty to support my art business.

As you know, I've got a bit of a start going with the rubber stamps (thanks mainly to my husband, Ron, who piped up in s Santa Fe stamp store that Skelekitty should have her own line ... the store owner also had a rubber stamp company and, after a short trip on the interwebs, we were on our way).

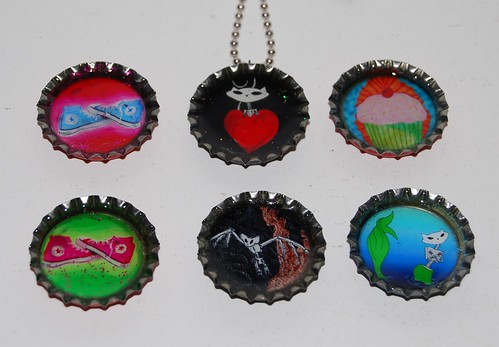
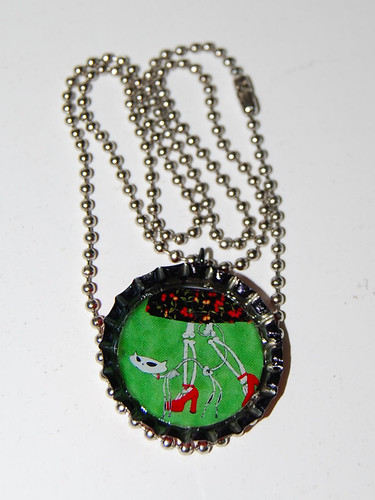
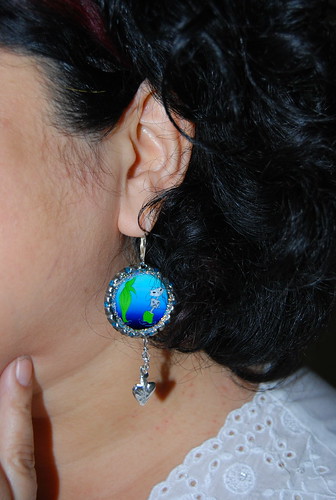
Today, like little Melinda Mae, I took another tiny bite of the whale, and agreed to create some jewelry kits which will premier at the Santa Clarita Craft Lab's Market Place, and will then be available through my blog, website and Etsy store. I'll be offering both pendants and earring kits, and you'll be able to choose from either bottlecaps (1" round) or wooden tiles (1"x1.25" rectangles).

1" BOTTLECAP NECKLACES
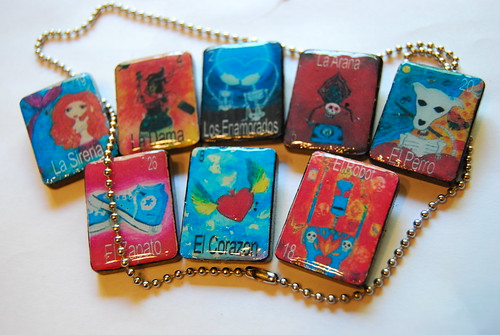
Loteria pendants
Welcome Home 1" BOTTLECAP NECKLACE Premier pair of Skelekitty earrings!

The bottlecap kits will have a variety of Skelekitty images and other images from my artwork, while the tile kits will all have my "Loteria" images. Of course, once the kits are together, I'll post photos, post a blog and let you know where to get all the goodies.

I suppose I should stop blogging and start working on those kits!

xoxo

Krissi, Skelekitty, Abby, Ron and the rest of the our furry, feathered and scaly family

*

View ALL DaVinci Mode Challenge posts

*
Read more ...

Wednesday, April 22, 2009

Loteria Pendants and Blank Canvases (2)

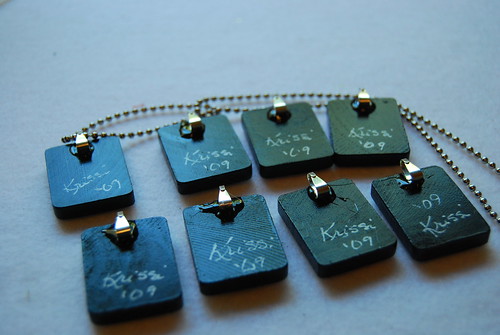
The day before yesterday was day 6 of the DaVinci Challenge and I took day 5's project, added a couple layers of a glossy dimensional sealer and turned those babies into pendants.

Loteria pendants
DVMChallenge-6 (5)

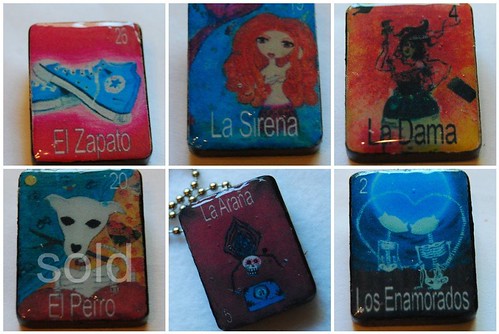
Each one is signed and comes with an 18" ball chain.  Because these are prototypes of sorts, I'm selling 'em cheap - $15 each or 2 for $25 and I'll cover the shipping and any sales tax (if you're in California).   Two of these puppies have already been snatched up by my pal Jill Allyn (she got the Corazon and the Robot).  Here's what's still available:
Loteria pendants
E-mail me if you're interested.  I'm going to let regular blog followers have first grab at these before I list them on Etsy.


As for "Day 7," well, it pretty much got away from me because of my gym schedule (I went - Allyson tried to kill me again), dog time at the river (an absolute must when you have a Jack Russell) and then discovering that the "sterile abscess" on Abby's neck from her anti-rattlesnake vaccine was getting bigger... so off to the vet and ... yeah. There goes the day.  HOWEVER, I did manage to drive to my favorite art supply store (Utrecht, 'cause everyone there is incredibly helpful) and purchase two  Baroque hardwood artist panels for my next two paintings, which I have worked out in my head, although not yet on paper.


Today, as I am sans dog, I need to do some grocery shopping, but I also hope to get something on those two blank boards.  Off I go.


View ALL DaVinci Mode Challenge posts.
 * 
Read more ...

Monday, April 20, 2009

DVM Day 5 - Loteria Tiles

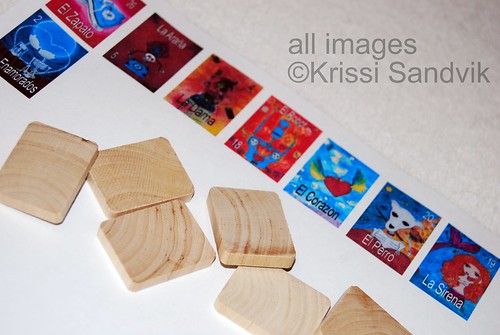
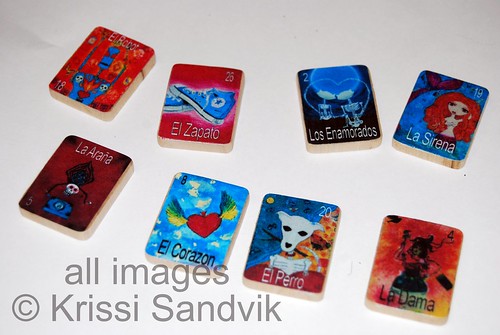
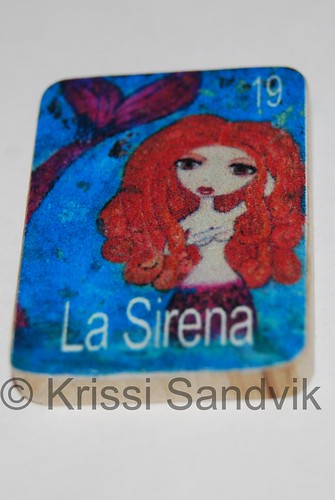
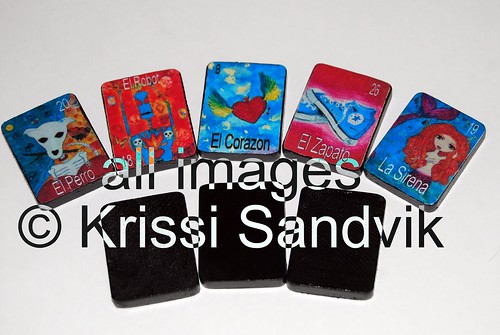
Inspired by Kathy Murillo's "Taste of Talavera" jewelry tutorial, I created these jewelry tiles using my own paintings which I then turned into Lotería cards.

Using 1" x 1¼" wooden craft tiles as a base, I resized my Lotería cards on my computer and printed them out just a teensy bit larger than the tiles (1.3" wide so the entire surface would of the tile would be covered). I have an Epson printer, but you could also use an ink jet or have them copied professionally (on accounta almost all home-office ink jet inks are water-based and bleed). Just to be sure, I used some spray fix to keep my images clear (you could also use a glossy presentation paper or another paper with a coating).
Loteria Tiles (Krissi Style)

Next, I cut out and glued my images onto the tiles. You could use just about any glue, but I settled on two extremely thin coats of soft gel medium by Golden Acrylics.
Loteria Tiles (Krissi Style)

After the tiles were completely dry, about 30 minutes, I sanded the edges of the tiles (an emery board works well!) to remove the overhanging paper and any tiny bit of gel I got onto the edges.
Loteria Tiles (Krissi Style)

I like to add a thin coat of a gloss varnish now - BEFORE I paint the sides and back. If you varnish it after, you won't be able to wipe any smeared paint off of the surface of the images. As always, I used Crafty Chica Glossy Gloss Varnish - one of my crafting staples.

When your varnish is dry, paint the edges of each piece. When the edges are dry, paint the backs (it's much less messy if you do it in steps).
Loteria Tiles (Krissi Style)
Now these little babies are ready to be added to art, jewelry or whatever project enters my brain for day 6 of the DaVinci Challenge!


View ALL DaVinci Mode Challenge posts.
Read more ...

Saturday, April 18, 2009

Tutorial: Matchbox Artists' Lofts

I am STILL in DaVinci Mode!

Update for yesterday (4/17 - day 3): I planned a garage sale with my hubby! Woo hoo! Today (day 4), I am creating a tutorial for you wonderful folks.

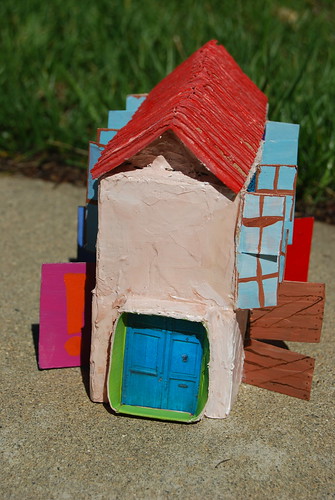
Many moons ago (just over a year, I think), the mixed-media group to which I belong posed a challenge for us to create our fantasy "neighborhood." While a lot of the other artists added things like bakeries and bookstores (good stuff, to be sure), I decided I'd create a single building containing "artists' lofts" so I could live near all of my creative friends!

More neighbors
L to R/top to bottom: art by Sam Marie Grove, Krissi Sandvik (Skelekitty), Nicolas Caesar and Christian Cinder

Tools and Materials:

  • "YES" paste or bookbinding glue*
  • 32 count matchboxes (21) - I get mine at the Dollar Store/Dollar Tree, etc.
  • corrugated cardboard scrap
  • paints
  • Golden Acrylic Medium: Molding Paste (either regular or hard is fine)
  • artist spatula
  • photos/ephemera** for inside "windows and doors"
  • varnish or glaze - like Crafty Chica Glossy Gloss varnish
Directions:
  1. With 9 of the matchboxes, separate the drawers from covers, and determine the interior dimensions.

  2. Using your computer, if necessary, resize, print out and trim to size 8 scenes for the interior of each room.
    **IMPORTANT NOTE ON COPYRIGHTS: Be certain that any images you use are copyright free or that you have permission from the artist(s) to use them. Just because you paid for an image, it does not mean you have the right to legally use it! Most craft supplies are OK, but some, like rubber stamps and printed images may still be covered by copyright protection (i.e., you may not have the legal right to sell work containing those images - my Skelekitty stamps are an example of such images). It would also be copyright infringement to create a print for personal use of someone else's work. It is your responsibility to determine if the images you use are under copyright protection. and most artists are willing to license their work, or will work with you to allow certain uses, so be sure to ask before you use them!
    The piece I have here was created for my own amusement and I informed each of the artists what I was making and that it would not be for sale.

  3. Glue* 8 images into matchbox drawers. Embellish now (or later is OK too!). *you can use white craft glue or glue stick if you don't have YES Paste, etc. Paste and bookbinding glue wrinkle your paper less, so they're a great investment!
    Glue an image of a door or paint one inside the 9th matchbox drawer and let everything dry.
    Front Door: Matchbox Artist Lofts
    Photo of door by Ann Pohlers.

  4. Cut open 8 of the matchbox covers' (along one of the folds) as shown here and paint doors and/or windows on the flap (I did mine to match up with the personalities of the artists "living" inside:
    Matchbox "Artists' Lofts"
    L to R/top to bottom: art by Yoli Manzo, Alisa Abrenica and Mark Fox. That "empty" apartment will have Char Hall's T-Rex living in it soon.
    I made my windows "shiny" with several coats of glossy varnish!

  5. Glue the outside of the 8 matchboxes (doors/windows) to the back /side of the 8 'drawers' (room scenes). Let them dry well! You may wish to use binder clips to hold the sides while these dry.

  6. Start assembling your building! Here you can use E6000 glue or another hard core craft glue to keep things from falling apart while you build. Here's how I put mine together:
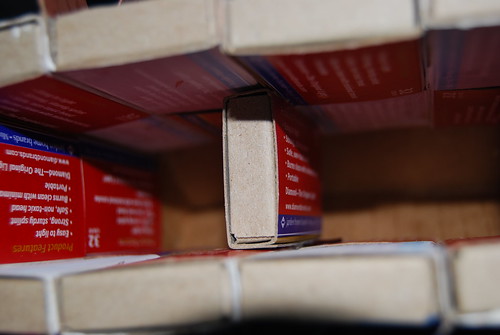
    Basic structure (from inside)
    Two matchboxes high, one matchbox wide (front/back) and four matchboxes long (sides) with one stuck in the middle (interior) for structural support.
    Add triangles made from scrap cardstock or cardboard for your roof gables (or you can make a flat roof).
    Bat in the belfry
    Kepi is the bat in my belfry.
    LET EVERYTHING DRY WELL!

  7. Now for the fun! Open up your jar of molding paste and, using your spatula, "plaster" the exterior walls of the building! When I created my set of artists' lofts, I used gel medium (regular), but realized later that molding paste would work WAY better (and you don't necessarily have to paint it!). Another idea for thatched, cracked or textured plaster looks: use Golden Fiber Paste, Crackle Paste or Course Molding Paste! Let your acrylic "plaster" dry well - usually overnight or more is best, depending on temp/humidity.

  8. Paint exterior of your building, if desired.

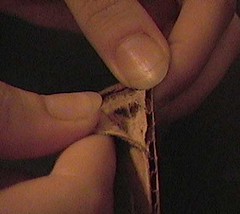
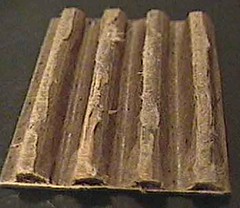
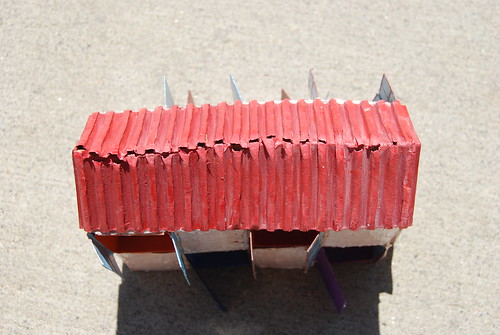
  9. Make your roof - I made a 'Spanish tiled' roof by peeling off one of the paper layers from a piece of corrugated cardboard and painting it brick red.
    cardboard_PrepCardboard_Finished
    Seriously. That's all. Fold your "roof" down the middle and glue onto the top of your "gables."
    Roof of Matchbox "Artist Lofts"
Now just sit back and be amused with yourself! Anyone want to make one out of 250 count matchboxes???
*
View ALL DaVinci Mode Challenge posts.

 * 
Read more ...

Friday, April 17, 2009

DaVinci Mode Challenge - Day 2 (4/16/09)

As I mentioned in yesterday's post, I'm participating in a 30-day creative challenge posed by Stacy "The Craft Whore" McQueen to her facebook friends. It's not a contest, so nobody "wins" anything, except 30 completed creative acts.

For day two, Stacy posed the possibility of finishing something you'd started some time back. Yeah, I have a lot of those projects and I'm filing that idea for future use because I had something else I wanted to tackle.

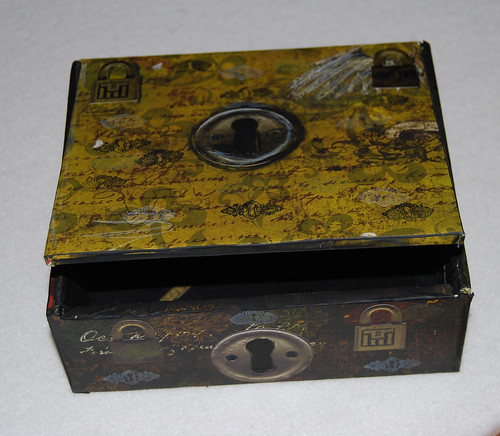
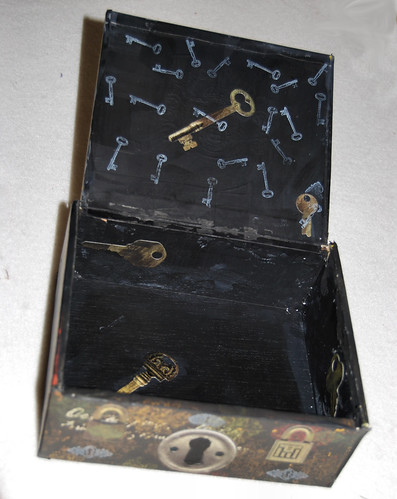
See, I'm a hoarder of craft supplies (and ideas). I buy things that I love, and then don't want to "use" them up. It's ridiculous. Therefore, I decided to take one of the cigar boxes I've been nesting upon for over a year and embellish it. It didn't have to be spectacular, I just needed to DO IT. Just to challenge my pack-rat nature some more, I used up some of the Seven Gypsies papers (from the new "Market Collection") and EK Success stickers (Nostalgiques line by Rebecca Sower) I bought on a recent shopping trip with Ann Pohlers while I stayed with her (and her equally awesome roomie Alisa) down in San Diego.

Some black gesso, a little distressing and some stamping....

I may still do more with the inside, but as it stands, I like it!

Day 2: covered cigar box

Day 2: covered cigar box

*
View ALL DaVinci Mode Challenge posts.

 * 
Read more ...

Thursday, April 16, 2009

In "DaVinci Mode"

As an experiment of sorts, the FABULOUS Stacy "The Craft Whore" McQueen posed to her facebook friends the "DaVinci Mode Challenge." Going into DaVinci mode means that anyone participating in the facebook group MUST commit to 30 contiguous days of creativity in any form we wish.

I'll do my best to post here on a daily basis!

Day 1 (4/15/09):
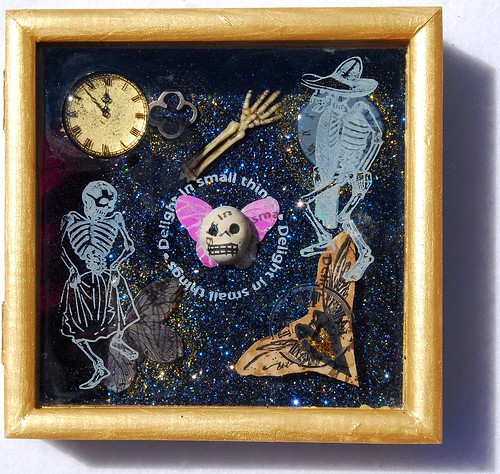
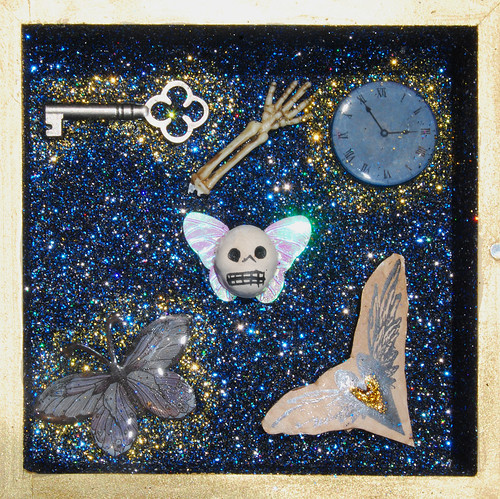
Da Vinci Mode Challenge - Day 1 (outside)

Da Vinci Mode Challenge - Day 1 (shiny)


For the first day of the challenge, I decided to just get my crafty butt back in my studio and make something. Anything. I decided on using one of the many shadow box frames I acquired at The Dollar Tree. I didn't really have a vision for this - mostly, I was experimenting with stamping on glass (Staz On ink) and mixing glitter colors (background glitter is Crafty Chica BeBopBlack / Nova Blue / SciFi Silver mix; gold is Ranger's Stickles). Obviously, this is also an experiment in layering. How do you think it came out?


View ALL DaVinci Mode Challenge posts.
*
Read more ...

Wednesday, April 15, 2009

That $%*& Just Isn't For Drinking Straight Outta The Jar....

This crafty blog was inspired by a tweet by my pal Crystal Case, well known around town as Xtal Secretin, the blogmistress of the Secretin Life Line - The Secretions' blog of fandom, punk rock, local shows & more, and now the soon-to-be "Mrs. Rat."  To me, she's just "Crystal," a sarcastic, creative, dog-loving geek who keeps me entertained on a regular basis.

In a brave, albeit erroneous, attempt to save a few Samolians, Crystal purchased [offensive content warning - reader discretion is advised] ... instant coffee.  As you might expect, the freeze-dried cremains just didn't hit the palate of this coffee lover the way she'd hoped, but she was determined not to waste what she'd purchased.

Since friends don't let friends drink icky reconstituted coffee, I sent her a response sending her over to Chef Noah here are my favorites:
  • Dye fabric brown inexpensively.Soak the fabric in a bucket of strong black coffee. This technique is also a good way to cover-up a coffee stain on a white table cloth.
  • Repair scratched woodwork. Mix a teaspoon instant coffee with two teaspoons water. Apply to the scratch with a cotton ball.
  • Highlight brown or red hair. Rinse your hair with coffee for a rich and shiny color.
  • Deodorize the refrigerator and freezer. Place a bowl filled with coffee grounds on the back shelf.
  • Patch woodwork.  Mix dry instant coffee with spackling paste until you achieve the desired brown tone, fill the crack or hole,and smooth with a damp cloth.
  • Clean a restaurant grill.  Pour left-over brewed coffee over a hot or cold grill and wipe clean.

I  like his tip about dying - especially if you're like me and you wear a portion of every latte you drink.  All of this got me thinking about other cool stuff you can do with instant coffee:

  • Make your own Kahlua.
  • Flavor up your cake/brownie batter (make cupcakes that look like little cappuccinos!).
  • Add it to hot cocoa mix (my favorite is Alton Brown's homemade instant cocoa).
  • Make some goodies from Folgers' website (I like the look of the no-bake mocha treats and the mocha dessert fondue).
  • Add it to a multitude of cocktails and other drinks.
  • Use it in crafts to give an aged look (mix with water and/or an acrylic glazing compound) - this one is a Krissi original, so no link - sorry!
If you have any more to add to the lists, feel free to add them to the comments and be sure to add links!!  Oh, and if you're here in Sacramento, buy Crystal a REAL cup of coffee, would ya?


photo by Lynne Lowe
Read more ...

Thursday, April 9, 2009

Skelekitty News (SCCL and Kitty-tweets)

I'm very excited to let all of you know that the lovely and talented (and I'm not kidding about either) Cyndi Garcia recently contacted me about carrying my Skelekitty rubber stamps in the Santa Clarita Craft Lab's new Market Place. I'm simultaneously humbled and thrilled. All the details, including a gushing review of the Santa Clarita Craft Lab, are on Skelekitty's blog.

While we're talking about the Kitty, did you know that she's tweeting now? It's true. You can follow her on Twitter at Miss_Skelekitty.
Read more ...

Thursday, April 2, 2009

She Rocks

Yeah, I know I go on and on about how awesome my personal trainer Allyson is and, well, I'm about to do it some more. Check out the video from Chip's blog of Al's workout. Of course the video wouldn't be complete without a special appearance by Lulu whom I know you remember from the recent skeledog painting (which still hangs at Body Tribe):
FINAL final version of Skele-Lulu painting


Oh yeah, and did I mention that she turned 40 this year?
Read more ...

Wednesday, April 1, 2009

Crafty Chica Cruise 2009 Recap

I can't believe it's been over two whole weeks! Geez.

SUNDAY: Well, three Sunday mornings ago, I got up bright and early and hopped a plane from FREEZING AND WINDY Sacramento down to sunny and dry, albeit breezy, San Diego. Got my luggage right away and strolled right up to a waiting taxi who dropped me at the docks and the awaiting Carnival ship, Elation, a mere 15 minutes later.
Docked in Ensenada

Thanks to the wonders of technology and a full keyboard for texting on my Crackberry, I quickly located Ann and Alisa.
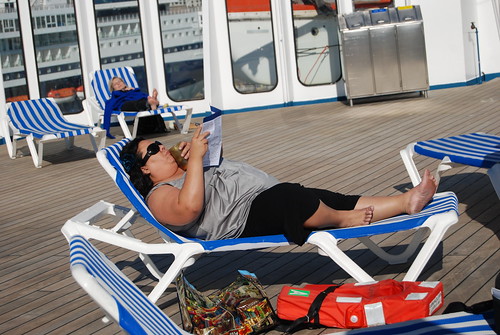
Alisita wastes NO time

...and together we discovered some girls who just HAD to be our people!

photo by Ann Pohlers

Yep! It was Ginger, the lucky winner of the free cruise, and her equally cute pal Alicia. We all took an immediate "like" to each other which still hasn't worn off (yay new friends!) It took me a while to put it together, but I'd been cyberstalking Alicia on MySpace and Etsy for a while - she's "Spooky Mama Creations." I'd also recently started stalking Ginger's Etsy store, Boudoir Noir. I guess I need to pay attention to who I'm stalking, huh?
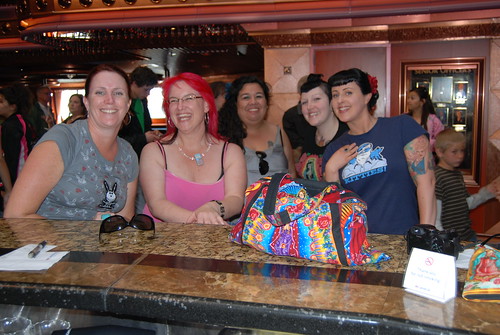
Who stalked whom, exactly?
Ann, me, Alisa, Alicia, and Ginger, at the bar (where else?)

Much silliness ensued at dinner the first night...
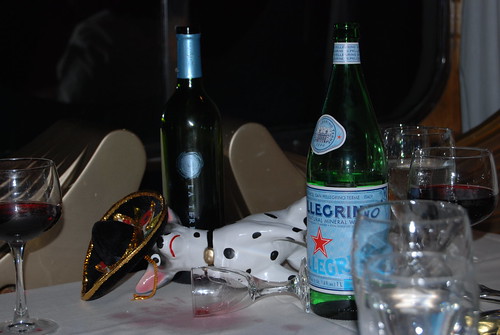
Time to cut Señor Perrito off

...and then the crafting began in earnest!

- photo by Ann Pohlers


Our first project was to embellish a blank canvas book (generously provided by CT Publishing) which could be turned into a banner or a lantern (or, duh! a book). The creativity among my fellow crafters was, while not unexpected, amazing.
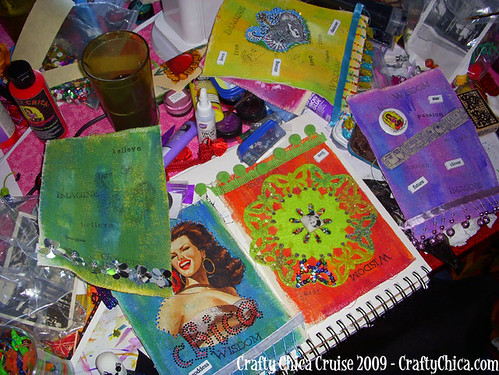
Alisa's "prayer flags" made from a blank canvas book
- photo by Kathy Cano-Murillo

MONDAY: We anchored off of Catalina Island, former summer home to the Wrigley family and subsequently ground zero for the Cubs' Spring training. Now it's a cute little island with some history and the clearest water you can find on the continental U.S. Oh yeah, and they have flying fish!

Carnival "Elation" from Catalina

Ann and I wandered around taking some photos and Alisa, Yoli, Ginger and Alicia did some shopping as we awaited the arrival of the ever-popular Cyndi Garcia of The Santa Clarita Craft Lab to join us.
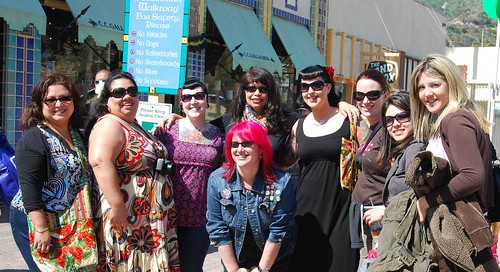
Santa Clarita Craft Lab meets Crafty Chica Cruisers!
The Crafty Chicas meet the Craft Labbers, and I finally realize that I don't make a very good where's Waldo.

After a couple of hours in the sunshine, several of us beat it back to the ship for more workshop time, but Yoli stayed and partied with the SCCL girlies! I won't even attempt to compete with the awesome post Cyndi wrote detailing her carousings with the Sacred One; you'll just have to read it for yourself.

Once Yoli tore herself away from the Coronas and chicas on Catalina, she taught an AWESOME altered silk scarf workshop.
silk scarf project
One of the very FEW projects I finished - my altered silk scarf


Dinner on the second night went off without Señor Perrito getting out of hand again, and we had another workshop awaiting us! This time, The Mantastic Crafter, Patrick Murillo himself, led a workshop in making Dia de los Muertos figures.
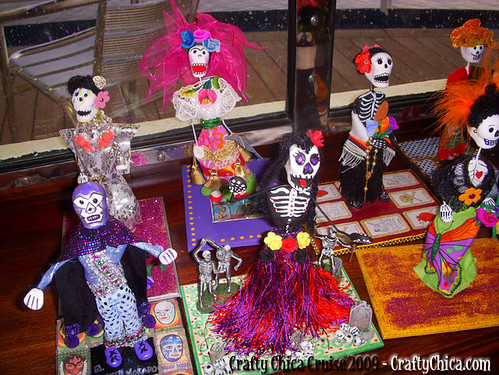
Isn't Mary K's Luchador magnificent?? And of course, Yoli did a super-awesome Frida.
- photo by Cathy Cano-Murillo

Patrick shared a lot of information on how he creates the bodies, but he made fifty "blanks" and carried them all the way from Arizona for us. All we had to do was embellish them! After a lot of giggling to myself, I decided upon a "burlesque dancer" for my skeleton. While she has her pasties securely in place (along with a very classy thong) along with her matching 'modesty' fans, she needs a LOT more work - photos of her later. Several of the ladies crafted into the wee hours of the morning, though I threw in the towel just after midnight. I heard through my sources that the conversation turned quite NC-17 after the witching hour, oh, my delicate ears!

TUESDAY: Shopping in Ensenada!!! We all got up early, donned our comfy shoes, grabbed our biggest shopping bags and headed for the debarkation deck.
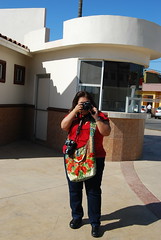
Yolita!
Yoli and I goofed off for a minute before the serious shopping started.

Our first stop was the fabulous Bazar Casa Ramirez, where Yoli and I did some drive-by shopping last year, but where we spent the bulk of our time this year!
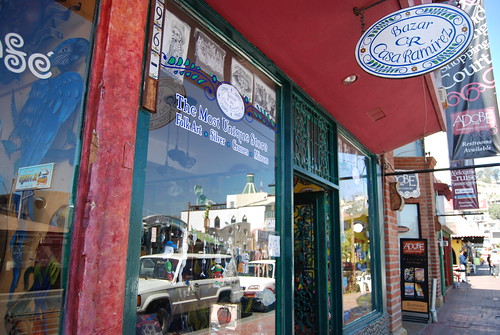
Bazar Casa de Ramirez

At least half of the craftistas from our group were already in the shop when we arrived, and the other half were on their way.
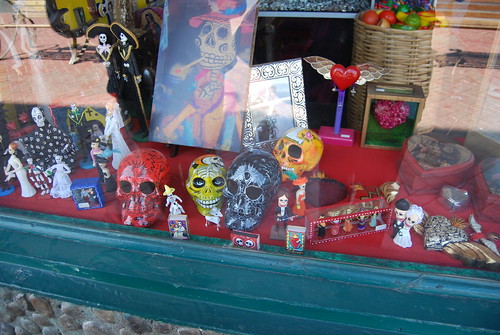
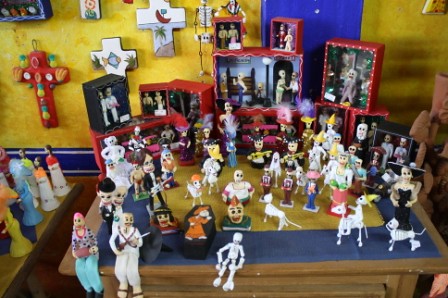
Window at Bazar Casa de Ramirez

photo by Yoli Manzo

At some point during the frenzy of purses, art, milagros, jewelry, figurines and other goodness, we found out it was Nana's birthday; it was a VERY feliz cumpleaños for her!
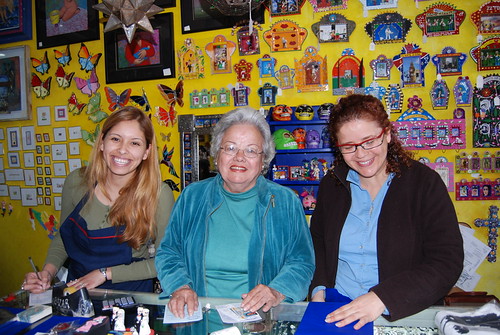
at Bazar Casa de Ramirez

Ann, Yoli and I wandered off down the street and found some pretty bags and blouses, but the find of the day was a little mercado of miniature shrine supplies that Yoli spied with her sacred little eye!
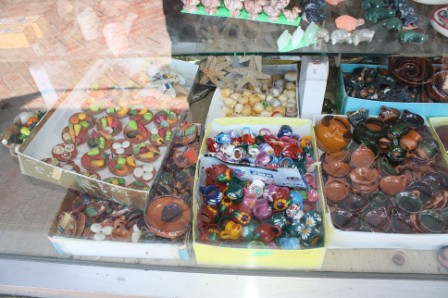

And here are a few of my tiny finds:
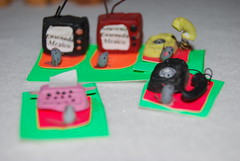
goodies! goodies! goodies!

We stopped at one more shop on our way out of town and back to the ship where I purchased a piece I thought had great bones (yeah, pun intended). Here it is before I got my glittery mitts on it:
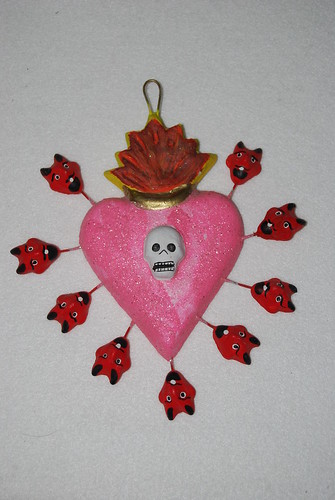
Ensenada purchase "before restoration"

and after:
Ensenada purchase -after the MAKEOVER
What a big change a little glue and Crafty Chica glitter in Frida's Fuchsia, Rockabilly Ruby, Goddess Gold and a touch of BeBop Black on the horns, with a tiny bit of iridescent Stickles in Diamond White to set off the skull

While waiting for the bus to take us back to the docks, we had "on board" entertainment. I clearly surprised him when he challenged the gringos to sing along to La Cucaracha and I actually did. En Español even!

Surprised "Messican"

We needed to be back on the boat by early afternoon so that we could learn tin embossing secrets from the Artsy Gringa, Michele Parlee.
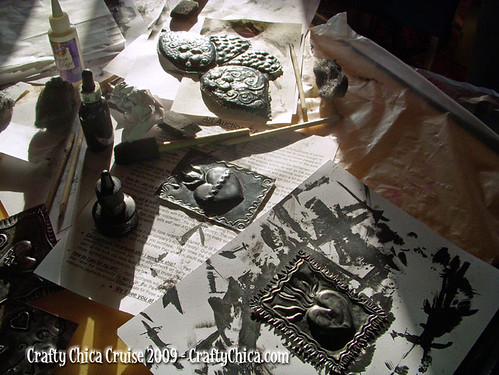
Step 2 - the india ink (before buffing) That's "Altered Rose" Jackson's piece in the foreground and mine is just above hers
- photo by Kathy Murillo
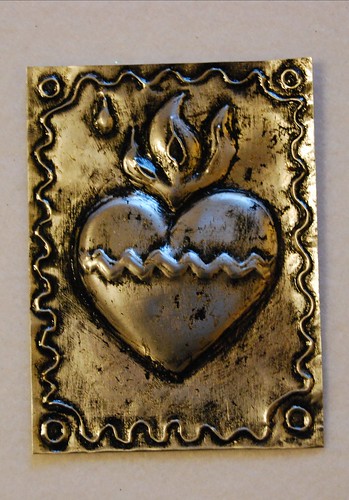
tin project
My tin embossing project following buffing and glazing

I've been really excited to work with tin and now that I have some tips and techniques under my belt, I feel confident that you'll be seeing more of it in my pieces! She made it look so darn easy! Be sure to check out her etsy store and her blog (and, hey, Michele! get some new tutorials up, would ya??)

Following din-din that night, we dove right back into the crafting with another project I actually finished (well sorta - I want to add one more detail): a 3D postcard shadow box!
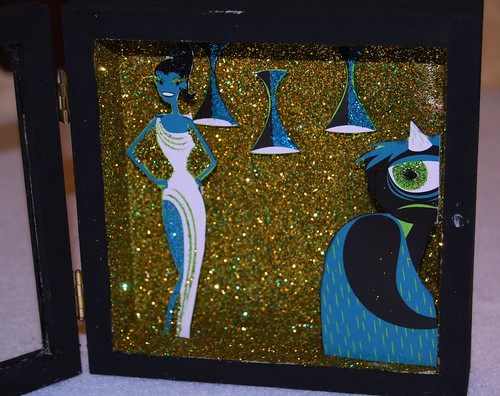
3d pop art shadow box
My 3d Pop Art Shadow Box using a SHAG (the art of JoSH AGle) retro art post card, my custom mixed Crafty Chica glitter (Glamour Queen Green / Goddess Gold) and a Dollar Tree shadow box


WEDNESDAY: Was a "fun day at sea" (ha! we were anchored amidst fog and wavy seas, but that didn't stop the crafting)! We had two projects on the books, but several of us spent our day working on our 'secret pal' swaps. I got the super-cute 'Friendy Wendy' who was also my table-mate, so I did some super sleuthing for her gift. I ended up painting her a skele-weiner dog (oh, and umm.... did anyone snap a photo of it? PUHLEASE send it to me if you did).


The official projects were a way cool bracelet kit with all kinds of funky swag and findings. The chicas really did some awesome work:
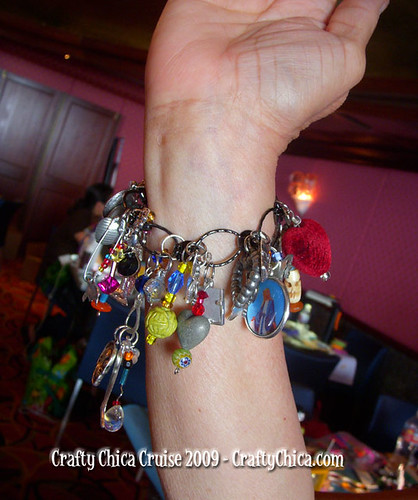
Pat's bracelet, which was so heavy, she built up muscles just lifting her arm for this photo!
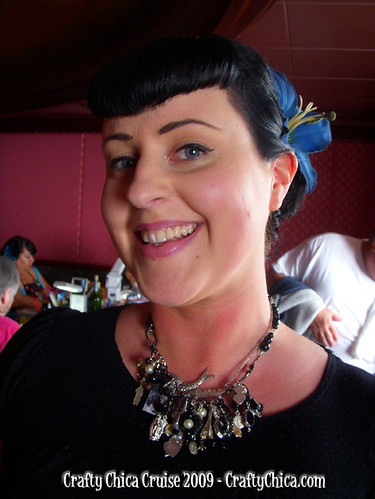

Ginger's "bracelet" project
- photo by Kathy Murillo

My "kit" finally got out of the bag last night at Scary CRAFT and I started working on it, but I'm looking forward to having the time to clean off one of the tables in my studio and really going to town. Photos when it's done, of course, will be posted here.

We also had a challenge to create a self-portrait out of paper, which Kelly Wright completely mastered! Hers is so simple and so right on!
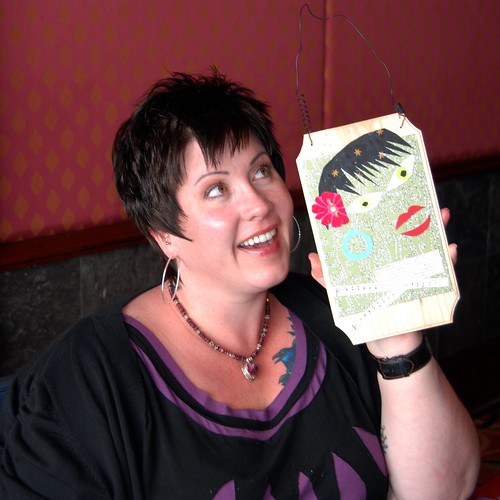
Cute Kelly times two

Right before din-din, we had our cocktail party and secret pal gift exchange. They just kept bringing the drinks! I don't know what I was drinking, but it had a lot of Midori in it and I had ... several. At one point, Ann even had two rum punches in her paws (and I'm pretty sure it was right after she told our server, "no, I'm OK"). We were also treated to a customized rendition of "My Favorite Things" by Kelly Wright. Dang that girl has a set of pipes!

Kelly Wright belts out a tune written especially for the Chicas
- photo by Mary Kirschbaum

AFTER dinner, we had our craft bazaar (for Crafty Chica cruisers only) where I got a chance to stock up on all kinds of goodies, especially milagros in all shapes and sizes from Annette and Jose Armas of C.J.'s Angels (my new official supplier of mexican ephemera!!). I also had some Skelekitty rubber stamps available (I need to replenish my supply now!) and introduced my new line of "loteria" greeting cards available in both "glitterfied" and "regular." Because they went over so well (I sold out of all the hand-glittered ones!), I'm offering the same price to everyone on Etsy ($12 for a set of 4, $15 for 6 - mix and match is welcome).

The next day was a bit of a blur as we all said our goodbyes and I went home with Alisa and Ann, hostesses extraordinaire, and stayed in San Diego for 3 extra days where we hung out at Balboa Park, ate lots of tasty ethnic foods, crafted (I taught Ann to use her sewing machine and Alisa gleaned all of my UTEE secrets!) and I snuggled with the kitties.
awww!
Balboa Park, San Diego Balboa Park, San Diego Balboa Park, San Diego

As is one of the downsides of a cruise ship, I came home with a cold virus and spent the week following our return sneezing and coughing. However, it was STILL worth it, and I'm looking forward to next year already. I just have to figure out how to pay for it.... (psst! buy my cards so I can go! LOL)


WHEW! that post took DAYS to write (I started it last Wednesday, if you can believe it). We all had SO much fun, that there is no way I could incorporate it all into a single blog post, but I gave it the old college try. To see more photos, be sure to check out the Crafty Chica Cruise 2009 pool on Flickr (and if you repost, be sure to attribute the photo to the person who took it and, if posting a photo of art, to the artist who created the piece).

Finally, but most imporantly, I wanted to thank all of the companies, both small and large, who donated to the cruise:

Duncan Enterprises, jumbo crystal stud iron-on appliques
Rings n Things, bracelet blanks
CT Publishing, blank canvas books
Walnut Hollow, wood bases, drills, metal embossing kit
Ranger Industries & Claudine Hellmuth Sticky Back Canvas & Brush sets
Marisa Pavelko, The Modern Surrealist, prize tiaras and an art shirt
Foxy Findings, jump rings
St. Theresa's Textile Trove, jumbo totes (I have one and LOVE it).
Art Chix Studio, mixed media swag bags
Miss Vicky's Retreats, assemblage swag bags
Santa Clarita Craft Lab, mixed media swag bags
Silver Crow Creations, ephemera & collectible swag bags
CJ's Angels, decorative supplies
Hannah Grey, curiosities and dry goods!
Craft Magazine, magazines and other treats
The Paper Studio, gourmet and handmade papers
Suenos Latin American Imports, milagro swag bag
Grand Central Publishing, juicy novels to read on the ship
Instructables, crafty cards filled with ideas (and the coolest robot patch!)
Etsy.com, bumper stickers, pins, crafty recipe cards
and don't forget:
The Mantastic Crafter, skellingtons, testosterone and know-how

p.s. I was supposed to be giving away a swag tote containing goodies from these companies, but it ended up going home in Kathy's suitcase instead of mine, so be sure to cruise over to her blog to win it!
Read more ...