
This really IS a blast from the past - it's even a post on a sewing project (I suppose I need to change the blog's name from "stitchery" to something more all-encompassing soon).
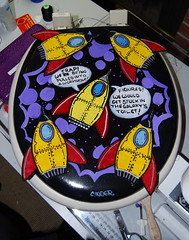 |
| Art toilet seat by Christian Cinder, encircled by my custom patches of his design |
Originally uploaded by Skelekitty (Krissi Sandvik)
I saw C!nder's painted toilet seats at the September 2007 "Functional Art" themed show at Body Tribe Fitness here in Midtown Sacramento. I really wanted one, but didn't have the scratch for it. I approached him with the idea of trading the seat for some custom-made iron on patches (he'd been nagging me to make some for ages) and he agreed! Oddly enough, he wanted patches of the rocket ship on the very toilet seat I'd chosen.
I gleefully scampered home with my new customized bathroom art and set about working on the patches. Once again using my favorite raw-edge applique method (which you'll want to refer to), I traced the outline of his art onto to some extra fusible medium backing paper I'd saved. Then I created some colorform-esque pieces out of some hand-dyed fabrics. I put the pieces onto a light box and drew on the details using fabric markers and a silver permanent marker (Sharpie or a similar brand of solvent-based ink or even a paint pen). When everything looked good, I assembled the pieces (including a backing piece of muslin to add some heft to the patch) onto a non-stick silicone craft sheet and tacked them in place with a hot iron.
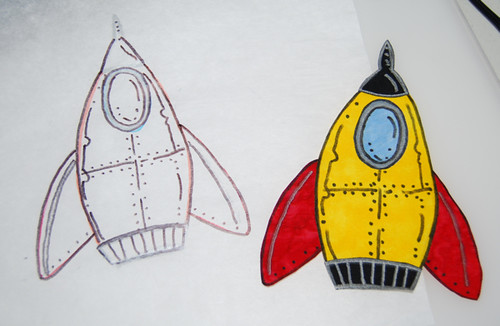 |
| Tracing of Cinder's rocketship on left; "coloform" version on right |
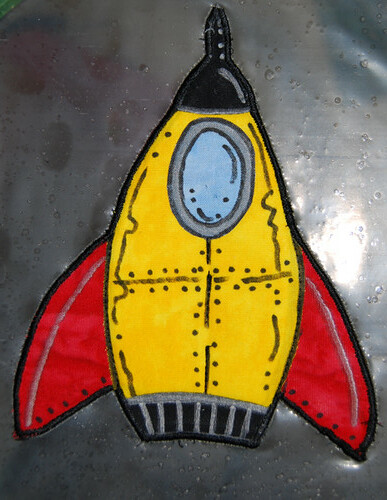 |
| patch on hooped water-soluble stabilizer with stitched outline |
The pen lines were traced over with some free-motion straight line stitching and some good ol' fashioned hand-embroidered french knots for the bolts.
I then went over the silver pen marks using a free-motion satin stitch with some high sheen light gray rayon thread (optional).
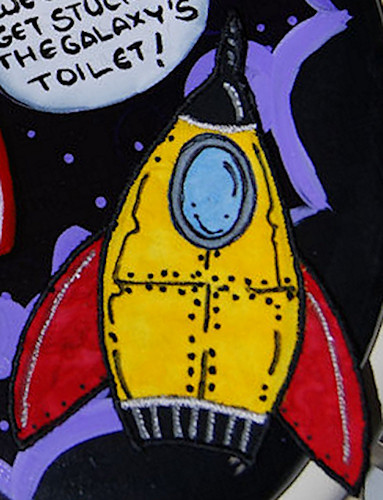 |
| Final patch - BLAST OFF! |
Voilá! A patch for him, a patch for his wife and two to give away to friends or whatever (if his kids didn't snatch 'em up first).
I hope you have fun with this little mini-tute and, as always, if you make a project of this, let me know and I'll post your photos on an upcoming blog. AND REMEMBER KIDS, ONLY MAKE PATCHES OF YOUR OWN ART! Never swipe someone else's images (unless, like me, you were asked to do so by the artist).
OK, end of lesson.
I love your patches and thought about you when i received a canvas bag with MiracleGro printed on the side. Hmm. Ideas. Swirling. Mojitos soon.
ReplyDelete