
I've decided to turn this into a series, rather than throwing it all at you at once. This way, I can spend a little more time going through and fleshing out or editing the sections for you, and you get a little more time to focus on each aspect of this how-to how-to. Here's what you can expect me to cover (I may throw in other stuff as we go):

It doesn't matter whether you're writing about crafts or Photoshop basics, people need to actually see what you are doing. The trouble with blogs is that the written word often causes misunderstandings - the great thing about blogs is that you can embed pictures!
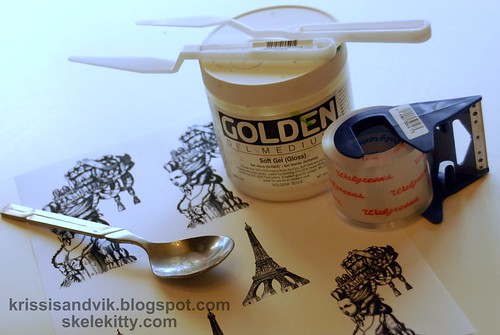 |
| BONUS: I've had HUNDREDS of hits on my image transfer tutorial as this photo keeps being "pinned"and "repinned!" |
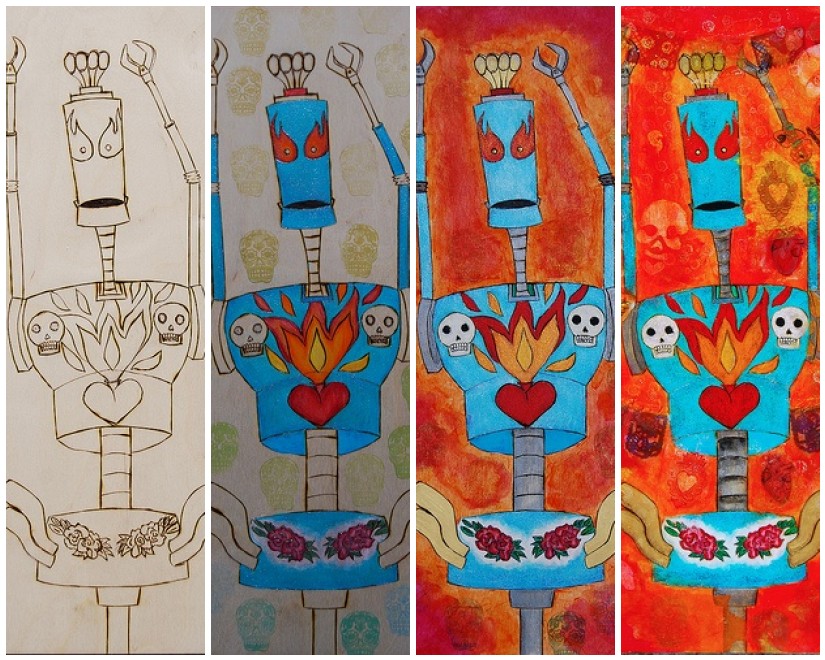 |
| "Tijuana Makeover" from woodburned outline to finished mixed-media painting |
Point out the little things. Let your inner "John Madden" out - use your editing software to label details.
 |
| You may be able to pick out the details clearly, but someone new to your process may not - help them out |
Now that you know how to use the photos in your post, here are a few tips to keep in mind when you are taking your photos:
- make sure your lighting picks up the details you want to show (avoid the temptation to "white out" your photos with overexposure)
- the area being photographed should be uncluttered (and free of pet hair, etc.)
- use a solid color background to avoid distractions (and please, don't use your bedspread)
- leave the artsy-fartsy stuff-on-books pictures for your Etsy listings; they have no place in a tutorial
- crop your photos and adjust the brightness and contrast, if necessary, but don't give your photos an over-processed look or mess with the depth of field (see above)
- take more pictures than you think you'll ever need, then take a few more
I hope this series becomes a helpful resource for you all.
If you have a question about writing tutorials, please post a comment here or in any future installments of this series.
Next time: writing style
Next time: writing style
Bravo!!
ReplyDelete